
What You Need to Know About Dimmer Switch Wiring
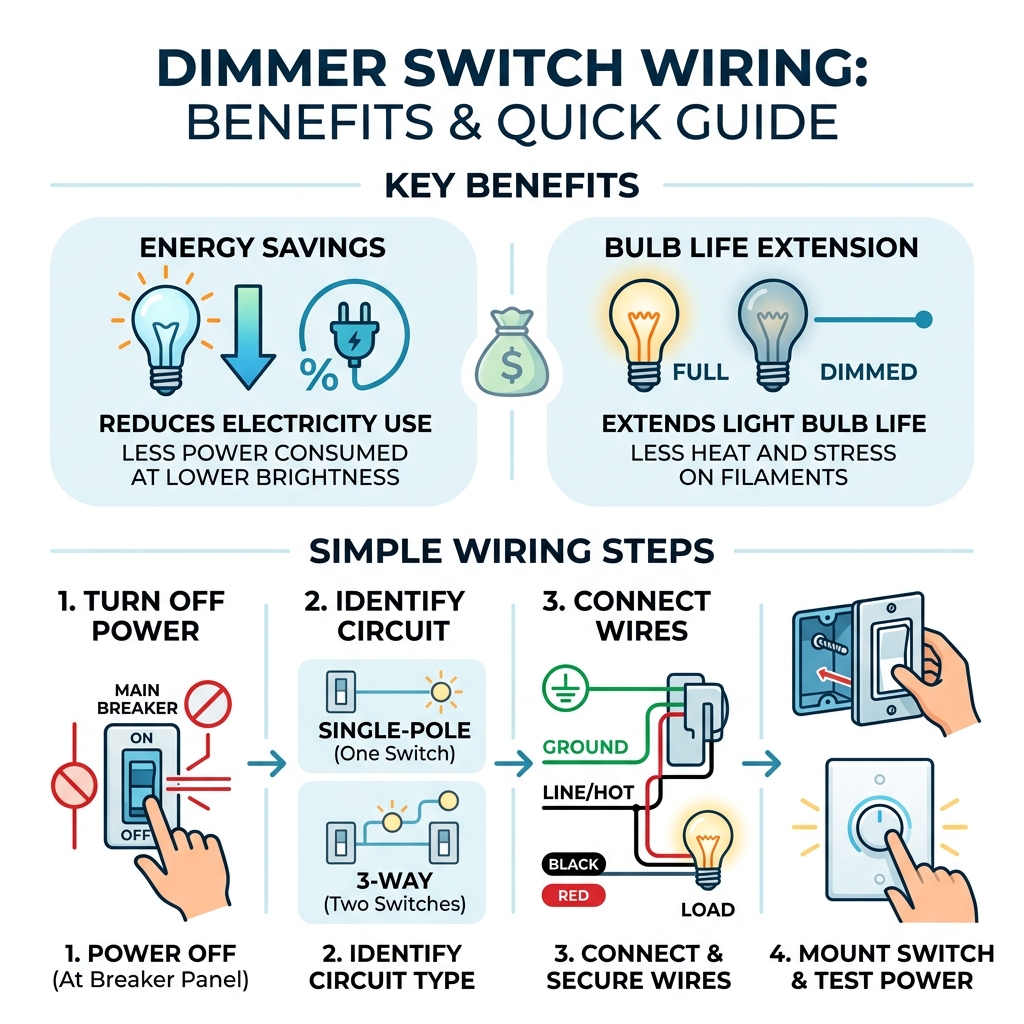
Dimmer switch wiring is the process of connecting a dimmer switch to your home's electrical circuit so you can control light brightness. Here's a quick overview of how it works:
- Turn off power at the circuit breaker before touching any wires.
- Identify your circuit type - single-pole (one switch location) or 3-way (two switch locations).
- Connect the wires - black to black (line in), black or red to the load (light fixture), and green to ground.
- Cap any unused wires - some dimmers include an extra wire not needed for single-pole setups.
- Mount the dimmer, attach the cover plate, restore power, and test.
Most dimmer installations take 15 to 30 minutes and cost between $10 and $30 for the switch itself.
Dimmer switches do more than just set a mood. They can extend the life of your bulbs and reduce your electricity use - two practical benefits that make the upgrade worth it for most homeowners. That said, a bad connection or the wrong dimmer for your bulb type can cause flickering, buzzing, or even a fire hazard. Getting the wiring right matters.
I'm Ed Sartell, President of Sartell Electrical Services, Inc., and I've been working with residential and commercial electrical systems across Massachusetts since 1985 - including hundreds of dimmer switch wiring jobs in both new construction and renovation projects. In this guide, I'll walk you through everything you need to do this safely and correctly.
Dimmer Switch Wiring vocabulary:
Essential Safety and Tools for Dimmer Switch Wiring
Before we even think about touching a screwdriver, we have to talk about safety. In the United States, over half of all home fires are caused by electrical issues. When we are working in homes from Reading to Andover, our first priority is always ensuring the circuit is dead before we open a junction box.
The Non-Negotiable Safety Check
You cannot rely on the position of the light switch to tell you if the power is off. Someone could have wired the switch on the neutral side (a dangerous but common mistake in older Massachusetts homes), or a "traveler" wire in a 3-way setup could still be hot.
- Shut off the breaker: Go to your electrical panel and find the circuit for the room you are working in. If the panel isn't labeled well, turn the light on and have a partner watch it while you flip breakers until it goes out.
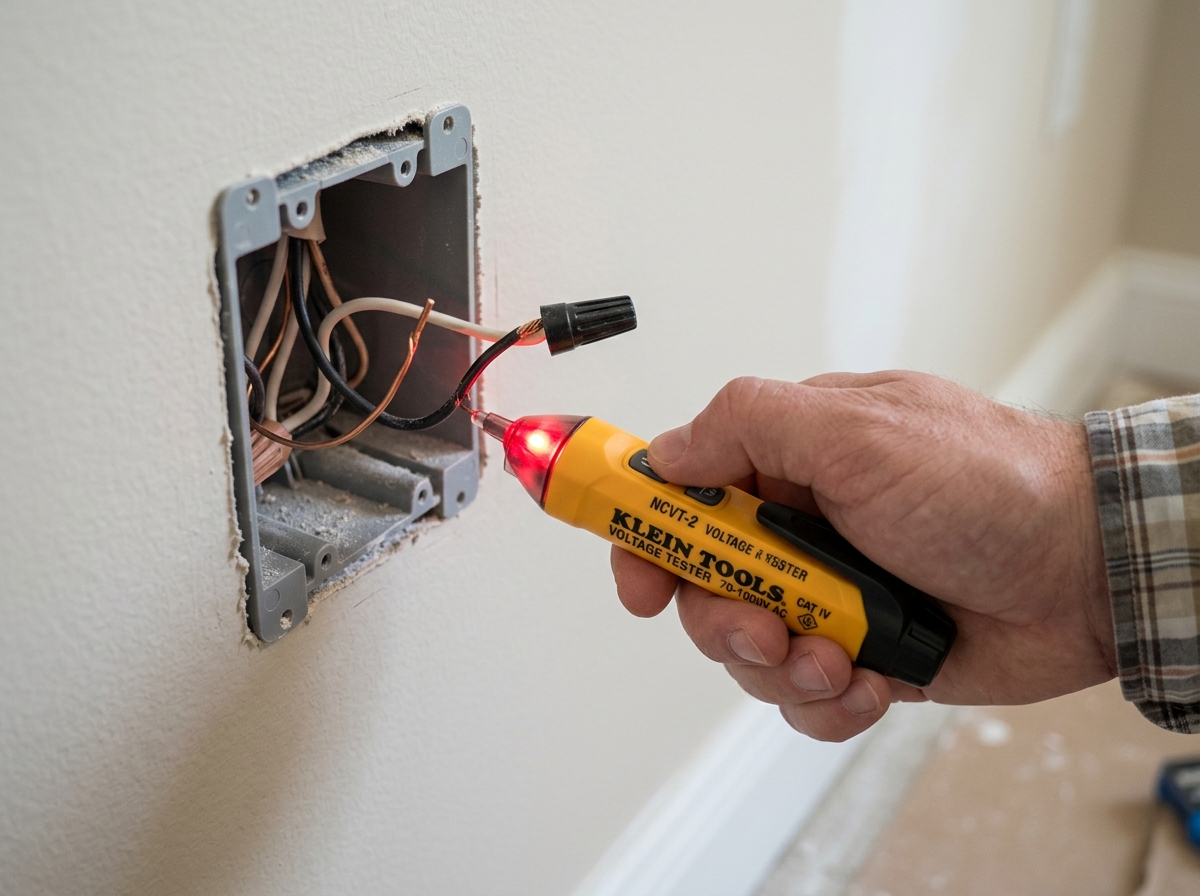
- Use a non-contact voltage tester: This tool is your best friend. Once the wall plate is off, hold the tester near the wires. If it beeps or lights up, the power is still on.
- Check for "hot" wires: Even if the light is off, some boxes contain wires from different circuits. Test every wire in the box to be 100% sure it’s safe to proceed.
Your Dimmer Installation Toolkit
To get the job done quickly and professionally, gather these materials:
- Phillips and flat-head screwdrivers: For the wall plate and mounting screws.
- Wire strippers: You'll need these if the existing wire ends are frayed or damaged.
- Needle-nose pliers: Helpful for bending wires into loops if your dimmer uses screw terminals.
- Wire nuts (connectors): Most dimmers come with these, but it’s good to have spares.
- Electrical tape: We recommend wrapping your wire nuts for extra security.
- Insulated gloves: An extra layer of protection is never a bad idea.
For a deeper dive into general switch mechanics, you can read our How to Wire a Switch Complete Wiring Guide. You can also find great visual aids on How to Install a Dimmer Switch to supplement this guide.
Identifying Your Circuit: Single-Pole vs. 3-Way
One of the most common mistakes homeowners make is buying the wrong type of dimmer. You need to know if you have a single-pole or a 3-way circuit before you head to the hardware store.
How to Tell the Difference
- Single-Pole: If one switch controls the light, it is a single-pole circuit. When you pull the switch out, you will usually see two insulated wires (usually black) and a green or bare copper ground wire.
- 3-Way: If you can turn the light on or off from two different doors or ends of a hallway, you have a 3-way circuit. These switches have three insulated wires plus a ground. One of these is the "common" wire (connected to a dark-colored screw), and the other two are "travelers."
| Feature | Single-Pole Setup | 3-Way Setup |
|---|---|---|
| Number of Switches | 1 | 2 |
| Terminal Screws | 2 + Ground | 3 + Ground |
| Common Wire | No | Yes (Dark Screw) |
| Traveler Wires | No | Yes (2 wires) |
| Usage | Small rooms, closets | Hallways, stairways, large rooms |
Visual Inspection and Box Volume
When you open the box, take a look at the wiring. Most modern homes use Romex cable, which contains a black (hot), white (neutral), and bare copper (ground) wire. However, in a 3-way setup, you will see an extra red wire.
It is also vital to check if your electrical box is large enough. Dimmer switches are much bulkier than standard switches because they contain electronic components that generate heat. The National Electrical Code (NEC) has specific standards for "box fill." If you cram a large dimmer into a small metal box, you risk a short circuit or overheating. We'll cover the math for this in the compatibility section, but if the box looks stuffed, you might need to upgrade to a larger one. For more on handling multiple switches in one area, see our guide on How to Connect Multiple Light Switches.
Step-by-Step Guide to Dimmer Installation
Now that we've confirmed the power is off and identified our circuit, let's get to the actual Dimmer Switch Wiring.
General Preparation
First, remove the old switch. We often suggest cutting the wires close to the old switch terminals rather than unscrewing them. Why? Over time, the copper wire wrapped around a screw becomes fatigued. If you straighten and re-bend it, it can develop micro-fractures that lead to arc faults.
Once cut, strip about 3/4 of an inch of insulation from the wires. Ensure the copper is clean and straight. If your dimmer has "pigtail" wires (wires coming out of the back of the switch), you will use wire nuts to connect them to the house wires.
Wiring a Single-Pole Dimmer
This is the most straightforward installation. Most universal dimmers have four wires: two black, one red (sometimes with a white stripe), and one green.
- Connect the Ground: Connect the green wire from the dimmer to the bare copper or green ground wire in the box.
- Connect the Line and Load: Take one black wire from the dimmer and connect it to the "Line" wire (the one bringing power in). Connect the other black wire from the dimmer to the "Load" wire (the one going to the light). In a single-pole setup, it usually doesn't matter which black wire goes to which, but check your manual.
- Cap the Extra Wire: If your dimmer is a "3-way compatible" model, it will have a red wire with a white stripe. For a single-pole installation, you must put a wire nut on this wire and wrap it with tape. It should not connect to anything.
- Secure and Test: Fold the wires into the box like an accordion—don't just shove them. Screw the dimmer into the box, attach the plate, and turn the power back on.
If you are wiring multiple fixtures to this one switch, refer to How to Connect Multiple Lights to One Power Source for specific load instructions.
Advanced 3-Way Dimmer Switch Wiring
Wiring a 3-way dimmer like the Leviton 6674 can be confusing because the colors don't always match your house wires.
Important Rule: In a 3-way circuit, you can typically only use one dimmer. The other switch must remain a standard 3-way on/off switch. Using two dimmers on the same circuit can cause electronic interference, leading to flickering or the dimmers burning out.
For a 3-way setup (specifically the "left box" or line-side box):
- Identify the Common: On your old switch, the common wire was on the dark screw. Mark this wire with a piece of tape.
- Leviton 6674 Connections:
- Connect the Black dimmer wire to the Common house wire (the one you marked).
- Connect the Red (Tagged) dimmer wire to one of the traveler wires (usually red or black).
- Connect the Red (Plain) dimmer wire to the other traveler wire.
- Connect the Green wire to the ground.
- The Second Box: In the second box, you will install a standard 3-way switch. Ensure the travelers match the positions on the dimmer side.
For more detailed diagrams, check our 3-Way Dimmer Switch Install page or read about Dimmer Duos: Can You Really Use Two Dimmers on One 3-Way Switch? to understand why the "one dimmer" rule exists. You can also view an AC Dimmer Circuit Diagram to visualize the flow of electricity.
Compatibility: Bulbs, Wattage, and Box Size
Not all dimmers are created equal. If you pair a 1990s-era dimmer with a modern LED bulb, you’re going to have a bad time (and likely a strobe-light effect in your living room).
LED vs. Incandescent Compatibility
Standard dimmers were designed for incandescent bulbs, which are basically resistive heaters that happen to glow. LEDs are different; they are electronic devices.
- Universal Dimmers: Look for dimmers labeled "C·L" or "LED+." These are designed to handle the dimming circuitry inside LED and CFL bulbs.
- Dimmable Bulbs: Ensure the bulb itself is labeled "Dimmable." If you try to dim a non-dimmable LED, it will likely buzz loudly or fail prematurely. Learn more about lighting specs from the Lumens and the Lighting Facts Label.
Calculating the Wattage Load
Most standard dimmers are rated for 600 watts. This is plenty for LEDs (which use very little power), but if you are running a large chandelier with twelve 60-watt incandescent bulbs, you are at 720 watts—which exceeds the limit.
- Example: If you have 4 recessed lights with 10W LED bulbs, your total load is only 40W. A standard 600W dimmer is more than enough.
- Heavy-Duty: If you have a massive lighting load, 1,000-watt and 1,500-watt dimmers are available.
Box Volume and Heat Dissipation
As we mentioned earlier, dimmers get warm. They use semiconductors to "chop" the electrical waveform, which generates heat.
- The Math: To calculate if your box is large enough per NEC standards, count each hot and neutral wire as 1, all grounds together as 1, and the dimmer itself as 2.
- The Multiplier: Multiply that total by 2.00 for 14-gauge wire or 2.25 for 12-gauge wire.
- Result: This gives you the required cubic inches. Most standard plastic boxes are about 18-22 cubic inches. If your math comes out to 25, you need a bigger box to prevent overheating.
Troubleshooting Common Dimmer Issues
Even with perfect Dimmer Switch Wiring, things can go wrong. Here are the most common issues we see in the field:
Flickering or Flashing
This is almost always a compatibility issue. If your LEDs are flickering, check if the dimmer has a "trim adjustment" (a small lever or dial). Adjusting the low-end trim can often stop flickering at low light levels. If that doesn't work, you likely have non-dimmable bulbs or an incompatible dimmer.
Buzzing or Humming
A slight hum is normal for some dimmers, but loud buzzing usually indicates a cheap bulb or a mismatch between the dimmer's technology (forward-phase vs. reverse-phase) and the bulb's driver. Switching to a high-quality brand of LED bulbs often solves this.
The Dimmer is Hot
It is normal for a dimmer to feel warm to the touch (up to 140°F is often within spec). However, if it’s too hot to hold your finger on, or if you smell burning plastic, shut off the power immediately. This could be caused by:
- Overloading the wattage rating.
- Loose wire nuts causing arcing.
- A box that is too small for heat dissipation.
No Dimming Range
If the light is either 100% on or 100% off with no in-between, you may have wired the line and load incorrectly, or the dimmer’s internal triac has failed.
For manufacturer-specific help, you can Check out our Support Page for Dimmer Troubleshooting.
Frequently Asked Questions about Dimmer Installation
Can I install a dimmer switch on any light fixture?
Mostly, yes, provided the fixture uses replaceable bulbs that are rated as dimmable. However, some integrated LED fixtures (where you can't change the bulb) require specific "ELV" (Electronic Low Voltage) dimmers. Also, you cannot use a standard dimmer for ceiling fans, as it will damage the fan motor. You need a specific fan speed control for that.
Why is my dimmer switch warm to the touch?
As explained, dimmers use semiconductors to regulate power. This process naturally sheds heat. As long as you aren't exceeding the wattage rating and the box has enough volume for air, a little warmth is perfectly normal.
How do I know if my electrical box is large enough?
Use the NEC volume calculation. If you have a single-gang box with a single Romex cable (black, white, ground) and a dimmer, a standard 18-cubic-inch box is usually fine. If you have three cables coming into that same box (common in "middle-of-the-run" wiring), you will almost certainly need a deep box or a two-gang box with a mud ring.
Conclusion
Upgrading your home with Dimmer Switch Wiring is one of the fastest ways to improve your home's ambiance and energy efficiency. Whether you're in a historic home in Salem or a new build in Reading, the principles of safety, compatibility, and proper connection remain the same.
While many homeowners successfully tackle this as a DIY project, electrical work always carries risks. If you open your switch box and find aluminum wiring, a "switched neutral" (two white wires on the switch), or if you simply aren't comfortable working with live panels, it is time to call in the professionals.
At Sartell Electrical Services, Inc., we have over 30 years of experience serving Middlesex and Essex Counties. We know the local Massachusetts electrical codes inside and out, and we can ensure your dimmers are installed safely, meet all NEC requirements, and function perfectly without the annoying buzz or flicker.
If you’re ready to upgrade your lighting or need help troubleshooting a tricky 3-way circuit, give us a call. We're proud to serve our neighbors from Boston to North Andover and everywhere in between.
For more information on our services, visit our Dimmer Switch Wiring service page. Stay safe and happy dimming!