
Why Your Next Lighting Upgrade Should Include a 3-Way Touch Sensor Dimmer
A 3-way touch sensor dimmer is a control module that replaces a standard lamp switch or wall dimmer, letting you cycle through multiple brightness levels — or adjust light smoothly from dim to full brightness — with a simple touch of your finger or the lamp's metal body.
Quick answer: Here's what a 3-way touch sensor dimmer does and where it's used:
| Feature | What It Means |
|---|---|
| 3-way control | Three brightness levels (low, medium, high) plus off |
| Touch sensing | Detects your finger via capacitance — no mechanical switch needed |
| Applications | Touch lamps, LED mirrors, bathroom lighting, commercial zones |
| Common types | Wire-in lamp modules, integrated mirror switches, DALI commercial sensors |
| Bulb compatibility | Incandescent/halogen (legacy); dimmable LEDs (modern) |
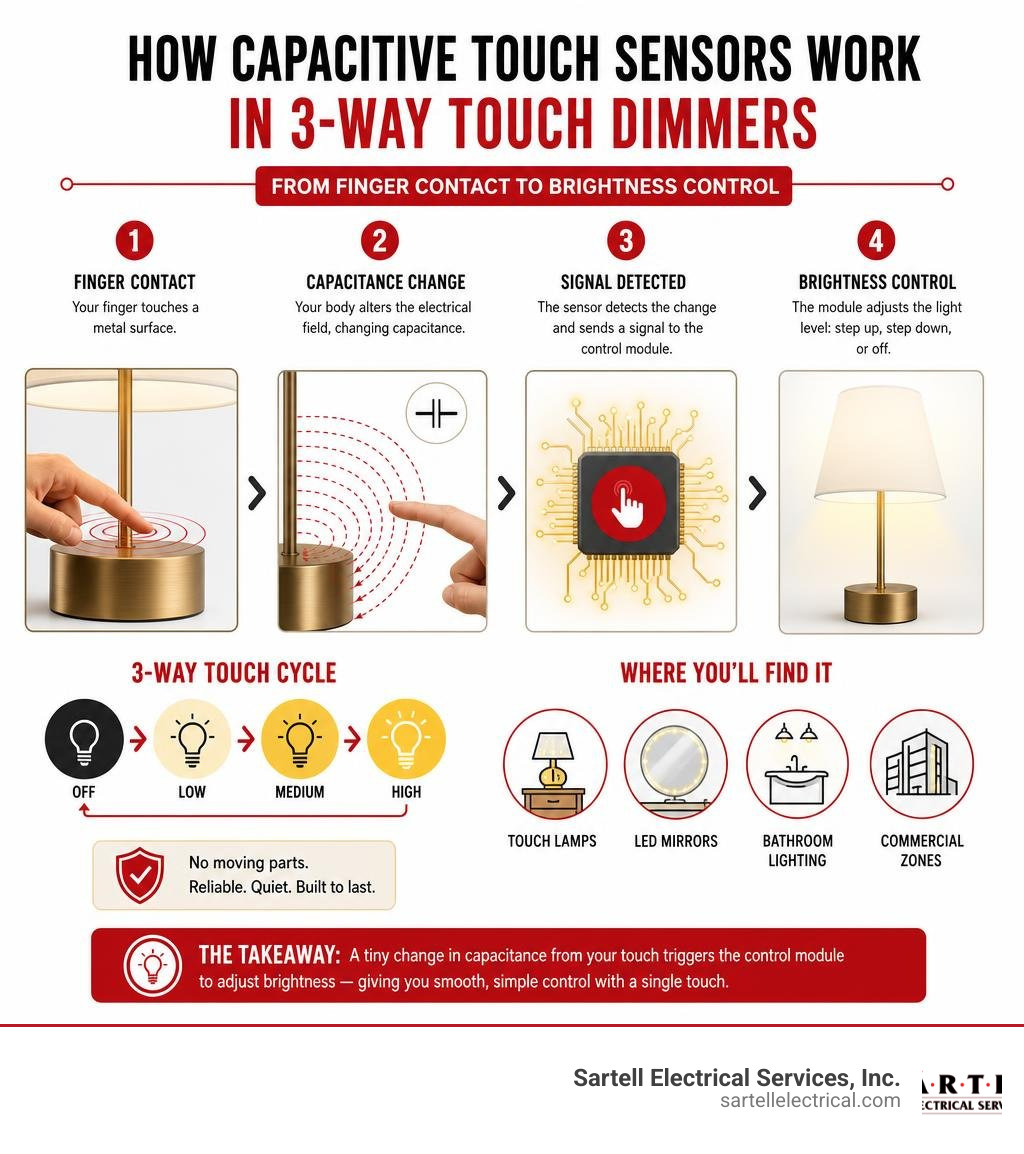
Touch dimmers work by detecting a tiny change in electrical capacitance when your hand contacts a metal surface — the lamp base, a mirror edge, or a sensor pad. That signal tells the module to step up, step down, or switch off the light. No moving parts. No fumbling in the dark.
These systems show up everywhere — from a $9 wire-in repair module for a bedside lamp to sophisticated multi-zone DALI sensors managing daylight, occupancy, and air quality across an entire office floor.
But not all touch dimmers are the same, and choosing the wrong one — or wiring it incorrectly — leads to flickering lights, unresponsive sensors, or even safety hazards.
I'm Ed Sartell, President of Sartell Electrical Services, and since 1985 I've installed and troubleshot every category of 3-way touch sensor dimmer across residential and commercial projects throughout Massachusetts. In this guide, I'll walk you through everything you need to know to choose, wire, and maintain the right touch dimmer for your application.
Easy 3 way touch sensor dimmer glossary:
What is a 3-Way Touch Sensor Dimmer and How Does It Work?
To understand how a 3-way touch sensor dimmer works, we have to look at the physics of capacitive sensing. Your body naturally carries a tiny electrostatic charge. When you touch a metal surface connected to a touch sensor, you alter the overall electrical capacitance of that metallic system.
The control module inside the light fixture continuously monitors this capacitance. When it detects a sudden, distinct change (the "touch"), it triggers an internal microchip to alter the electrical output going to the light bulb.
Historically, standard dimmers relied on rotary knobs or slide switches that physically resisted electrical flow (rheostats) or cut off parts of the AC sine wave (triac dimmers). A touch sensor eliminates these mechanical parts entirely. This lack of physical wear and tear is why touch sensors are highly reliable, though they are vulnerable to electrical surges and moisture.
If you are looking to bring this modern convenience to your home, understanding the electrical foundation is key. For a deeper dive into why upgrading makes sense, read about the bright ideas why you need a 3 pole dimmer switch in your life to see how multi-location controls enhance daily living.
Understanding the 3-Way Touch Sensor Dimmer Mechanism
Within a standard touch lamp, the metal body acts as the antenna. The 3 Way Touch Sensor dimmer, Touch lamp Repair kit Control Module, ... contains a sensor lead wire (often yellow) that connects directly to the metal chassis of the lamp.
When you touch any bare metal part of that lamp, the electrical capacitance shift travels down the sensor lead to the integrated circuit. The module then routes current through different paths or uses pulse-width modulation (PWM) to step the voltage up or down.
In a traditional 3-level touch lamp, the sequence is highly predictable:
- First touch: Low brightness (often used as a soft nightlight).
- Second touch: Medium brightness (ideal for reading or ambient light).
- Third touch: High brightness (full task lighting).
- Fourth touch: Off.
This elegant cycle bypasses the need for expensive, specialized 3-way light bulbs. Instead, the module itself regulates the power, letting you use standard, inexpensive 1-way bulbs to achieve three distinct light levels.
Multi-Location Control vs. Multi-Key Smart Interfaces
There is a common point of confusion in the electrical industry regarding the term "3-way." Depending on whether you are talking to a residential electrician or a product manufacturer, "3-way" can mean completely different things. It is crucial to distinguish between these terms before starting a project.
| Control Type | Definition | Wiring Requirement | Best Used For |
|---|---|---|---|
| 3-Way (3-Level) Dimmer | A single switch or module that cycles a single light source through three levels of brightness (Low, Medium, High). | Simple hot, neutral, and sensor lead wiring. | Bedside table lamps, accent lights, desk lamps. |
| Traditional 3-Way Circuit | A wiring configuration that allows you to control a single light fixture from two different physical wall switches. | Uses a common terminal and two traveler wires running between switches. | Hallways, stairwells, large living rooms. |
| 3-Key / 3-Channel Touch Sensor | A modern solid-state interface featuring three distinct touch-sensitive keys to control separate functions. | Low-voltage DC wiring, often requiring relays for high-voltage loads. | Smart bathroom LED mirrors (Dimming, Color Tuning, Anti-fog). |
If your goal is to wire a wall-mounted touch switch that coordinates with another switch across the room, you are dealing with a traditional 3-way circuit. If you are repairing a bedside lamp, you are dealing with a 3-level touch module. If you are upgrading a bathroom vanity, you are likely looking at a 3-key smart interface.
Types of Touch Dimmers and Technical Specifications
Whether you are designing a high-end commercial office in Boston or retrofitting a vintage brass lamp in a Middlesex County home, the hardware you select must match the specific application. Touch dimmers fall into three primary categories based on their physical design and electrical architecture.
Wire-In Replacements for Touch Lamps
These are compact, plastic-housed modules designed to fit snugly inside the hollow base of a table or floor lamp. The Westek Indoor Wire-In 3-Level Touch Dimmer Replacement (Model #6503BC) is a classic example of an affordable, consumer-grade fix. Priced at just $8.76, it is engineered primarily for traditional incandescent and halogen bulbs up to 150 watts.
Another popular choice is the Touch & Glow Touch Dimmer Replacement for 3-Way Switch-DIY-L . This UL-recognized module is highly favored by DIYers because it allows standard, inexpensive 1-way bulbs to function with three levels of brightness. These modules are perfect for helping elderly homeowners or individuals with arthritis who struggle with stiff, hard-to-turn mechanical rotary switches on older lamps.
Integrated Touch Switches for LED Mirrors and Bathrooms
If you have ever stayed in a modern hotel in Greater Boston, you have likely seen backlit LED mirrors. These mirrors do not use physical buttons; instead, they feature illuminated touch icons engraved directly into the glass.
Products like the Trumsense WS08F3-M6-BW 3 key touch sensor switch with dimming and anti-fog film on off control for LED mirror in washroom are designed specifically for these wet, high-humidity environments.
These switches mount securely behind the glass (up to 5mm thick). To install them, the mirror's reflective mercury backing must be removed—often via precise laser engraving—to create a transparent window where the capacitive sensor can detect your finger through the glass.
Concealed and DALI-Based Commercial Sensors
For minimalist interior designs, visible switches are increasingly being replaced by hidden sensors. The Concealed Touch Dimmer Switch | DC3.7-24V LED Strip Sensor can penetrate non-metallic solid surfaces like wood, stone, glass, plastic, and acrylic up to 3cm (30mm) thick. This allows you to turn a solid wood bedside table or a stone bathroom vanity splashback into a fully functional touch switch without drilling any visible holes.
On the commercial end, systems transition from simple hardware switches to complex digital networks. The Legrand Light Up 3-zone DALI sensor (Cat. No. 0 485 73) is a ceiling-mounted presence detector designed for sophisticated commercial spaces.
According to the LIGHT-UP 3-zone DALI multisensor advanced detector specifications, this unit can control three distinct lighting zones (such as window, corridor, and screen areas) using daylight harvesting. It measures natural light levels from 5 to 1275 lux and dims the connected LED drivers dynamically to maintain constant, energy-efficient illumination.
Voltage, Load Capacity, and PWM Dimming
Before purchasing any touch sensor, you must verify its electrical ratings:
- Voltage: Lamp modules typically operate on 120VAC household current. LED strip dimmers and mirror switches usually run on low-voltage DC (12V or 24V).
- Load Type: Ensure the dimmer matches your light source. Legacy dimmers designed for incandescent bulbs will fail or cause severe flickering if paired with modern LEDs.
- Dimming Method: High-quality LED touch dimmers use Pulse-Width Modulation (PWM). Devices like the Touch DIMMER for High Power LEDs (Installation Version) operate directly from mains voltage without transformers, driving high-power LEDs safely while maintaining a very low standby power consumption of just 0.4W.
- Memory Features: Modern switches like the Trumsense WS08F3-M6-BW feature built-in power-off memory. When the light is switched off and on again, it automatically restores the previously selected brightness and color temperature settings.
To learn more about matching your light bulbs to your switch, read our detailed guide on all about dimmer switch three way compatibility.
Step-by-Step Installation and Wiring Guide
Working with household electricity requires absolute caution. If you are uncomfortable handling raw wiring, please contact us at Sartell Electrical Services. We routinely handle low-voltage and high-voltage dimming integrations for homeowners across Reading, Andover, and the greater Boston area.
Choosing the Right 3-Way Touch Sensor Dimmer for Your Setup
Before starting, confirm that your dimmer's total wattage rating exceeds the cumulative wattage of the bulbs you plan to connect. For a standard lamp, a 150W-rated module is plenty. For larger multi-light installations, you may need a heavy-duty wall-mounted option.
Ensure the physical dimensions of the module will fit within your junction box or lamp base. For help planning a wall-mounted installation, check out our comprehensive guide on 3 way dimmer switch install.
Standard Wiring Configurations and Safety Protocols
Always shut off the power at the main circuit breaker before touching any wires. Use a reliable non-contact voltage tester to verify the wires are completely dead.
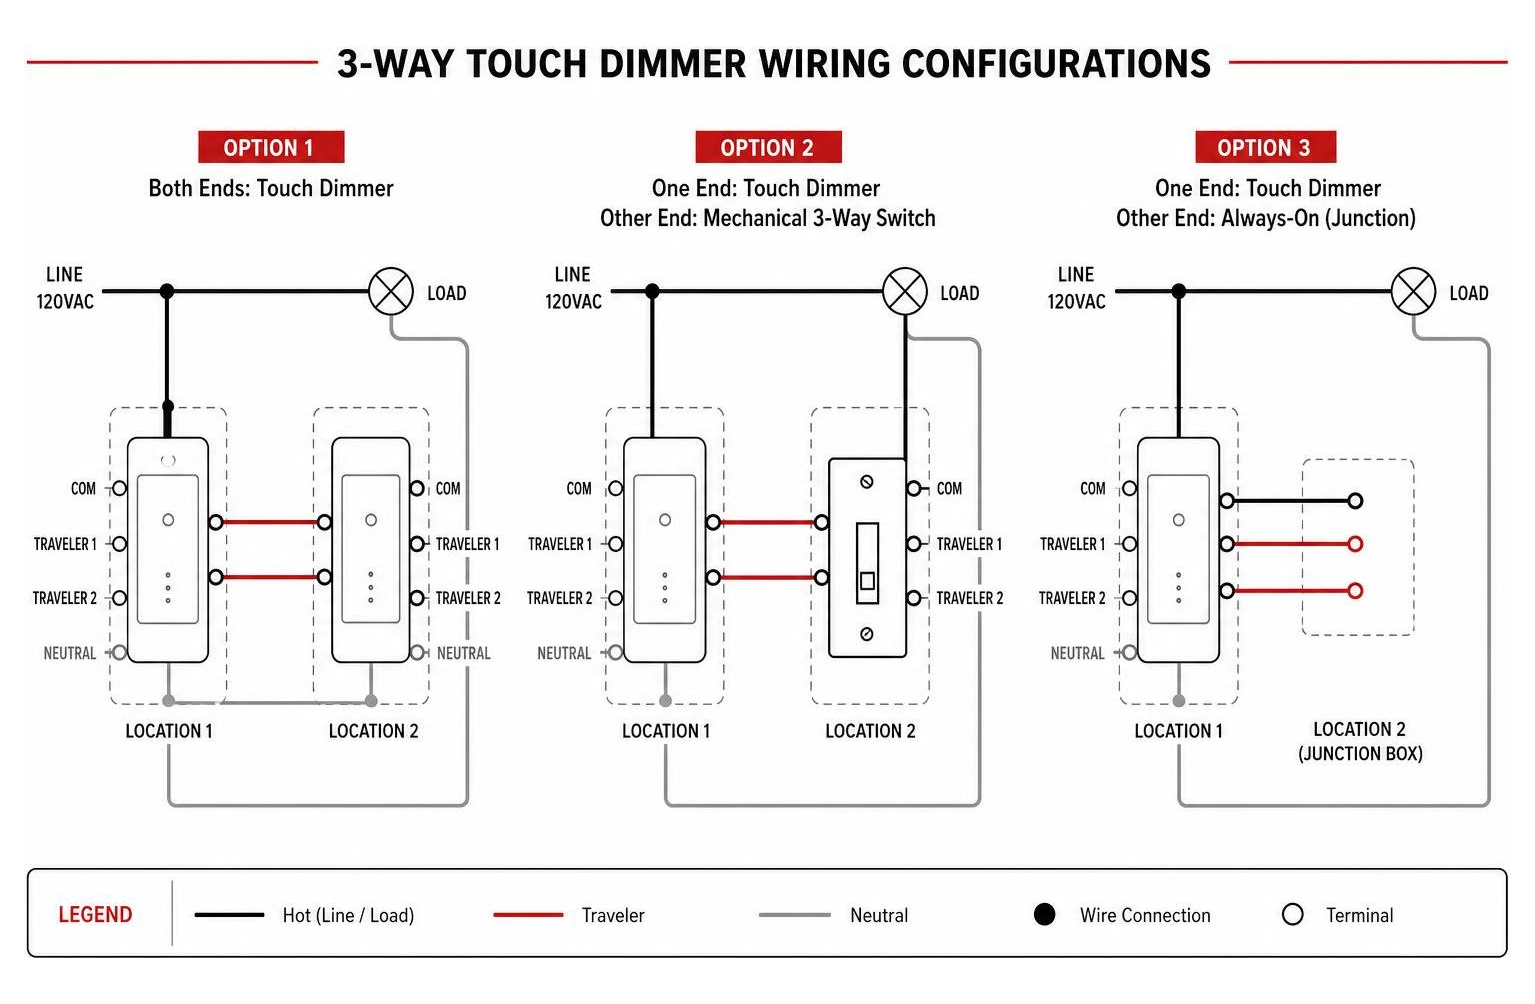
When replacing a standard 3-way wall switch with a touch-capacitive wall dimmer, you will typically find several wires in the wall box:
- Common (Hot) Wire: Usually connected to a dark-colored screw on your old switch.
- Traveler Wires: Typically two wires (often red and black) that run between the two switch locations.
- Neutral Wire: A white wire (or bundle of white wires) tucked into the back of the box. Many modern smart touch switches require a neutral wire to power their internal capacitive circuitry.
If you are dealing with a wire-in lamp module, the wiring diagram is simpler but must be executed precisely:
- Black Wire: Connects to the incoming hot wire from the power cord.
- White Wire: Connects to the neutral wire from the power cord and the neutral wire leading to the light socket.
- Red Wire: Connects to the hot terminal of the light socket.
- Yellow/Sensor Wire: Connects securely to the metal body of the lamp using a screw or spade terminal.
For a detailed look at general switch box connections, see our guide on dimmer switch wiring or identify your terminals using 3 way light switch terminals how to identify common and traveler screws. If you want to see the step-by-step process of installing a wall switch like a professional, refer to our article on wiring wonders installing your 3 way dimmer switch like a pro.
The Role of Relays in High-Voltage and Anti-Fog Systems
In bathroom LED mirror applications, you often want a single touch interface to control both low-voltage LED lights (DC 12V) and a high-voltage anti-fog heating pad (AC 110V/220V). Because low-voltage touch switches cannot handle high-voltage AC currents directly without burning out, an external relay is required.
According to the trumsense WS08F3-M6-RBL 3 key touch sensor switch with dimming and anti-fog film on off control specifications, the switch operates on DC12V with a maximum switching current limit of 5A.
To safely control a high-power anti-fog film, the touch switch sends a low-voltage signal to a relay. The relay then acts as an isolated magnetic switch, safely closing the high-voltage AC circuit to power the heating film. This completely isolates the user's touch interface from high-voltage hazards, ensuring maximum safety in wet bathroom environments.
Troubleshooting Common Touch Dimmer Issues
Touch-sensitive electronics are highly convenient, but they can occasionally behave unpredictably. If your touch dimmer is acting up, use these proven troubleshooting steps to isolate and resolve the issue.
Fixing Unresponsive Sensors and Ghost Activations
If your touch lamp turns on or off randomly (often called "ghost touching"), or if it refuses to respond when touched, the culprit is usually environmental or electrical interference.
- Line Capacitance and Wire Length: Capacitive touch sensors are highly sensitive to the length of the sensor wire. In advanced LED setups, the primary touch pad wire should be kept under 0.5 meters. If you must run a longer control wire (up to 10 meters), you must decouple the line capacitance using a high-resistance resistor (typically 40 to 80 MΩ) to prevent false triggers.
- Grounding Issues: Because capacitive sensing relies on completing a path to ground through your body, the light fixture itself must be properly grounded. If a touch lamp is plugged into an ungrounded outlet, or if the sensor lead is not making clean, metal-to-metal contact with the chassis, touch sensitivity will drop dramatically.
- Power Surges and Storms: Power surges, brown-outs, and nearby lightning strikes can introduce massive electrical noise into your home's wiring. This noise can easily fool a sensitive capacitive sensor into thinking it has been touched. To reset a glitched module after a storm, simply unplug the lamp from the wall, wait 30 seconds, and plug it back in.
If you are dealing with a wall-mounted switch that lacks a neutral connection, you might experience erratic behavior. Learn how to resolve this by reading about the no neutral solution for your 2 wire dimmer switch.
Resolving LED Flickering and Load Mismatches
If you swap out an old incandescent bulb for a new LED bulb in a touch lamp, you will often experience rapid flickering, buzzing, or a complete failure to dim.
This happens because older touch modules (like the legacy Westek or Touch & Glow units) require a minimum electrical load to operate correctly. A standard incandescent bulb draws 40 to 60 watts, whereas a highly efficient LED bulb might draw only 6 to 9 watts.
If the electrical draw falls below the touch dimmer's threshold, the internal triac cannot fire cleanly, resulting in a strobe-like flicker.
To resolve this:
- Verify Bulb Compatibility: Ensure you are using bulbs explicitly labeled as "dimmable." Non-dimmable LED bulbs cannot handle voltage or current drops and will flicker or fail immediately.
- Add a Bypass Capacitor: In some wall-mounted LED touch setups, installing a dummy load or a bypass capacitor across the load and neutral lines can stabilize the circuit and eliminate low-wattage flickering.
- Upgrade the Module: Replace the legacy touch sensor with a modern, LED-compatible touch module designed to handle ultra-low wattage loads.
For more quick tips on resolving electrical noise and wiring switches efficiently, check out our guide on how to wire dimmer switch fast by using simple steps.
Frequently Asked Questions about Touch Dimmers
Can I use standard LED bulbs with a 3-way touch dimmer?
No, you cannot use standard, non-dimmable LED bulbs. Standard LEDs are designed to run on a constant, unvarying voltage. When a touch dimmer drops the voltage or alters the duty cycle to lower the light output, a standard LED's internal driver will struggle to compensate, leading to severe flickering, buzzing, and premature bulb failure. Always look for bulbs marked "dimmable" on the packaging.
Why does my touch lamp turn on by itself during storms?
Touch lamps rely on capacitive sensing to detect the electrical charge of your hand. During lightning storms or periods of high grid activity, power surges, voltage spikes, and electromagnetic interference travel through your home's electrical lines. The sensitive microchip inside the touch module interprets this electrical noise as a physical touch, causing the lamp to turn on, off, or change brightness levels randomly. Unplugging the lamp during severe storms protects the sensitive module from burning out.
How do I wire a touch dimmer without a neutral wire?
If you live in an older home in Massachusetts (such as in historic areas of Essex or Middlesex County), your wall switch boxes may not contain a white neutral wire. While many advanced smart touch switches require a neutral wire to keep their internal electronics powered when the light is off, some manufacturers offer "no-neutral" touch switches.
These specialized switches work by allowing a tiny, imperceptible amount of current to leak through the ground wire or the light bulb itself to complete the circuit. If you are retrofitting older wiring, read our step-by-step guide on 2 way dimmer switch wiring a step by step guide for diyers to understand your options.
Conclusion
Upgrading your home with a 3-way touch sensor dimmer is a fantastic way to eliminate clunky mechanical switches, save energy, and bring a clean, modern aesthetic to your living spaces. Whether you are fixing a cherished bedside touch lamp using a simple wire-in replacement, installing a sleek backlit LED mirror in your master bath, or designing a high-end commercial space with concealed stone-penetrating sensors, matching the right hardware to your electrical system is critical for a safe, flicker-free result.
While small lamp repairs are great weekend DIY projects, modifying your home's permanent wall switches and integrating low-voltage smart sensors with high-voltage AC lines requires professional expertise. Dealing with traveler wires, identifying common terminals, and working around older wiring without neutral lines can quickly become complicated.
At Sartell Electrical Services, Inc., we have spent over 30 years providing top-tier residential, commercial, and industrial electrical services throughout Massachusetts—including Reading, Andover, Woburn, and the Greater Boston area. Our licensed electricians are experts in advanced lighting controls, custom LED integrations, and safe, code-compliant installations.
If you are ready to upgrade your home's lighting or need help troubleshooting a tricky dimming system, don't risk your safety. Contact us today to schedule a professional consultation, or read our detailed guide on 3 way dimmer switch install to start planning your next home improvement project.
Why Professional Electrician Services Matter for Your Home and Business
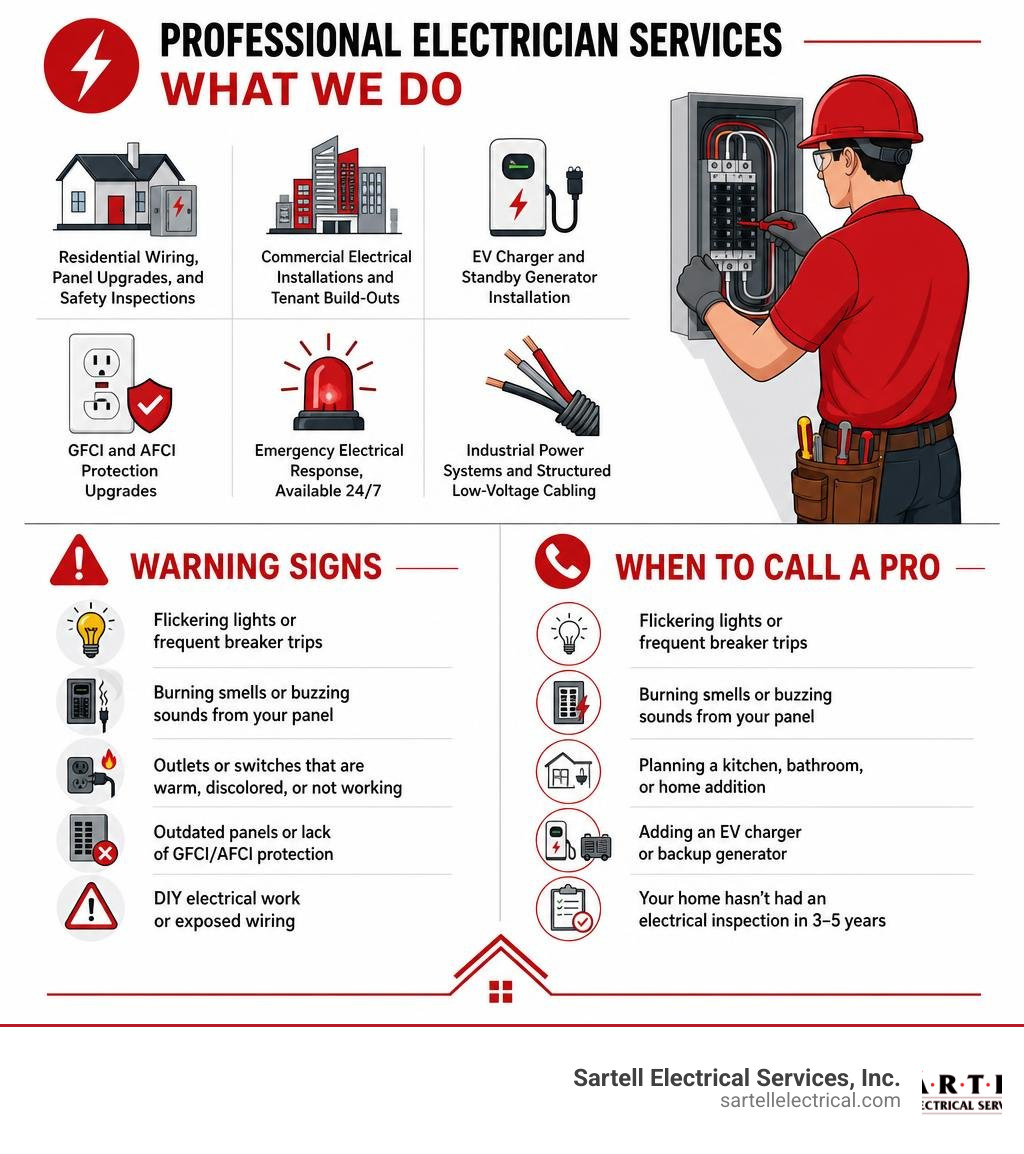
Professional electrician services cover a wide range of electrical work — from simple outlet repairs to complex commercial power systems. Here's a quick overview of what they include and when you need them:
What professional electrician services typically include:
- Residential wiring, panel upgrades, and safety inspections
- Commercial electrical installations and tenant build-outs
- EV charger and standby generator installation
- GFCI and AFCI protection upgrades
- Emergency electrical response, available 24/7
- Industrial power systems and structured low-voltage cabling
When to call a licensed electrician:
- Flickering lights or frequent breaker trips
- Burning smells or buzzing sounds from your panel
- Planning a kitchen, bathroom, or home addition
- Adding an EV charger or backup generator
- Your home hasn't had an electrical inspection in 3–5 years
Electricity is one of those things most people don't think about — until something goes wrong. A burning smell near an outlet. Lights that dim every time the air conditioner kicks on. A panel that trips for no clear reason. These aren't just annoyances. They're warning signs that your electrical system may be under serious strain.
The stakes are high. Faulty wiring is one of the leading causes of house fires in the United States. And with modern homes running more high-draw devices than ever — EV chargers, smart panels, whole-home backup systems — an outdated electrical system can quickly become a safety hazard.
This guide breaks down everything you need to know about professional electrical services: what's included, when to call a pro, and how to choose a contractor you can actually trust.
I'm Ed Sartell, President of Sartell Electrical Services, Inc., and I've been delivering professional electrician services to homeowners, builders, and businesses across Massachusetts since 1985. With nearly four decades in the trade, I've seen what separates a safe, code-compliant electrical system from a dangerous one — and I'll walk you through what that means for your property.
Quick professional electrician services definitions:
Understanding the Scope of Professional Electrician Services
When you think of an electrician, you might picture someone replacing a light switch or fixing a dead outlet. While those quick fixes are a vital part of what we do, the true scope of professional electrician services is incredibly broad. Modern electrical contractors handle complex energy ecosystems that keep homes safe, businesses operational, and industrial facilities running efficiently.
To truly understand how these systems work, it helps to review a Residential Electrical Services Complete Guide. This overview highlights how residential, commercial, and industrial systems are fundamentally different, requiring distinct skill sets, tools, and regulatory compliance.
If you are managing a business or commercial property, you will want to refer to a Commercial Electrical Services Ultimate Guide to see how commercial infrastructure differs from standard household power.
Residential vs. Commercial Professional Electrician Services
Residential electrical work centers around comfort, convenience, and safety inside the home. This includes everything from routine troubleshooting to comprehensive home renovations. When searching for Licensed Residential Electricians Near Me, homeowners are typically looking for experts who can safely install interior lighting, wire new home additions, or troubleshoot complex issues like system-wide power dips.
Commercial electrical work, on the other hand, operates on a completely different scale. Commercial properties—like offices, retail stores, and mixed-use developments—require heavy-duty distribution systems. Specialized Commercial Electricians handle large-scale tenant improvements, commercial automation, emergency exit lighting, and complex fire alarm integrations.
Because we serve businesses throughout the Greater Boston area, we understand that commercial electrical work must minimize downtime. A loss of power doesn't just mean the lights are out; it directly impacts business revenue, security systems, and even plumbing infrastructure like commercial booster pumps.
We operate closely within major Massachusetts hubs, providing reliable services across Essex County, Middlesex County, Norfolk County, Suffolk County, and the Greater Boston area. Whether you need assistance in Boston, Reading, Andover, or Chelsea, our team is ready to support your residential and commercial electrical needs.
Specialized Industrial and Telecom Professional Electrician Services
Beyond homes and retail storefronts lie industrial plants and telecommunications networks. These environments demand highly technical, specialized services. According to an Industrial Electrical Services Complete Guide, industrial environments rely on massive three-phase power systems, complex motor controls, and Programmable Logic Controller (PLC) support.
At Sartell Electrical Services, our specialized Industrial Electrical Service ensures that manufacturing plants, water treatment facilities, and warehouses maintain continuous, safe operations.
In July 2026, the modern business landscape also demands seamless digital connectivity. This is where low-voltage and telecommunications services come in. Rather than carrying high-voltage power to run appliances, low-voltage technicians install structured cabling, fiber optics, network infrastructure, and security camera systems.
Whether we are wiring a commercial office in Reading, MA, or setting up data networks in Cambridge, MA, integrating high-voltage power with low-voltage telecom systems is essential for a fully functional modern facility.
Recognizing the Warning Signs of Electrical System Strain
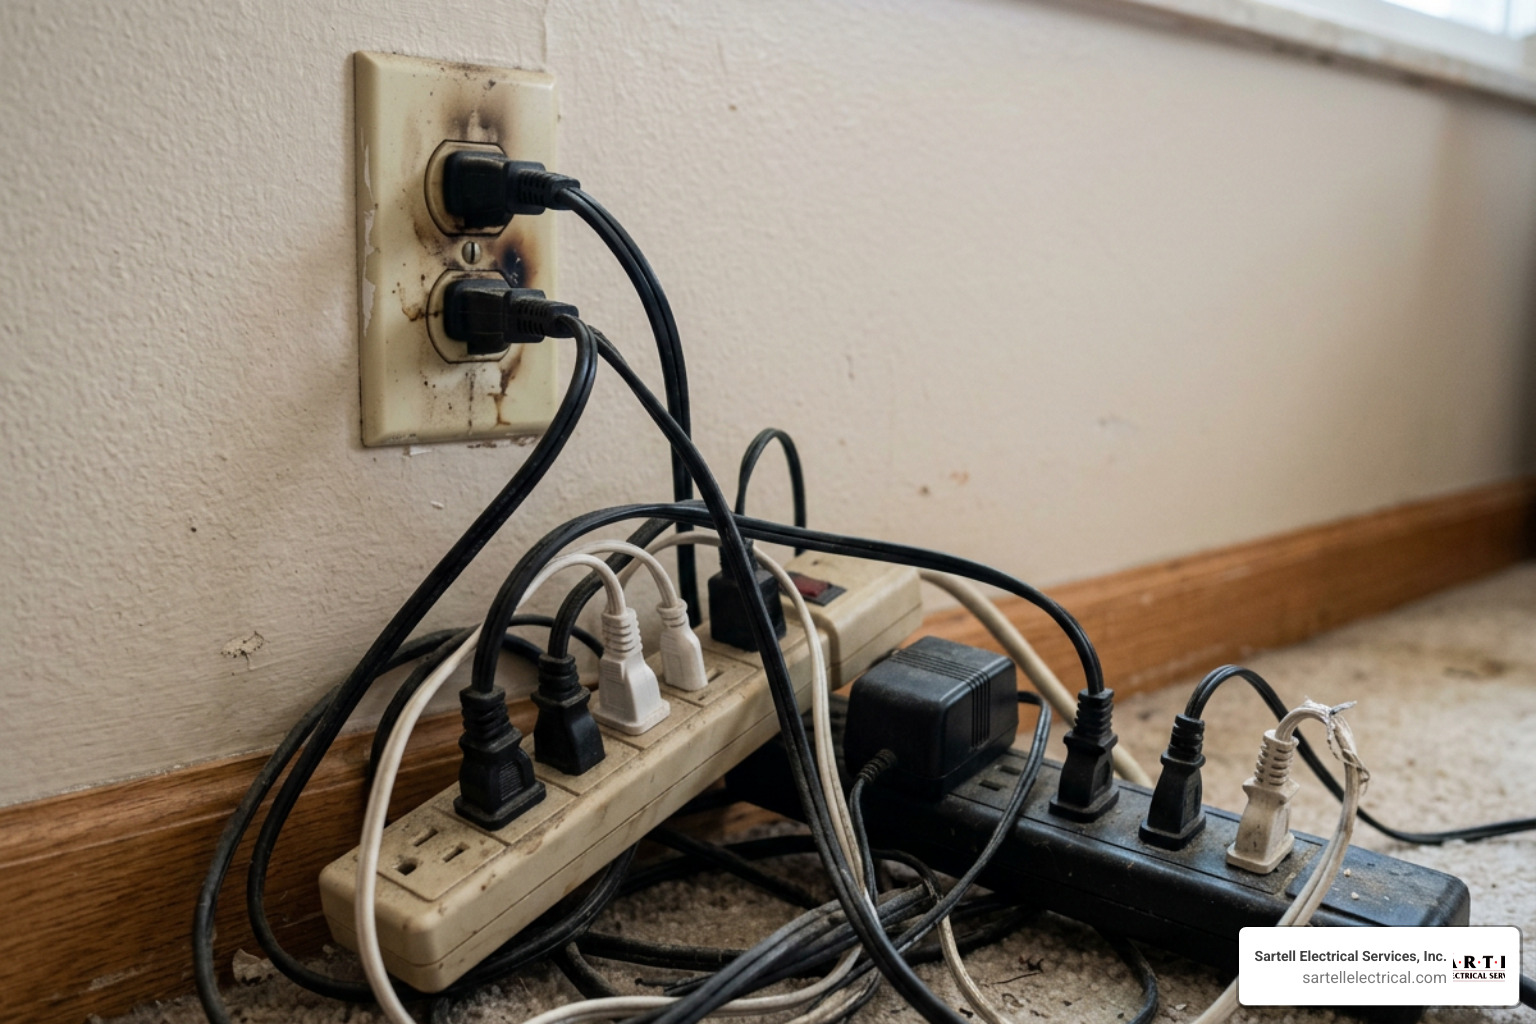
Many property owners assume that if the lights turn on, their electrical system is perfectly fine. However, electrical systems degrade slowly over time, often hiding behind walls until they reach a breaking point. Recognizing the early signs of electrical strain is the best way to prevent costly repairs or, worse, devastating electrical fires.
If you suspect your home is showing these symptoms, consulting an Electrical Home Repair Service Complete Guide can help you identify whether you need a minor fix or a system-wide overhaul.
Outdated Wiring Hazards
If your Massachusetts home was built before the late 1970s, it may contain outdated and potentially hazardous wiring materials. Two of the most common culprits we encounter in historic properties throughout Boston, Salem, and Ipswich are knob-and-tube wiring and aluminum branch wiring.
- Knob-and-Tube Wiring: This was the standard method of electrical piping from the late 1880s through the 1940s. It consists of single insulated copper conductors run through porcelain protective tubes. Because it lacks a grounding wire, it poses a severe shock hazard for modern, three-prong appliances. Over time, the protective cloth insulation becomes brittle and crumbles away, leaving bare, hot wires exposed.
- Aluminum Wiring: Commonly installed in homes built between 1965 and 1973 due to rising copper prices, aluminum wiring is now recognized as a major fire hazard. Aluminum expands and contracts much more than copper when heated by electrical currents. This thermal expansion causes connection points at outlets and switches to loosen over time, leading to electrical arcing, intense heat, and localized fires.
If you suspect your historic home still relies on these outdated systems, you should seek professional Electrical Wiring Services Boston immediately to discuss upgrading to modern, safe copper alternatives.
Frequent Breaker Trips and System Overloads
Do your lights dim slightly when your microwave, refrigerator, or air conditioner kicks on? Do you find yourself running to the basement or garage to reset a tripped circuit breaker every time you use a hair dryer? These are classic signs of system strain.
A circuit breaker is designed to trip and cut off power when the electrical current exceeds safe limits. When multiple high-draw appliances are connected to a single circuit, the system overloads. While modern homes are built with dedicated circuits to handle heavy loads, older properties often suffer from a lack of capacity.
To help you understand your home's capacity, let's look at a quick comparison between older 100-amp panels and modern 200-amp panels:
| Electrical Service Capacity | Common in Homes Built | Suitable For | Ability to Support EV Chargers / Heat Pumps |
|---|---|---|---|
| 100 Amps | Pre-1980s | Small homes with standard appliances, gas heating, and minimal electronics. | Extremely limited; often requires smart load shedding or a full panel upgrade. |
| 200 Amps | Post-1980s to Present | Modern homes with electric HVAC systems, hot tubs, and heavy electronic loads. | Excellent; easily supports Level 2 EV charging and whole-home backup systems. |
If you are constantly dealing with tripped breakers, it means your current panel is struggling to keep up with July 2026 power demands. It's time to consider a modern upgrade.
Essential Upgrades for Modern Home Energy Ecosystems
The way we use electricity has fundamentally changed over the last few decades. We no longer just power lightbulbs and basic television sets. Today, our homes are active energy ecosystems that charge electric vehicles, run smart automated systems, and generate backup power during severe New England winter storms.
To prepare your property for these modern demands, it is highly recommended to read through an Electrical Service Upgrades Complete Guide.
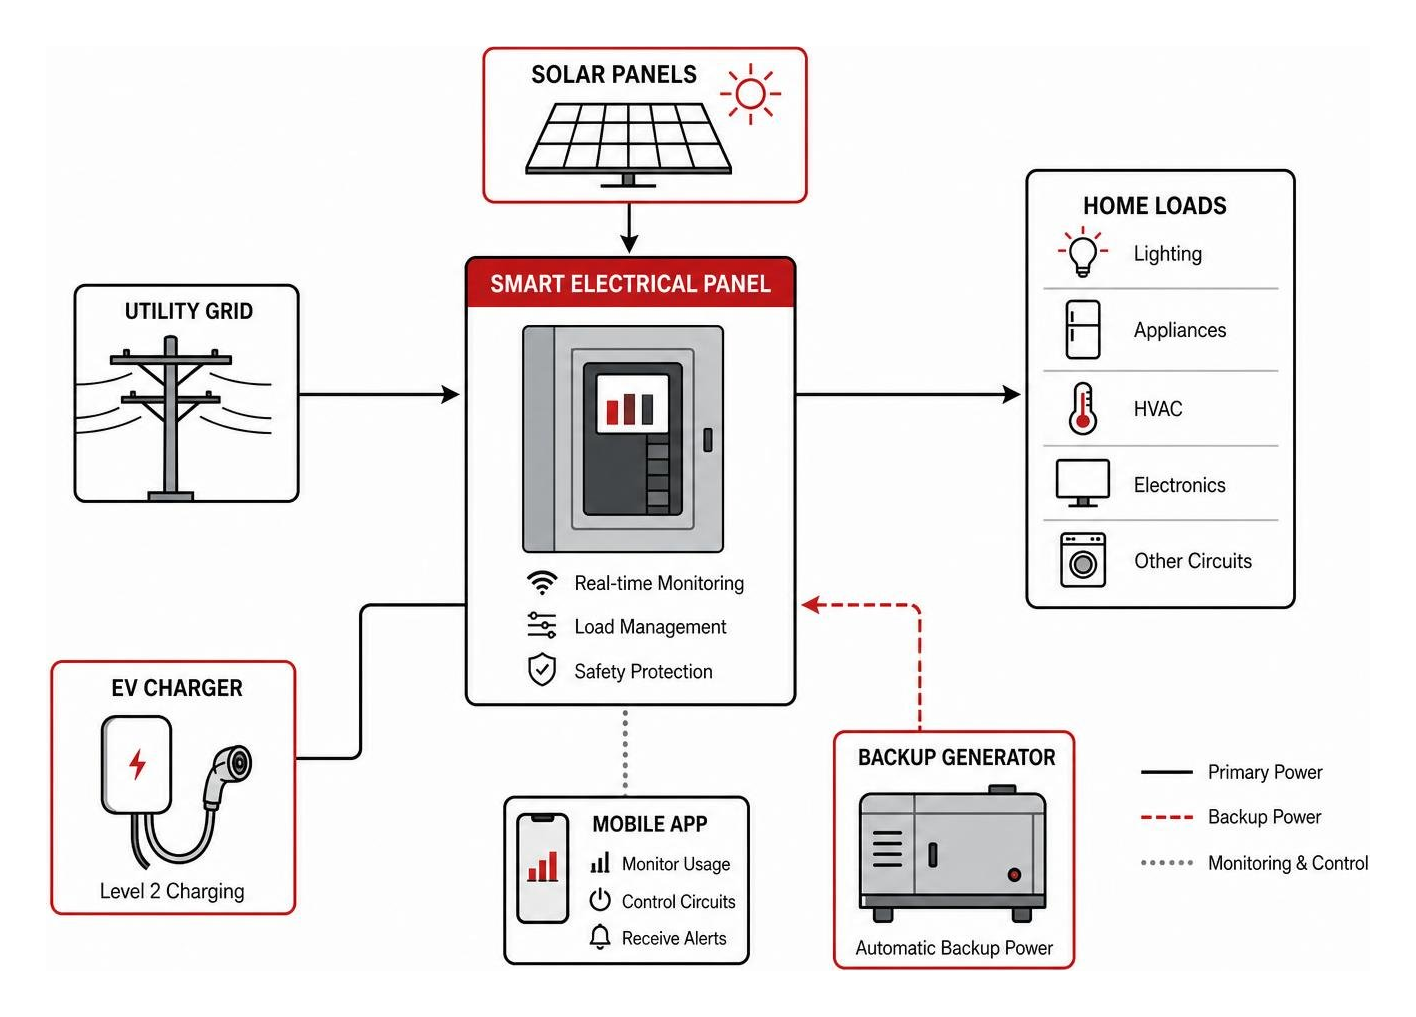
Electrical Panel Upgrades and Smart Load Balancing
Your electrical panel is the central nervous system of your home's power supply. If you are still relying on an outdated analog breaker box, or worse, a dangerous Federal Pacific or Zinsco panel (which are notorious for failing to trip during overloads), upgrading is your single most important safety investment.
When planning an upgrade, homeowners often consult an Electrical Panel Upgrade Cost Guide 2025 to budget appropriately. Modern installations often incorporate smart electrical panels, such as SPAN panels. These smart systems allow you to monitor and control your electrical usage at the individual circuit level directly from a smartphone app.
Additionally, smart load-balancing technology allows you to add high-draw appliances—like Level 2 EV chargers—without undergoing an expensive utility service upgrade. The smart panel dynamically manages the power, temporarily shifting energy away from non-essential zones to ensure your vehicle charges safely and quickly.
EV Charger and Standby Generator Installation
As electric vehicles become the standard in July 2026, relying on a standard 120V household outlet (Level 1 charging) is no longer practical. Level 1 charging only adds about 3 to 5 miles of range per hour. A professional Level 2 EV charger installation utilizes a dedicated 240V circuit, allowing you to fully charge your vehicle overnight.
Alongside EV charging, residential backup power has become a necessity. Severe weather in Massachusetts can knock out power grids for days. Installing a whole-home standby generator ensures your heating systems, refrigeration, medical equipment, and security systems remain fully functional.
These systems utilize an automatic transfer switch (ATS). The moment utility power drops, the ATS detects the failure, safely disconnects your home from the main grid to prevent dangerous backfeeding, and starts the generator—restoring power to your home in under 20 milliseconds.
For homeowners in Middlesex or Essex counties, working with a local specialist for Generator Installation MA guarantees that your backup system is properly sized, permitted, and compliant with all local building codes.
Prioritizing Safety: Inspections and Code Compliance

Electricity is an invisible force. You cannot see a loose neutral wire or a degrading connection behind a wall until it begins to arc and generate dangerous levels of heat. That is why proactive safety inspections and strict adherence to the National Electrical Code (NEC) are so critical.
If you manage specialized facilities or rely on life-saving equipment at home, ensuring safety is even more critical. You can learn more about specialized safety protocols in our guide on Electrical Safety Check on Medical Equipment. For general preventative measures, consult our Electrical Maintenance Ultimate Guide.
Recommended Electrical Inspection Frequency
Just like your car needs regular oil changes and your heating system needs annual tune-ups, your home's electrical system requires periodic checkups.
We recommend having your electrical system professionally inspected every 3 to 5 years. If you live in an older historic home in Massachusetts (such as in historic areas of Concord, Lexington, or Gloucester), or if you have recently purchased a new property, an immediate safety inspection is highly advised.
During a comprehensive safety inspection, a licensed electrician will check:
- Grounding and bonding systems
- Main service panel health and breaker connections
- Outlets and switches for proper polarity and physical wear
- The presence of functional smoke and carbon monoxide detectors
- Proper GFCI and AFCI protection in required zones
GFCI and AFCI Protection Requirements
Modern electrical codes place a heavy emphasis on two life-saving technologies: Ground Fault Circuit Interrupters (GFCIs) and Arc Fault Circuit Interrupters (AFCIs).
- GFCI Protection: GFCIs are designed to protect people from lethal electrical shocks. They constantly monitor the balance of electrical current moving through a circuit. If they detect even a tiny leakage of current (such as electricity flowing through water or a human body), the GFCI cuts off power in milliseconds. By code, GFCI outlets are strictly required in all "wet" or damp areas, including kitchens, bathrooms, garages, unfinished basements, and outdoor locations.
- AFCI Protection: While GFCIs protect people from shocks, AFCIs protect homes from fires. AFCIs detect dangerous electrical arcing - sparking that occurs when wire insulation is damaged or connections are loose. Arcing can reach temperatures hot enough to ignite nearby wood or insulation. Modern building codes require AFCI protection on nearly all residential branch circuits, especially in bedrooms, living areas, and during major kitchen or bathroom remodels.
How to Choose a Reliable Electrical Contractor
Your electrical system is too important—and too dangerous—to leave in the hands of an unlicensed handyman or an unvetted contractor. Making the wrong choice can lead to failed municipal inspections, damaged appliances, and severe safety hazards.
To guide you through this process, we have put together a comprehensive Electrical Contractor Hiring Guide, alongside a directory of Electrical Companies Near Me to help you find local, licensed professionals. If you are looking for highly rated local services with deep community roots, you can also explore options like Electricians Near Me to find trusted experts in your area.
Red Flags to Avoid When Hiring
When searching for an electrical contractor in Massachusetts, keep an eye out for these common red flags:
- Lack of Active Licensing and Insurance: Always ask for proof of a valid Massachusetts Journeyman or Master Electrician license and active liability insurance. If a contractor cannot provide these, walk away immediately.
- Vague or Unwritten Estimates: A reliable contractor will always provide a detailed, written estimate outlining material costs, labor, and permit fees. Avoid companies that offer vague over-the-phone quotes without seeing the job site.
- Heavy Reliance on Subcontractors: Some larger companies act as dispatch agencies, sending independent, unvetted subcontractors to your home. Look for companies that hire W-2, background-checked employees who are trained to the latest standards.
- No Permit Filing: If a contractor suggests doing a major job (like a panel upgrade or addition) without filing a municipal permit, they are cutting corners. Permits ensure that a local town inspector reviews the work to guarantee it is 100% safe and up to code.
Emergency Response and Warranties
Electrical emergencies don't wait for convenient business hours. A fallen tree limb crushing your service mast or a sudden burning smell from your breaker box in the middle of the night requires immediate action.
When choosing a contractor, verify that they offer genuine emergency support. If you are facing an urgent power loss, you should look for a reliable Emergency Electrical Service Near Me or a dedicated 24 Hour Electrician Service Near Me to get a technician dispatched to your location immediately.
Furthermore, look for companies that stand behind their craftsmanship. While the industry standard warranty on electrical labor is typically one year, premier contractors will offer extended warranties—sometimes up to 10 years on major installations—giving you ultimate peace of mind that the job was done right the first time.
Frequently Asked Questions about Home Electrical Systems
How often should my home's electrical system be inspected?
We recommend a professional electrical safety inspection every 3 to 5 years for standard residential properties. However, you should schedule an inspection immediately if you live in an older historic home, are planning a major renovation, are experiencing frequent breaker trips, or have recently purchased a new property. Preventative maintenance is always more cost-effective than emergency repairs.
What is the difference between a Level 1 and Level 2 EV charger?
The primary differences are voltage and charging speed:
- Level 1 Charging: Uses a standard 120V household outlet. It requires no special installation but is incredibly slow, adding only 3 to 5 miles of range per hour. It can take over 24 hours to fully charge a modern EV.
- Level 2 Charging: Operates on a dedicated 240V circuit (similar to a clothes dryer or electric stove). It must be professionally installed by a licensed electrician. Level 2 charging adds 15 to 30+ miles of range per hour, allowing most electric vehicles to fully charge in just 4 to 8 hours.
What should I do during an electrical emergency?
If you smell burning plastic, see active sparks, or hear loud buzzing coming from an outlet or your main electrical panel, follow these steps immediately:
- Safety First: If it is safe to do so, immediately turn off the main breaker in your electrical panel to cut off all power to the home.
- Evacuate if Necessary: If there is active smoke or fire, evacuate your family immediately and call 911.
- Call a Professional: Contact a licensed emergency electrician. Do not attempt to investigate or touch damaged wiring yourself, as this poses an extreme risk of electrocution.
Conclusion
Your electrical system is the backbone of your property's safety, comfort, and daily operations. Whether you are upgrading an outdated breaker panel, installing a modern Level 2 EV charger, setting up a standby generator, or requiring commercial tenant build-outs, investing in professional electrical services is the only way to guarantee safety, efficiency, and complete code compliance.
At Sartell Electrical Services, Inc., we have been proudly serving homeowners, businesses, and industrial facilities throughout Reading, MA, and the Greater Boston area for over 30 years. Our commitment to excellence, leadership, and unmatched customer service ensures that projects of all sizes are completed safely, on time, and up to the highest technical standards.
If you are ready to secure, upgrade, or troubleshoot your property's power systems, contact our expert team today to schedule an inspection or request an estimate. Explore our comprehensive Electrical Contractor Service to see how we can keep your home or business safely powered for years to come.
Why Finding a Trusted Garden Electrician Near Me Matters
If you're looking for a garden electrician near me, here's a quick answer to get you started:
What does a garden electrician do, and do you need one?
| Your Situation | Do You Need a Garden Electrician? |
|---|---|
| Adding outdoor sockets or lighting | Yes — outdoor wiring requires weatherproof, code-compliant installation |
| Powering a shed, garage, or garden room | Yes — requires dedicated circuits and proper underground cabling |
| Installing an EV charger in your driveway | Yes — needs panel assessment and permits |
| Setting up a hot tub or pool circuit | Yes — specialized safety standards apply |
| Replacing a dead outdoor bulb yourself | Usually no — but call a pro for anything beyond the fixture itself |
Outdoor electrical work is not the same as indoor work. It requires weatherproof fittings, protected wiring, and code-compliant installation to stay safe through rain, temperature swings, and everyday use. Skipping any of these steps creates real risk — over 50,000 residential electrical fires occur in the U.S. every year, and many start with wiring that was never built for the conditions it was placed in.
Your garden and outdoor spaces deserve the same level of electrical safety as the inside of your home — often more.
I'm Ed Sartell, President of Sartell Electrical Services, Inc., with nearly four decades of residential and commercial electrical experience across Massachusetts — including the outdoor and garden electrician near me work that homeowners and businesses consistently get wrong when they try to cut corners. Let's walk through exactly what professional outdoor electrical service looks like, so you can make a confident, informed decision.
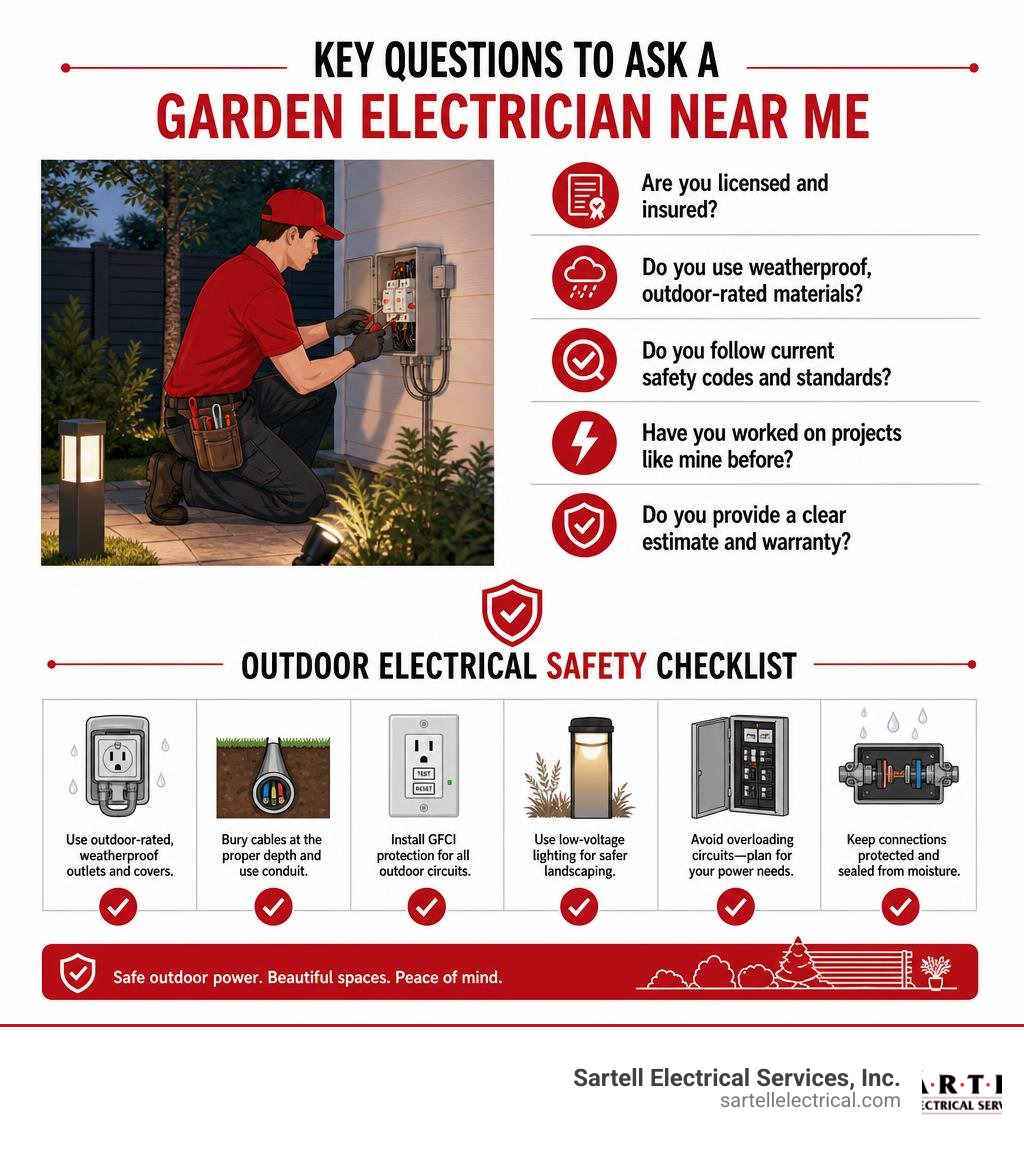
Garden electrician near me terms to know:
- 24 hour electrician service near me
- emergency electricians in my area
- local electrical contractors near me
Why You Need a Specialized Garden Electrician Near Me
Many property owners assume that any general contractor or handy neighbor can run a wire out to a garden bed or mount a patio spotlight. However, outdoor electrical environments are inherently hostile to electrical systems. Moisture, shifting soil, extreme temperature fluctuations, and pests present unique challenges. A specialized garden electrician understands that bringing power outside requires a completely different approach than wiring a bedroom or kitchen.
When you look for qualified Electricians Near Me to handle your backyard project, you are investing in specialized knowledge of moisture protection, soil conditions, and strict outdoor electrical codes.

Outdoor Power and Weatherproof Sockets
Installing power outlets in a garden or on a patio requires heavy-duty, weatherproof equipment. Unlike indoor receptacles, outdoor outlets must be protected by robust Ingress Protection (IP) rated enclosures.
- IP Ratings Explained: For most garden environments, a minimum rating of IP44 is required to protect against splashing water. However, for fully exposed areas subject to heavy rain or hose sprays, we install IP66-rated enclosures. These "while-in-use" wet-location covers remain completely sealed even when an appliance or lighting string is plugged in.
- RCD and GFCI Protection: In outdoor environments, the risk of electrical shock is significantly elevated due to wet ground conditions. Every single outdoor circuit must be protected by a highly sensitive Residual Current Device (RCD) or Ground Fault Circuit Interrupter (GFCI) rated at 30mA. These safety devices continuously monitor the current and cut power in milliseconds if they detect the slightest leakage, preventing lethal shocks.
- Professional Installation Standards: Running temporary extension cords across your lawn is a major fire and tripping hazard. A professional garden electrician will install permanent, weatherproof sockets mounted securely to solid structures like brick walls, treated wooden posts, or concrete plinths. This ensures your lawnmowers, hedge trimmers, and patio heaters always have a safe, reliable power source.
Landscape and Patio Lighting Design
A beautifully lit garden does more than extend your living space into the evening hours; it increases your property’s security, aesthetic appeal, and overall market value. According to real estate studies, professionally installed outdoor lighting can increase a home’s value by up to 20% while yielding an impressive return on investment of approximately 50%.
- Aesthetic and Feature Lighting: From highlighting a mature oak tree to casting a soft glow along a stone pathway, landscape lighting design is an art. Professional electricians utilize low-voltage LED systems that are highly energy-efficient, safe to touch, and versatile. Placing uplights, downlights, and path fixtures correctly requires a deep understanding of voltage drop and circuit layout. For inspiration on beautiful Massachusetts properties, you can read about Landscape Lighting Installation in Massachusetts.
- Security and PIR Lighting: Integrating Passive Infrared (PIR) motion sensors with your garden lighting provides an excellent deterrent against intruders. These lights activate instantly when movement is detected, illuminating dark entryways and blind spots. A specialized electrician can configure these sensors so they do not trigger constantly from passing wildlife or wind-blown branches.
- Low-Voltage Systems vs. Line Voltage: While some elements like security floodlights run on standard line voltage (120V/240V), most modern decorative garden lighting runs on safe 12V or 24V low-voltage systems powered by an outdoor-rated transformer. This drastically reduces the risk of shock if a cable is accidentally nicked by a garden trowel.
Essential Outdoor Electrical Services for Homes and Businesses
Whether you are a homeowner wanting to light up a backyard deck or a business owner managing a commercial facility, outdoor electrical demands are diverse. Working with established Local Electrical Contractors Near Me ensures that your systems are engineered to handle the specific loads required.

| Service Category | Residential Properties | Commercial Properties |
|---|---|---|
| Primary Lighting | Soft landscape lights, patio sconces, path lighting | High-intensity security lights, architectural floodlights |
| Power Outlets | Weatherproof outlets for tools, lawn care, pool pumps | Heavy-duty sockets for maintenance equipment, exterior events |
| High-Load Power | Hot tub connections, EV chargers, detached garage panels | Parking lot pole lights, EV fleet charging stations, HVAC |
| Safety Systems | Standard GFCI breakers, motion-activated floodlights | Integrated commercial security, fire alarms, emergency exit paths |
High-Demand Residential Upgrades: EV Chargers, Generators, and Panels
As we move through 2026, residential power needs are changing rapidly. Modern homes demand significantly more power than they did just a few decades ago. Homes with older 100-amp electrical service (common in pre-1990 homes) often cannot safely support modern, high-draw outdoor additions like Level 2 electric vehicle (EV) chargers, which require dedicated 40-to-50 amp circuits.
- EV Charger Installation: Adding an EV charger to your driveway or carport requires a comprehensive load calculation of your existing electrical panel. If your panel is maxed out, a professional Licensed Home Electrician will perform a panel upgrade to 200 amps or install a smart load-management system to ensure your vehicle charges safely without overloading your home.
- Whole-Home Standby Generators: With severe weather events becoming more common, having a reliable backup generator is crucial. Electricians can install a standby generator with an automatic transfer switch (ATS). When the grid fails, the ATS instantly transfers your home's critical circuits—like your heating system, refrigerator, and outdoor security—to generator power.
- Whole-Home Surge Protection: Did you know that the average home experiences dozens of minor, unnoticed power surges every day? While Florida experiences the highest number of lightning strikes per square mile, Massachusetts coastal storms and grid fluctuations still pose a massive threat to sensitive electronics. Installing a whole-home surge protection device directly into your main electrical panel shields your expensive appliances, smart home systems, and outdoor LED lighting from sudden voltage spikes.
Commercial Solutions: Parking Lot Pole Lights and LED Upgrades
Commercial properties require heavy-duty outdoor electrical services that go far beyond standard residential applications. Keeping your commercial exterior properly illuminated is vital for customer safety, employee security, and liability protection.
- Parking Lot Pole Light Maintenance: Maintaining commercial pole lights requires specialized equipment, including bucket trucks and diagnostic tools. Commercial electricians regularly troubleshoot and repair dead bulbs, burned-out ballasts, faulty capacitors, and malfunctioning photocells. Ensuring these high-mast fixtures function at peak performance keeps your parking lots safe and compliant with local municipal codes.
- Commercial LED Lighting Upgrades: Upgrading outdated metal halide or high-pressure sodium fixtures to modern commercial LEDs is one of the smartest investments a business can make. LED lighting uses 75% to 80% less energy than traditional incandescent or HID bulbs and can last up to 25 times longer. This leads to dramatic utility bill savings and slashes your ongoing maintenance costs. Many local utility companies in Massachusetts also offer substantial rebates for commercial LED retrofits, sometimes covering a significant portion of the upfront installation costs.
Safety, Code Compliance, and Local Permitting
Electrical work is highly regulated for a reason: improper installations can cause catastrophic fires, severe injuries, or fatal shocks. In Massachusetts, all electrical work must comply with the strict guidelines of the National Electrical Code (NEC) as well as localized state building codes. When you hire a Registered Electrician Near Me, you are ensuring that your project is fully permitted, inspected, and certified.

Verifying Licenses and Insurance Regulations
Never allow an unlicensed contractor, landscaper, or handyman to perform electrical work on your property. In Massachusetts, licensing laws are strictly enforced to protect consumers.
- Verify the License: Always ask to see an electrician's license before they begin any work. You can verify a license online through the Massachusetts Division of Occupational Licensure. A legitimate contractor will gladly provide their license number.
- Check the Vehicle: Under state regulations, licensed electrical contractors must clearly display their license number on their service vehicles. Keep an eye out for this indicator of professional compliance.
- Confirm Insurance Coverage: A professional contractor must carry substantial liability insurance and workers' compensation coverage. This protects you from financial liability in the rare event of property damage or an on-site injury during your project. Hiring a Licensed Residential Electricians Near Me guarantees that the team on your property is fully insured and qualified.
Underground Cabling and Weatherproofing Standards
Running power through a garden requires specialized materials and physical installation techniques to protect the cables from moisture, soil chemicals, and physical damage from gardening tools.
- Steel Wire Armored (SWA) Cable: For underground runs to garden rooms, sheds, or remote light fixtures, standard indoor cables cannot be used. Electricians utilize heavy-duty Steel Wire Armored (SWA) cables. The steel wire wrapping provides excellent mechanical protection against accidental punctures from shovels or garden forks.
- Correct Burial Depths: The NEC dictates precise depths for buried cables to ensure they remain safe from surface activities. Under a standard lawn or garden bed, cables must be buried at a minimum depth of 600mm (approximately 24 inches). Under permanent paths or driveways, armored cables must be buried to at least 450mm (18 inches).
- Conduit Protection: In areas where cables transition from underground to above-ground—such as running up the side of a wooden post to an outlet—they must be enclosed in rigid, impact-resistant conduit to prevent physical damage.
How to Hire a Reliable Professional
Finding the right contractor for your outdoor project doesn't have to be overwhelming. By focusing on local experience, clear communication, and verified credentials, you can easily filter out unreliable providers from professional Electrical Companies Near Me.
How to Choose the Best Garden Electrician Near Me
When searching for a specialized contractor, use these actionable steps to ensure you hire the best:
- Look for Specialized Outdoor Experience: Ask potential contractors about their experience with garden electrics, landscape lighting, and underground cabling. Outdoor work requires a different skill set than simple indoor outlet replacements.
- Request Written Estimates: A reputable electrician will always provide a detailed, written estimate outlining the scope of work, materials, labor costs, and project timeline. Avoid contractors who only offer vague verbal quotes.
- Check Google Reviews and Local References: Read online reviews to assess the company’s reliability, punctuality, and quality of work. Look for consistent praise regarding their clean-up practices and customer service.
- Consult Local Guides: For a comprehensive overview of what to look for when hiring, check out resources like Finding Your Spark: The Ultimate List of Local Electrical Contractors.
When to Call an Emergency Garden Electrician Near Me
Some electrical issues can wait for a scheduled appointment, but others require immediate professional intervention to prevent a fire or severe shock hazard. You should call an emergency electrician immediately if you notice:
- Burning Smells or Smoke: If you detect a fishy, burning, or plastic-like odor near an outdoor outlet, light fixture, or your main breaker panel, shut off the power immediately and call a pro.
- Sparking Outlets or Fixtures: Visible sparks when plugging in outdoor equipment or turning on garden lights indicate a severe short circuit or loose connection that must be addressed right away.
- Storm Damage: If a severe Massachusetts storm has knocked down branches that damaged your outdoor electrical service mast or exposed underground wiring, stay far away and contact an emergency team.
- Repeatedly Tripping Breakers: If an outdoor circuit breaker trips immediately after being reset, do not force it back on. This is a clear warning sign of a dangerous fault. For more safety tips, read Stop Playing With Fire and Find a Local Electrician Today.
Frequently Asked Questions about Garden Electrical Services
Navigating outdoor electrical projects can raise many questions. If you are planning an upgrade, read through our guide on Current Events: Your Guide to Hiring a Private Electrician Near Me or review these common queries below.
Do outdoor electrical sockets need special weatherproofing?
Yes, absolutely. Outdoor sockets must be housed in specialized weatherproof enclosures. Under current electrical regulations, these enclosures should feature an IP66 rating, which protects against powerful jets of water and dust. They must also include a "while-in-use" cover that keeps the receptacle completely sealed even when an appliance is plugged in, and they must be connected to a dedicated 30mA RCD/GFCI breaker for shock protection.
Can I run standard indoor extension cords for my garden lighting?
No. Standard indoor extension cords are not built to withstand UV radiation, moisture, temperature changes, or physical wear. Using them outdoors is a major fire hazard and can easily result in electric shocks. Temporary outdoor extension cords should only be used briefly in dry conditions and never as a permanent wiring solution for garden lighting or outbuildings.
How deep do underground garden cables need to be buried?
To meet safety standards, standard cables buried under garden beds or lawns must be buried at a minimum depth of 600mm (24 inches). If you are using heavy-duty Steel Wire Armored (SWA) cable, it must be buried at least 450mm (18 inches) deep. The trench should also include a brightly colored warning tape buried slightly above the cable to alert anyone digging in the future.
Conclusion
Bringing power and light to your outdoor spaces is one of the best ways to enhance your property's beauty, security, and utility. However, because water and electricity are a deadly combination, outdoor projects require the specialized skills of a professional garden electrician.
At Sartell Electrical Services, Inc., we have spent over 30 years delivering safe, reliable, and code-compliant electrical solutions to homeowners and businesses across Massachusetts. Headquartered in Reading, MA, we proudly serve communities throughout Essex, Middlesex, Norfolk, and Suffolk Counties, including Greater Boston. Whether you need a skilled Residential Electrician Boston for a backyard lighting design or a commercial team to handle complex exterior installations, our commitment to excellence ensures your project is completed safely and on time.
Ready to transform your outdoor living spaces with beautiful, safe, and reliable power? Schedule your professional outdoor electrical consultation today with Sartell Electrical Services and let us help you spark joy in your garden!
Finding a Trusted Electrician in Amesbury MA: What You Need to Know
If you need an electrician in Amesbury MA, here are the top things to know right away:
- Licensed contractors serving Amesbury include both local firms and regional companies covering the North Shore and Southern NH
- Services available range from panel upgrades and EV charger installation to 24/7 emergency response and generator installation
- What to look for: Massachusetts state license, liability insurance, verified reviews, and experience with local permit requirements
- Response times: Many area electricians offer same-day or next-day scheduling, with some providing 24/7 emergency service
Amesbury, MA sits in Essex County near the New Hampshire border — and the homes and businesses here reflect that mix of old and new. You'll find 19th-century homes with outdated wiring right next to modern commercial builds that need robust, code-compliant electrical systems. That range of needs makes choosing the right electrician matter more than you might expect.
Whether you're managing a complex commercial project with tight deadlines, dealing with a sudden power failure, or planning a major upgrade like a 200-amp panel replacement or EV charger installation, the electrician you hire has a direct impact on safety, budget, and timeline. Getting this decision wrong can mean failed inspections, costly rework, or worse — a serious safety hazard.
I'm Ed Sartell, President of Sartell Electrical Services, Inc., and I've been delivering residential and commercial electrical solutions across Massachusetts since 1985 — including projects throughout the Amesbury MA area and the broader North Shore. In this guide, I'll walk you through everything you need to know to make a confident, informed decision.
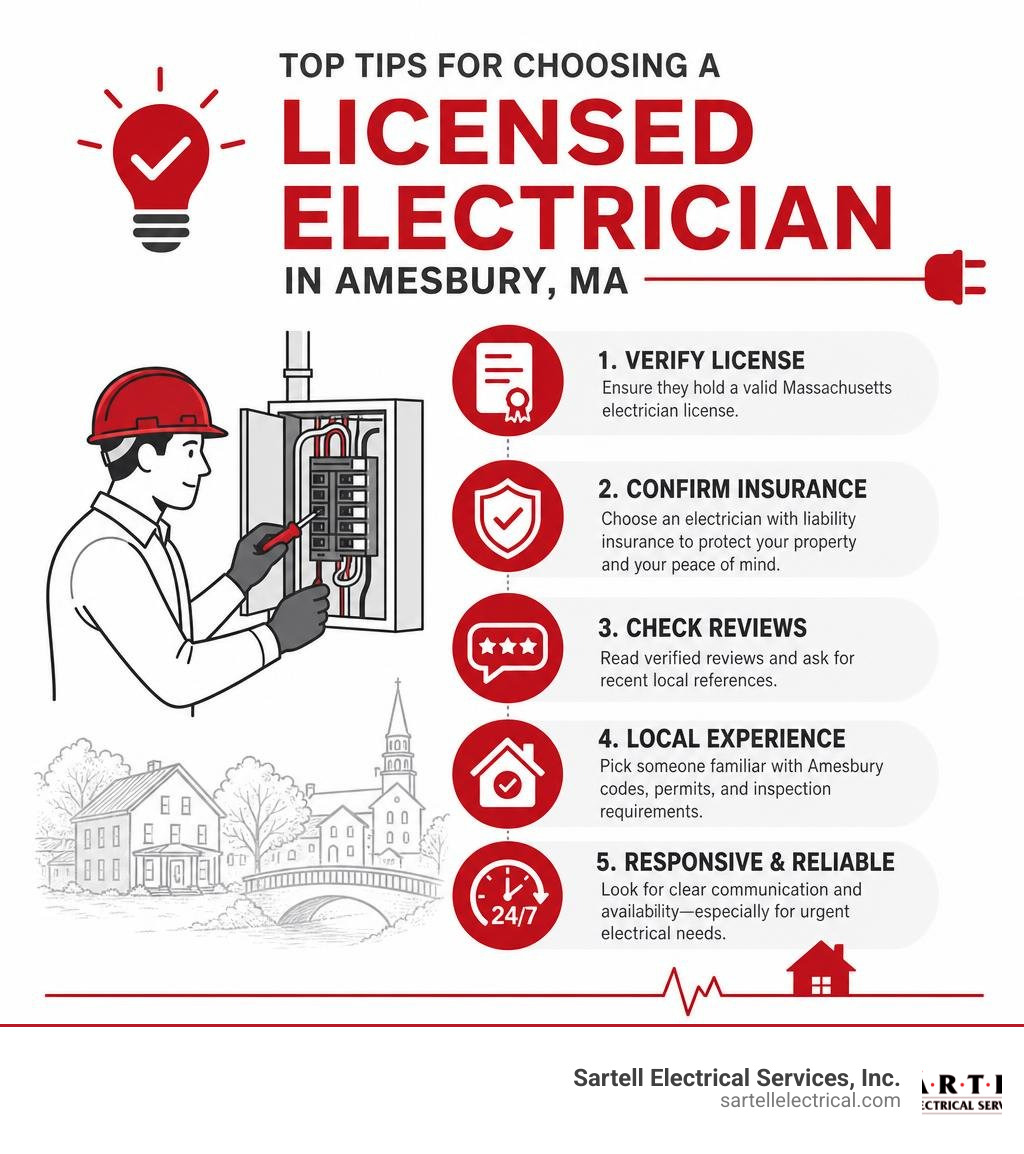
Electrician Amesbury MA word roundup:
Hiring a Licensed Electrician Amesbury MA: What to Look For
When you begin searching for a professional electrician Amesbury MA property owners can trust, it is easy to get overwhelmed by the sheer volume of choices. However, narrowing down your options becomes much simpler when you focus on a few non-negotiable standards: proper licensing, active liability insurance, positive customer feedback, and deep local experience.
Hiring an unlicensed "handyman" for electrical work is a recipe for disaster. If a fire or electrical failure occurs due to unpermitted or unlicensed work, your homeowner's insurance policy may deny your claim.
To help you navigate the selection process without getting burned, we recommend checking out our comprehensive Finding Your Spark: The Ultimate List of Local Electrical Contractors and reviewing our guide on how to Don't Get Zapped by Choosing the Wrong Local Electrical Contractor.
Why You Need a Certified Electrician Amesbury MA for Code Compliance
In Massachusetts, all electrical work must comply strictly with the Massachusetts Electrical Code (527 CMR 12.00), which is built upon the national NFPA 70 standards. These rules are updated regularly to incorporate modern safety technologies and prevent electrical fires.
A certified electrician Amesbury MA handles the entire permit process with the local building department. This ensures that:
- The scope of work is officially recorded and reviewed.
- A local municipal inspector signs off on the installation.
- The work meets or exceeds NFPA 70 safety standards.
To verify the standing of any professional you plan to hire, you can consult the Board of State Examiners of Electricians (or the alternative lookup page Board of State Examiners of Electricians - Mass.gov ). This step guarantees that your contractor holds an active, valid license in the Commonwealth of Massachusetts.
Evaluating Experience and Local Reputation
A company’s history in the community is one of the strongest indicators of quality. When evaluating an electrical contractor, look for:
- Verified Online Reviews: Check platforms like Google and the Better Business Bureau (BBB) to see how the company handles both standard jobs and unexpected challenges.
- Service Area Familiarity: An electrician who regularly works in Amesbury, Essex County, and surrounding communities will understand local municipal guidelines and older home construction styles.
- Transparent Pricing: A reputable contractor provides clear, upfront estimates rather than surprising you with hidden fees at the end of the project.
For a step-by-step breakdown of questions to ask during your consultation, refer to our Electrical Contractor Hiring Guide.
Essential Residential and Commercial Electrical Services

Whether you are managing a historic colonial home near the Merrimack River or operating a bustling commercial facility near I-95, your electrical needs will vary widely. A full-service contractor should possess the equipment, manpower, and specialized knowledge to handle both residential systems and heavy-duty commercial or industrial installations. For a complete overview of what these services entail, you can explore our Residential Electrical Services Complete Guide.
Comprehensive Residential Solutions
Your home’s electrical system is its central nervous system. From the moment you flip on a light switch to the continuous operation of your refrigerator, you rely on safe, steady power. Standard residential services we provide include:
- Indoor and Outdoor Lighting: Installing energy-efficient LED recessed lights, custom chandeliers, and landscape lighting to boost your home's curb appeal.
- Outlet and Switch Upgrades: Replacing worn-out outlets with modern, tamper-resistant models and adding GFCI (Ground Fault Circuit Interrupter) protection in kitchens, bathrooms, and outdoor areas to prevent shocks.
- Home Remodeling Support: Wiring additions, finished basements, and kitchen renovations.
If you are a homeowner in the North Shore region, it is crucial to partner with a qualified Licensed Home Electrician. We are proud to serve communities across Essex County, including Essex and Beverly, ensuring your home's electrical systems are safe and up to code. We also maintain a strong presence in Middlesex County, providing reliable residential services to homeowners in Reading and surrounding areas.
Commercial and Industrial Capabilities
Commercial and industrial electrical systems require a completely different set of skills, tools, and safety protocols compared to residential work. These systems often operate on three-phase power, high-voltage lines, and intricate distribution networks.
Our commercial and industrial capabilities include:
- Office Remodeling and Tenant Fit-Outs: Designing and installing power, lighting, and data systems for corporate offices, retail spaces, and medical clinics.
- HVAC Hookups and Industrial Controls: Powering commercial heating, ventilation, and air conditioning units, as well as variable frequency drives (VFDs) and heavy machinery.
- Safety and Security Systems: Installing addressable fire alarm systems and networked security cameras.
- Data and Network Wiring: Structured low-voltage cabling (CAT-5e/6) backed by industry-standard certifications like BICSI to support high-speed telecommunications.
If your business is located in neighboring regions, we have you covered. We regularly support businesses throughout Middlesex County and provide specialized commercial electrical services across Norfolk County.
Emergency Services from a Reliable Electrician Amesbury MA
Electrical emergencies do not wait for business hours. A fallen tree limb, a sudden power surge, or a burning smell coming from your panel demands immediate professional attention.
When you experience an urgent issue, you need a Local Emergency Electrician who can respond quickly to secure the site. Having access to a reliable 24 Hour Electrician Service Near Me ensures that your family or business is never left in the dark. We maintain fully stocked service vans ready to deploy at a moment's notice to troubleshoot and resolve dangerous electrical hazards.
Specialized Upgrades: EV Chargers, Panels, and Historic Wiring

As technology evolves, our homes and businesses require more power than ever before. Central air conditioning, high-end kitchen appliances, and electric vehicles can easily push older electrical systems to their absolute limits.
Panel Upgrades and EV Charger Installation
If your home still operates on an outdated 60-amp or 100-amp electrical panel, you will likely experience frequent breaker trips when running multiple appliances. Upgrading to a 200-amp or 400-amp service is the best way to future-proof your property and accommodate modern additions like Level 2 EV charging stations.
| Panel Capacity | Common Use Case | Suitability for EV Charging |
|---|---|---|
| 100 Amps | Older, smaller homes with gas appliances | Limited; may require a smart load-shedding device |
| 200 Amps | Modern standard for medium-to-large family homes | Excellent; easily supports Level 2 charging & central AC |
| 400 Amps | Large luxury homes, multi-family units, or home workshops | Outstanding; supports multiple EV chargers and heavy loads |
When planning an EV charger installation, it is highly recommended to work with EVITP (Electric Vehicle Infrastructure Training Program) approved contractors. This ensures your charger is installed safely, complies with manufacturer specifications, and qualifies for any available state or federal utility rebates.
Knob-and-Tube Wiring Replacement
Many historic homes in Amesbury and the wider Greater Boston area still contain active knob-and-tube wiring. Developed in the late 19th century, this system uses single-insulated copper conductors run through porcelain protective tubes. While innovative for its time, it poses significant modern risks:
- No Ground Wire: It does not feature a ground wire, increasing the risk of electrical shock and damage to sensitive electronics.
- Degraded Insulation: Over the decades, the rubberized cloth insulation becomes brittle and flakes away, leaving bare wires exposed.
- Combustion Risks: Knob-and-tube relies on free-air cooling. If modern fiberglass or cellulose insulation is packed around the wires, heat cannot dissipate, creating a severe fire hazard.
Replacing this historic wiring with modern NM-B (Romex) cabling is a major project, but it is essential for the safety of your property. If you own an older home in the region, consult with a Residential Electrician Boston to evaluate your system and plan a safe, code-compliant upgrade.
Generator Installation and Maintenance
New England weather can be unpredictable. From winter blizzards to summer thunderstorms, power outages are a common occurrence in our region. A standby generator provides seamless backup power, automatically turning on within seconds of a utility outage.
We handle the entire generator lifecycle:
- Sizing and Selection: Determining the appropriate wattage to run your essential circuits (refrigerator, well pump, heating system) or power your entire home.
- Automatic Transfer Switch (ATS) Installation: Wiring the ATS to safely isolate your home from the utility grid when the generator is running, protecting utility workers from dangerous backfeeding.
- Annual Maintenance Plans: Conducting oil changes, spark plug replacements, and battery testing to ensure your generator is ready to perform when you need it most.
Frequently Asked Questions about Amesbury Electrical Services
How do I know if my Amesbury home needs a panel upgrade?
You should consider a panel upgrade if you notice any of the following warning signs:
- Flickering or dimming lights when your refrigerator or air conditioner kicks on.
- Circuit breakers that trip frequently under normal household loads.
- The presence of an old fuse box instead of a modern circuit breaker panel.
- The need to unplug one appliance to use another in the same room.
What should I do during an electrical emergency in Amesbury?
If you smell burning plastic, see smoke coming from an outlet, or hear a loud buzzing sound from your panel:
- Safety First: If it is safe to do so, immediately shut off the main breaker in your electrical panel.
- Evacuate: If there is active smoke or fire, evacuate your home immediately and call 911.
- Avoid Water: Never throw water on an electrical fire or step in standing water near electrical equipment.
- Call a Professional: Contact an experienced Emergency Electrician Boston MA to locate and repair the fault safely.
Are local electricians in Amesbury licensed to work in neighboring states?
Because Amesbury sits right on the New Hampshire border, many local property owners wonder if their electrician can work across state lines. Massachusetts does not have direct licensing reciprocity with every state, but many of our master and journeyman electricians hold separate, individual licenses in New Hampshire and Maine. Always verify that your contractor holds the specific active license for the state where the property is located before work begins. If you are searching for qualified professionals in your immediate area, you can use our Electricians Near Me tool.
Conclusion
Your electrical system is too important—and too dangerous—to leave to chance. Whether you are dealing with flickering lights, planning an EV charger installation, or upgrading a commercial facility, partnering with an experienced, licensed professional is the only way to guarantee safety, code compliance, and long-term peace of mind.
At Sartell Electrical Services, Inc., we have spent over 30 years building a reputation for excellence, leadership, and unmatched customer service across Massachusetts. From small residential repairs to massive industrial installations, our team brings the same dedication to quality craftsmanship and transparent communication to every single project.
Don't let electrical issues leave you in the dark. Schedule Your Electrical Service Today and let our family take care of yours.
When the Power Goes Out, You Need a Plan Before It Happens
If you need emergency electricians in my area right now, here's where to start:
Quick Answer: How to Find an Emergency Electrician
- Search now, not later - Google "emergency electrician near me" or call a local licensed electrical contractor directly
- Confirm 24/7 availability - Ask if they respond nights, weekends, and holidays
- Verify licensing - In Massachusetts, check the state licensing database to confirm credentials
- Ask about response time - Reputable local contractors can often arrive within an hour
- Get a price before work starts - Request upfront pricing before any repairs begin
An electrical emergency doesn't wait for a convenient moment. It happens at 2 a.m. on a holiday weekend, when your panel starts buzzing, your outlets smell like burning plastic, or your home goes dark for no obvious reason.
Here's the hard truth: most homeowners don't have an emergency electrician's number saved in their phone. That gap - between the moment something goes wrong and the moment you find someone qualified to fix it - is exactly where danger lives.
According to the U.S. Fire Administration, roughly 46,700 residential fires occur every year due to faulty electrical systems, resulting in approximately 430 deaths annually. Many of those fires start with warning signs that were ignored or misunderstood.
This guide gives you a clear, practical plan for finding qualified emergency electricians before you ever need one - and what to do if you're already in the middle of a crisis.
I'm Ed Sartell, President of Sartell Electrical Services, Inc., and I've been helping homeowners and businesses across Massachusetts navigate emergency electricians in my area situations since 1985. In nearly four decades of hands-on electrical work, I've seen how preparation - and knowing who to call - makes all the difference when things go wrong.
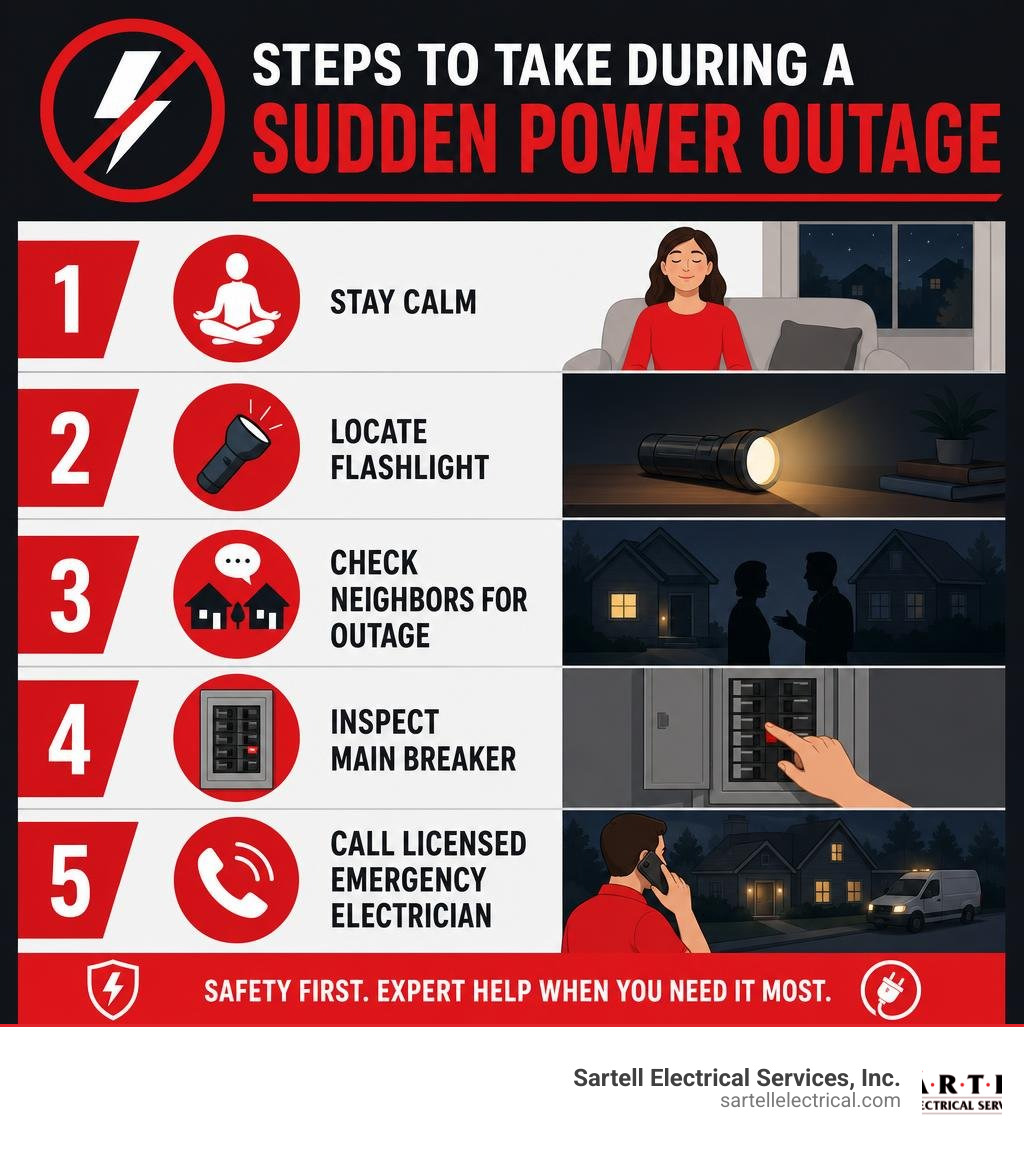
Simple guide to emergency electricians in my area:
1. Recognizing a True Electrical Emergency
Not every electrical issue requires waking up a technician in the middle of the night. A broken light switch in a guest bedroom can easily wait until Monday morning. However, delaying a call for a true hazard can put your home and family at severe risk.
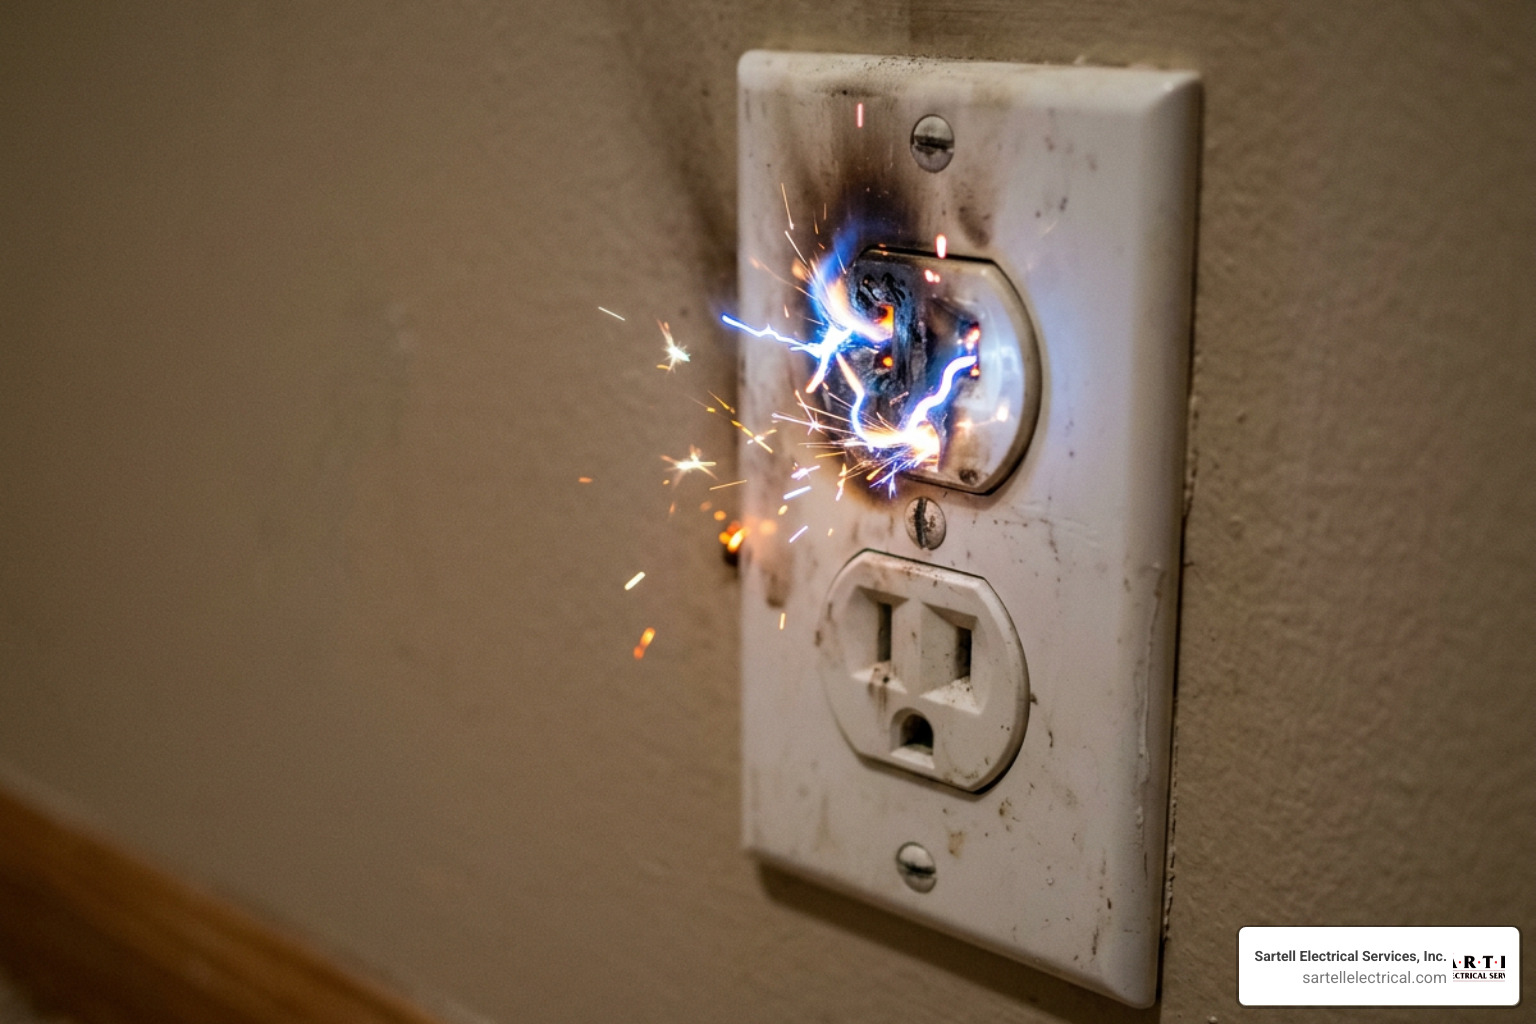
A real electrical emergency is any situation where your system poses an immediate threat of fire, severe physical shock, or sudden, total power loss to critical medical or heating systems. If you notice any of these signs, you must Stop Playing With Fire And Find A Local Electrician Today to resolve the issue safely.
When to Search for Emergency Electricians in My Area
You should begin looking for emergency electricians in my area immediately if you experience any of the following critical warning signs:
- A Burning Smell or Smoke: If you detect an odor resembling burning plastic, fish, or ozone near an outlet, switch, or electrical panel, this indicates that wires are overheating or melting.
- Loud Buzzing or Humming: A quiet hum from a panel can be normal, but a loud, crackling, or buzzing sound indicates active arcing, which is a major fire hazard.
- Sparking Outlets: If plugging in an appliance produces a bright spark or leaves black scorch marks on the wall plate, stop using that outlet immediately.
- Repeatedly Tripping Breakers: A breaker that trips immediately after being reset is warning you of a severe short circuit or ground fault. Do not keep forcing it back on.
- Partial Power Outages: If half of your house loses power while your neighbors' homes remain fully lit, you may have dropped a "leg" of your electrical service. This requires rapid diagnostic attention from an Emergency Electrician Boston MA to prevent damage to your appliances.
- Water Intrusion: If a pipe bursts or heavy rains cause water to leak directly into your electrical panel or outlets, the entire system is compromised and highly dangerous.
Immediate Steps for Sparks or Burning Smells
If you smell burning, see smoke, or witness active sparking, do not wait for the technician to arrive before taking basic safety precautions. Follow these steps immediately:
- Cut the Power Safely: If you can access your main electrical panel safely without stepping in water or touching wet surfaces, flip the main circuit breaker to the "OFF" position. This cuts all electrical current to your home.
- Never Use Water on an Electrical Fire: Water conducts electricity. If an active fire breaks out, use only a Class C rated fire extinguisher, which is specifically designed for electrical fires.
- Evacuate and Call 911: If you see active flames or heavy smoke and cannot safely shut off the main breaker, evacuate your home immediately. Get everyone to safety and call 911 first. Once the fire department has secured the scene, call for professional emergency services and repairs.
- Keep Your Distance: Stay away from the affected outlets, switches, or panel. Do not touch any metal fixtures or appliances connected to the faulty circuit.
2. How to Choose the Best Emergency Electricians in My Area
When a crisis strikes, it is easy to panic and hire the first person who answers the phone. However, making a rushed choice can lead to shoddy work, code violations, or even greater safety hazards.
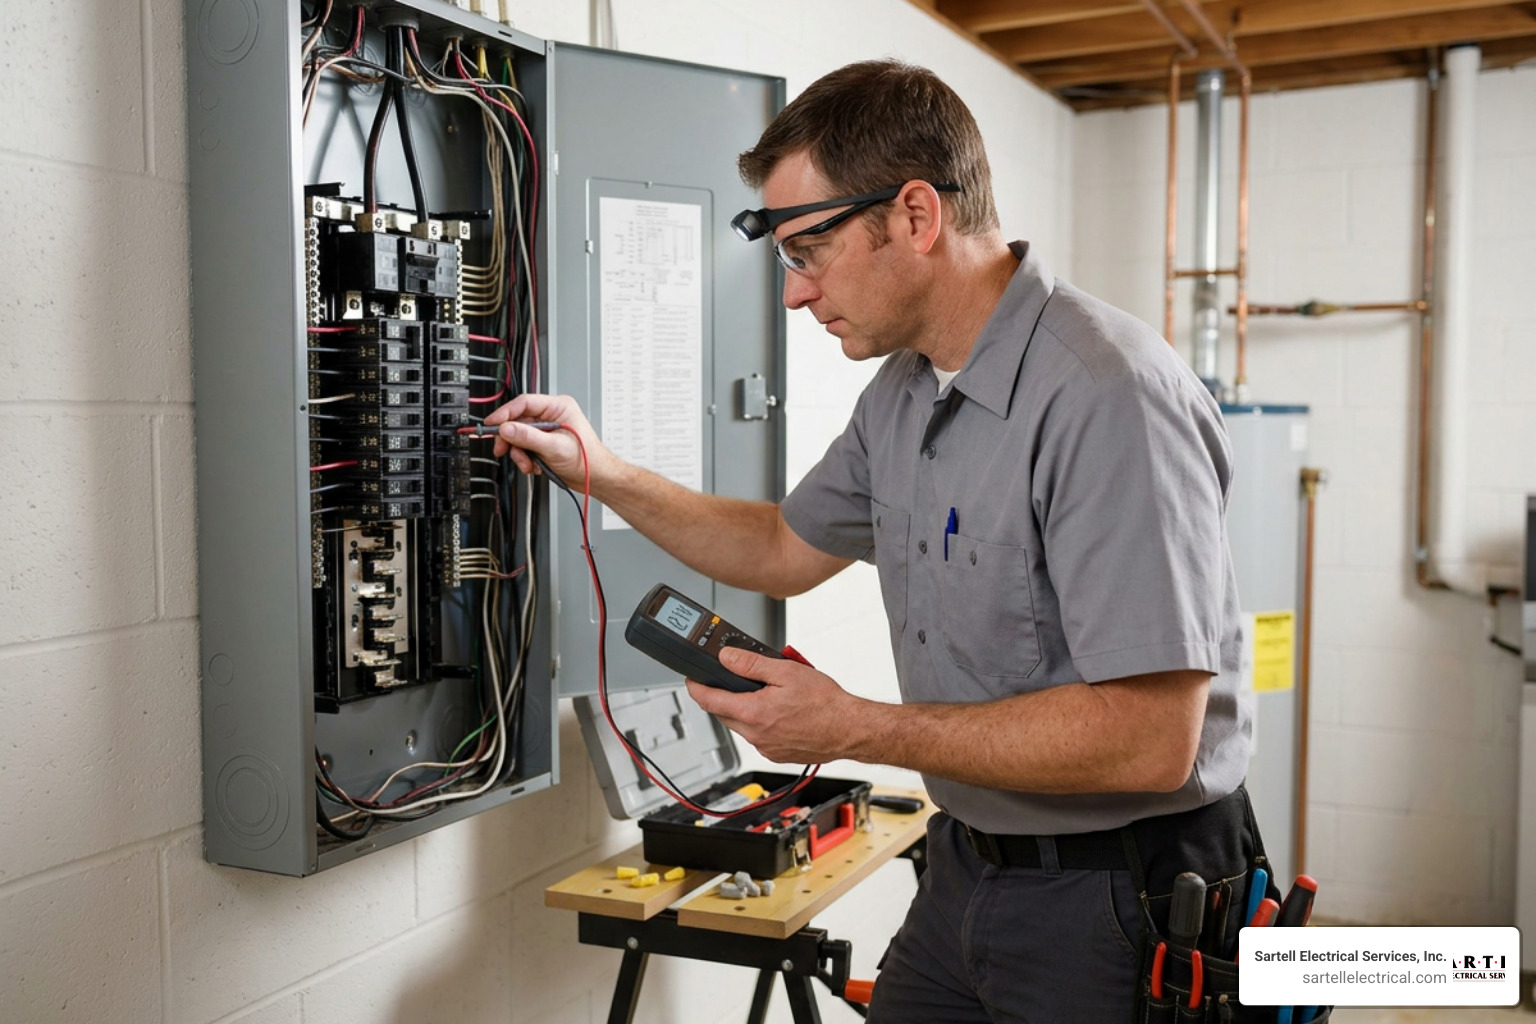
Taking a few minutes to verify credentials ensures you are bringing a qualified professional into your home. If you want to build a reliable list of local experts before an emergency happens, check out Finding Your Spark The Ultimate List Of Local Electrical Contractors.
Licensed Electricians vs. Unlicensed Handymen
In an emergency, some homeowners are tempted to call a local handyman because they might charge less or arrive quickly. This is a dangerous mistake. Electrical systems are highly complex and governed by strict safety standards, including the National Electrical Code (NEC).
An unlicensed handyman lacks the specialized training, diagnostic tools, and licensing required to safely troubleshoot complex problems. Furthermore, if an unlicensed worker performs unpermitted electrical repairs that later cause a house fire, your homeowner's insurance policy may deny your claim entirely.
By contrast, a licensed Local Emergency Electrician has completed years of classroom education and thousands of hours of supervised field experience. Licensed professionals understand how to pull emergency permits, coordinate with local building departments, and perform repairs that strictly comply with state and local safety codes.
Verifying Credentials and Insurance in Massachusetts
In Massachusetts, you should never take an electrician's word regarding their qualifications. You can easily verify their standing yourself.
- Check the State Database: The Massachusetts Division of Occupational Licensure provides an online portal where you can search for a professional's license by name or license number. Ensure their Journeyman or Master Electrician license is active and free of disciplinary actions.
- Verify Liability Insurance: A reputable emergency contractor carries substantial general liability insurance (typically $2,000,000 or more) and workers' compensation. This protects you from financial liability if a technician is injured on your property or if the repair work causes accidental damage to your home.
- Look for Local Expertise: Hiring an established contractor with deep roots in your community—such as a professional electrician in North Reading, Massachusetts—ensures they are familiar with local municipal codes and the unique structural challenges of Massachusetts homes.
3. What to Expect: Response Times, Costs, and Utility Coordination
Knowing what to expect during an emergency service call helps reduce anxiety and prevents surprises when the bill arrives.
| Service Type | Typical Pricing Structure | Key Details |
|---|---|---|
| Standard Service Call | Standard hourly rate + dispatch fee | Scheduled during normal business hours |
| After-Hours Emergency | Double standard rate (often 2-hour minimum) | Nights, weekends, and minor holidays |
| Holiday Emergency | Premium rate (often 3 to 4-hour minimum) | Major holidays (Thanksgiving, Christmas, etc.) |
| Diagnostic Fee | Flat rate ($75 – $150) | Covers the initial safety assessment and troubleshooting |
If you are looking for a reliable professional who can break down these costs clearly before starting any work, you can search for a trusted 24hr Electrician Near Me to assist you.
Average Response Times for Emergency Electricians in My Area
When your power is out or your panel is sparking, every minute feels like an hour. In the Greater Boston area and surrounding towns like Andover, Reading, and Chelsea, a local emergency electrician can typically arrive at your home within one to two hours under normal conditions.
However, response times can vary based on several factors:
- Severe Weather: During major winter blizzards or summer thunderstorms, regional demand spikes dramatically. High winds and icy roads can also slow down dispatch times.
- Location: If you live in a highly congested area or a remote part of Essex or Middlesex County, travel times may be slightly longer.
- Triage Protocols: When you call a reputable 24 Hour Electrician Service Near Me, the dispatcher will ask detailed questions to assess the severity of your situation. Active fire risks, sparking panels, and total power losses affecting heating systems during freezing weather are prioritized over partial outages.
Coordinating with Utility Companies Like Eversource
A common point of confusion for homeowners is determining where the utility company’s responsibility ends and the homeowner’s responsibility begins. If you suspect a wider outage, report it through Eversource's outage center or your local utility before assuming the problem is inside your home.
- The Utility Company (Eversource or National Grid): Manages the power lines running from the street to your home, including the service drop wires and the physical electric meter itself. If a neighborhood-wide storm knocks out power to your entire street, you must contact your utility provider directly.
- The Homeowner: Owns and is responsible for the weatherhead, the service entrance cable running down the side of the house, the meter socket enclosure, and the main circuit breaker panel inside the home.
If a falling tree limb tears the service wires away from your roof, your utility company will not reconnect the power until a private, licensed Emergency Electrical Service Near Me repairs the weatherhead and service cable. Emergency electricians coordinate directly with utility companies to safely isolate the power, complete the necessary structural repairs, and secure the clearance required for the utility company to restore your electrical service.
4. Special Considerations for Older Homes and Prevention
Massachusetts is home to some of the most beautiful historic properties in the country, but these older structures present unique electrical challenges.
If you own an older home in towns like Salem, Gloucester, or Newton, understanding your wiring system is crucial for preventing sudden emergencies. For a comprehensive look at managing these systems, read The Definitive List Best 24 Hour Emergency Electricians In Your Area.
What to Do While Waiting for Help to Arrive
Once you have called a licensed professional and confirmed their arrival time, you should take a few steps to prepare your home and ensure everyone stays safe:
- Unplug Sensitive Electronics: Sudden power surges can occur when an electrical fault is diagnosed or when power is restored. Unplug computers, televisions, and expensive appliances to protect them from damage.
- Keep the Panel Area Clear: Ensure the path to your main electrical panel is clear of clutter, boxes, or stored items so the technician can access it immediately upon arrival.
- Secure Your Pets: Electrical emergencies can be loud and stressful. Place your pets in a secure, quiet room away from the panel and work areas to keep them safe and prevent them from slipping outside.
- Use Flashlights, Not Candles: If your power is out, avoid lighting candles, which present an open-flame fire hazard. Keep fresh batteries in your household flashlights and headlamps. For more tips on managing your home during an outage, check out Current Events Your Guide To Hiring A Private Electrician Near Me.
Preventing Future Electrical Emergencies
The best way to handle an electrical emergency is to prevent it from happening in the first place. By taking a proactive approach to your home's infrastructure, you can avoid costly middle-of-the-night service calls:
- Schedule Yearly Inspections: Have a licensed technician perform a comprehensive safety inspection of your panel, connections, and grounding system once a year.
- Upgrade Outdated Wiring: If your home still contains active knob-and-tube wiring, brittle cloth insulation, or 1970s-era aluminum branch-circuit wiring, plan for a professional rewiring project. These outdated materials degrade over time and cannot safely handle modern appliance loads.
- Install GFCI and AFCI Protection: Ground Fault Circuit Interrupters (GFCIs) protect you from shocks in wet areas like kitchens and bathrooms, while Arc Fault Circuit Interrupters (AFCIs) detect dangerous arcing in your walls before a fire can start.
- Invest in Whole-Home Surge Protection: Lightning strikes and utility grid fluctuations can destroy your home's electronics in an instant. A whole-home surge protector typically costs $200 to $600 for the unit plus $100 to $300 in professional labor, providing invaluable peace of mind. If you are ready to find a professional to install these upgrades, start your search with Electricians Near Me.
Frequently Asked Questions About Electrical Emergencies
What is the typical cost of an emergency electrical visit?
Emergency electrical visits generally include a dispatch or diagnostic fee ranging from $75 to $150, plus elevated labor rates for the actual repair work. Because emergency technicians must remain on call 24/7, after-hours, weekend, and holiday rates are typically double the standard business-hour rates, often with a two-to-four-hour minimum charge. Always ask for upfront pricing and a clear explanation of fees before the technician begins work.
Can an emergency electrician replace an entire panel overnight?
While an emergency electrician can stabilize a failing panel, replace bad main breakers, or bypass immediate hazards overnight, a complete panel replacement typically cannot be finished in the middle of the night. Replacing an entire electrical panel requires several hours of meticulous labor, coordination with your local utility company to disconnect the main power drop, and an official electrical permit from your town's building department. In an emergency, the technician will focus on making your home safe and restoring temporary power before scheduling the full replacement for the next business day.
Should I keep resetting a breaker that keeps tripping?
No. A circuit breaker's job is to shut off power when it detects a dangerous overload, a short circuit, or a ground fault. If you reset a breaker and it immediately trips again, do not force it back on. Repeatedly resetting a faulty circuit forces high-voltage electricity through a compromised system, which can rapidly overheat the wiring inside your walls and cause an electrical fire. Leave the breaker off and call a licensed professional to diagnose the underlying short circuit.
Conclusion
When your lights go out, your outlets start sparking, or your electrical panel begins to buzz, you do not have time to research credentials or compare quotes. Having a reliable, licensed professional's number saved in your phone is the ultimate safeguard for your home and family.
For residents and businesses across Massachusetts—including Middlesex, Essex, Norfolk, and Suffolk Counties—Sartell Electrical Services, Inc. is here to help. Based in Reading, MA, and backed by over 30 years of hands-on experience, our team is committed to delivering unmatched excellence, safety, and customer service on every single call.
Do not wait until you are sitting in the dark to find a partner you can trust. Contact us today at Sartell Electrical Services to schedule a safety inspection, upgrade your panel, or ensure your home is fully prepared for whatever comes next. No matter where you are located in Eastern Massachusetts, having a trusted professional on hand is the best way to keep your property safe and secure.
The 3 Way Switch Hook Up Diagram: What Every Homeowner Should Know First
A 3 way switch hook up diagram shows how to wire two switches so they control one light from two different locations — like the top and bottom of a staircase, or both ends of a long hallway.
Here's the quick answer:
- Power (hot wire) enters the first switch box on the common terminal (dark screw)
- Two traveler wires (red and black) run between the two switches on the brass terminals
- The neutral wire bypasses both switches and runs straight to the light fixture
- The switched hot leaves the second switch's common terminal and goes to the light
- Ground wires connect to the green screw on each switch and to the metal boxes
That's the core of every standard 3-way circuit. The rest is just knowing which wire goes where — and doing it safely.
Walking across a dark room to hit a light switch is a small frustration. But miswiring a 3-way switch is a real problem — one that leaves lights that only work from one location, breakers that trip unexpectedly, or worse, a fire hazard hiding behind your wall plate. According to national data, over 51,000 home electrical fires occur every year in the U.S., with faulty wiring among the leading causes.
The good news: once you understand the diagram, the logic clicks fast.
I'm Ed Sartell, President of Sartell Electrical Services, and in nearly four decades of wiring homes and commercial buildings across Massachusetts, I've seen every variation of the 3 way switch hook up diagram — and every mistake that comes with it. This guide will walk you through each configuration clearly, so you know exactly what you're looking at before you touch a single wire.
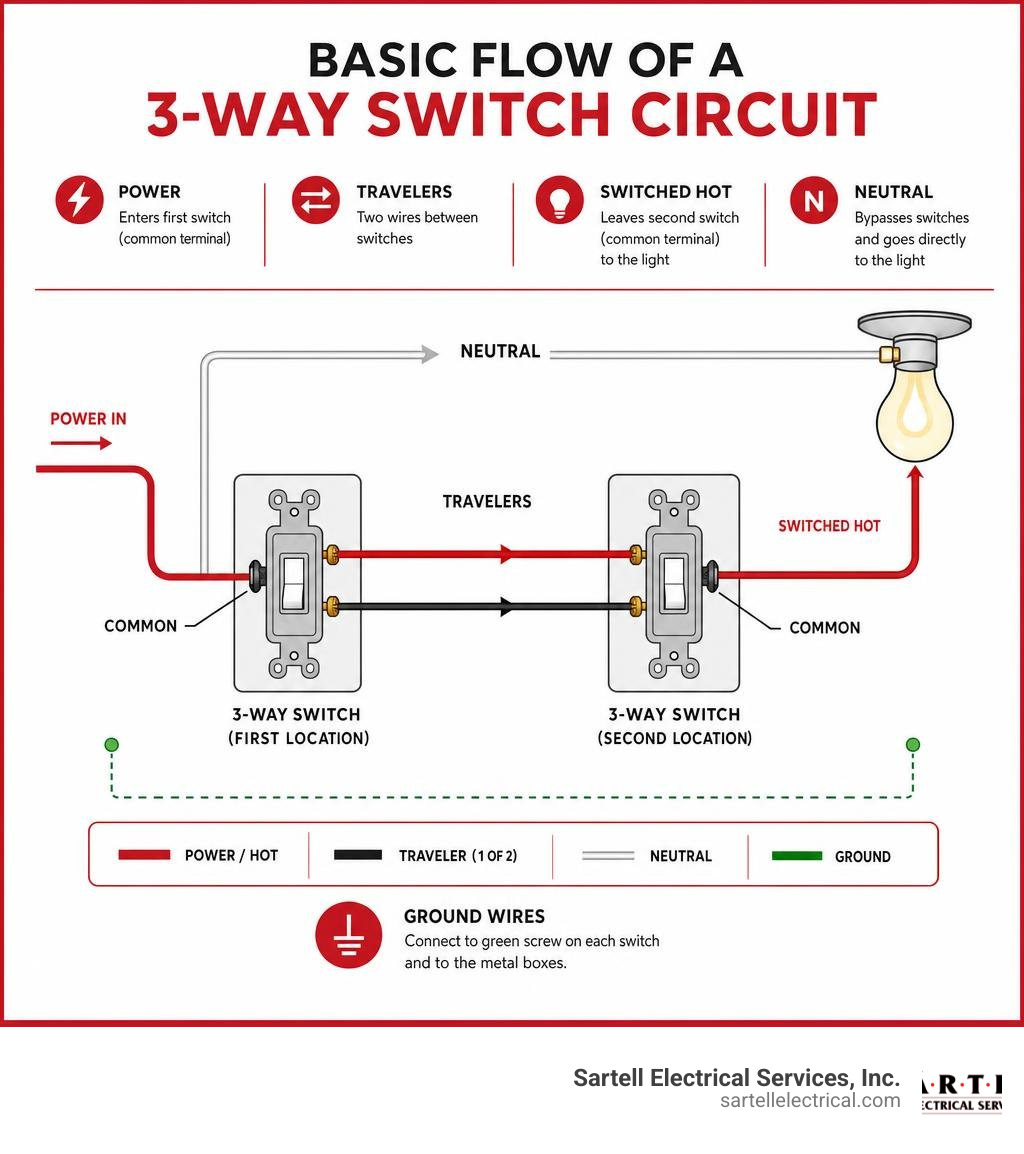
What is a 3-Way Switch and How Does It Work?
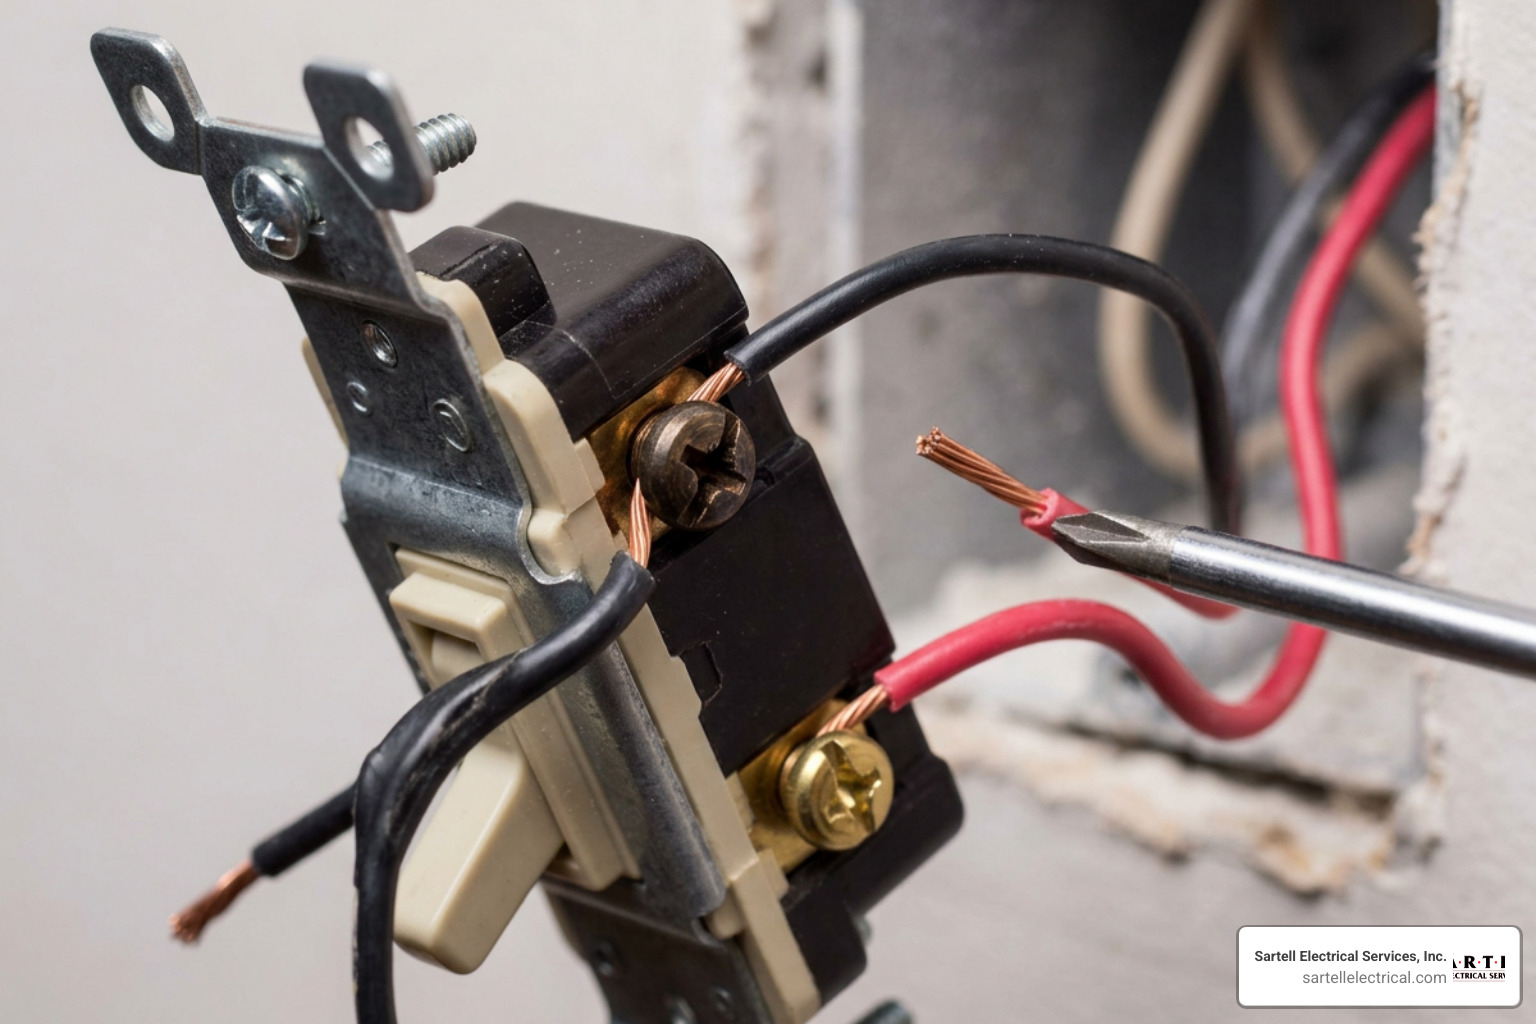
To understand how to wire these devices, it helps to understand what is happening inside the plastic housing. A standard light switch is a Single Pole Single Throw (SPST) device. It has two terminals: power comes in, and when you flip the switch, the internal contact closes to let power flow out to the light. It is a simple on/off gate.
A 3-way switch is a Single Pole Double Throw (SPDT) device. It does not have an "ON" or "OFF" label stamped on the toggle. Instead of simply opening and closing a single path, a 3-way switch redirects the electrical current down one of two paths.
Think of it like a train track switch. When you flip the toggle, you redirect the train (the electricity) from Track A to Track B. Because you have two of these switches connected together, flipping either switch will complete or break the circuit, regardless of the position of the other switch.
To see this mechanism in motion, you can watch this helpful How 3-Way Switches Work video.
To make this work, the switch uses three distinct screw terminals (plus a green grounding screw). Knowing which screw does what is the secret to reading any 3 way switch hook up diagram successfully. If you want a deep dive into identifying these terminals on a physical switch, check out our guide on 3-way light switch terminals.
Key Components of a 3-Way Circuit
Before we look at the schematic, let's identify the physical players in our electrical box:
- The Common Terminal (Dark Screw): This is the most important terminal on the switch. It is usually black or dark bronze. On the first switch, the incoming 120-volt "hot" power wire connects here. On the second switch, the "switched hot" wire (which carries power directly to the light fixture) connects here.
- The Traveler Terminals (Brass Screws): There are two brass-colored screws on every 3-way switch. These terminals connect the two switches to each other. It does not matter which traveler wire goes to which brass screw, as long as they run between the two switches.
- The Ground Screw (Green): This screw bonds the switch to your home's grounding system for safety.
- 14/3 NM-B Cable: This cable contains three insulated copper conductors (black, red, white) and one bare copper ground wire. It is used to run between the two switches to carry the traveler connections.
- 14/2 NM-B Cable: This cable contains two insulated copper conductors (black, white) and a bare ground. It is typically used to bring power from the service panel to the first switch, and to run from the second switch to the light.
Note: If your circuit is protected by a 15-amp breaker, you must use 14-gauge wire. If it is on a 20-amp breaker, you must use 12-gauge wire (12/2 and 12/3 NM-B). To learn more about selecting the right conductors, read our guide on wire for house wiring.
Understanding the 3 Way Switch Hook Up Diagram
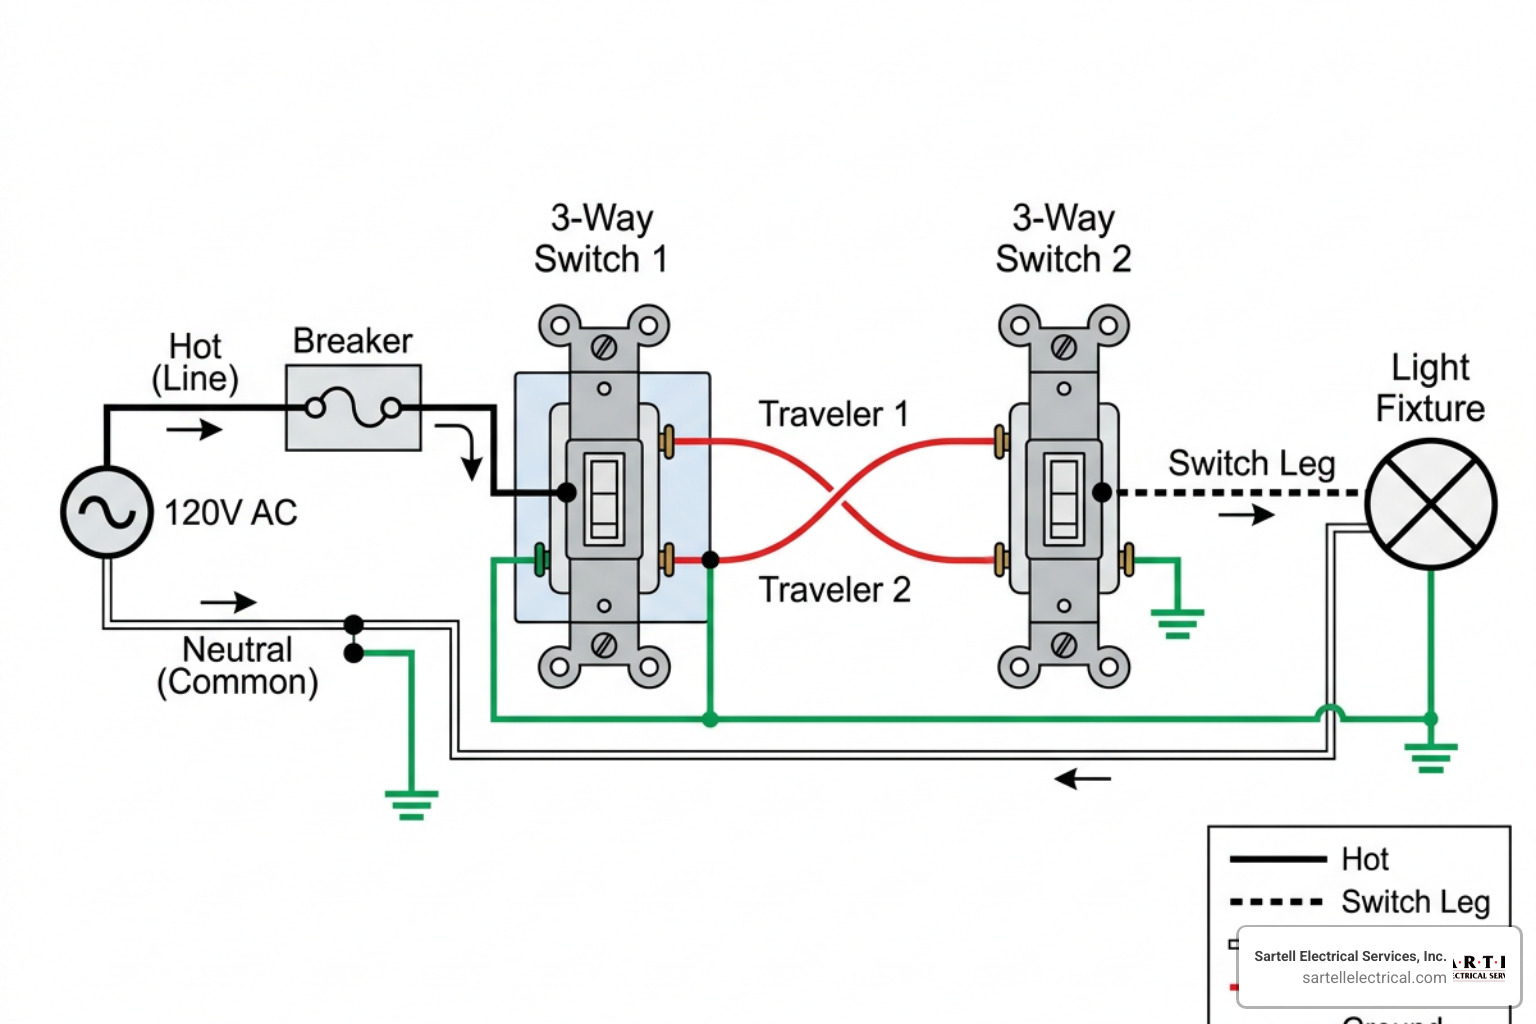
When you look at a 3 way switch hook up diagram, you will generally see one of two primary configurations. The difference between them comes down to one simple question: Where does the power source enter the circuit first?
In modern residential construction across Massachusetts, we almost always bring the power feed into one of the switch boxes first. However, in older homes throughout Boston, Reading, and the North Shore, you may find that the power source goes directly to the light fixture box first.
Understanding both configurations is crucial to avoiding a wiring headache.
| Feature / Configuration | Power-to-Switch First (Modern Standard) | Power-to-Light First (Older Homes) |
|---|---|---|
| Where Power Enters | First Switch Box | Light Fixture Box |
| Cable Between Switches | 14/3 NM-B (Travelers + Neutral) | 14/3 NM-B (Travelers + Switched Hot) |
| Neutral Location | Available in both switch boxes | Often terminates in the light box |
| Complexity | Straightforward, standard colors | Higher; requires re-identifying white wires |
| Smart Switch Ready | Yes (Neutral is easily accessible) | No (Requires rewiring or special smart switches) |
How to Read a 3 Way Switch Hook Up Diagram
To read a diagram like a pro, you must follow the path of the current.
- Line Hot (Black): Represents the constant, unswitched 120V power coming from the breaker panel.
- Load Hot (Black or Red): Represents the power going from the second switch to the light bulb.
- Travelers (Black & Red): Represent the two parallel paths connecting the switches.
- Neutral (White): Completes the circuit by returning current to the panel. It never connects to a standard 3-way switch terminal.
- Ground (Bare/Green): Provides a safe path for fault current.
For a comprehensive collection of alternative schematics, you can refer to the Three-Way Switch Diagram Guide.
Standard Power-to-Switch 3 Way Switch Hook Up Diagram
This is the most common setup you will encounter.
- Incoming Power: A 14/2 cable brings constant hot (black) and neutral (white) into the first switch box. The black wire connects directly to the dark common screw of Switch 1.
- Between the Switches: A 14/3 cable runs from the first box to the second box. The red and black wires connect to the brass traveler screws on both switches. The white wire is spliced directly to the incoming neutral using a wire nut (it bypasses Switch 1 completely).
- Outgoing Power: A 14/2 cable runs from the second switch box to the light fixture. The black wire (switched hot) connects to the dark common screw of Switch 2. The white wire is spliced to the white neutral wire coming from the first box.
- At the Light: The black switched hot connects to the gold terminal of the light, and the white neutral connects to the silver terminal.
For a visual breakdown of this specific configuration, you can view the How to Wire a 3-Way Switch Guide.
Step-by-Step Guide to Wiring a 3-Way Switch
Now that you understand the theory and have studied the 3 way switch hook up diagram, let's walk through the physical installation. If you are unfamiliar with general home wiring, we recommend reviewing the basics of standard residential electrical wiring before proceeding. You can also refer to the Family Handyman 3-Way Switch Guide for additional illustrations.
Preparing the Wires and Boxes
Before stripping any insulation, we have to make sure our electrical boxes aren't overcrowded. Under National Electrical Code (NEC) Article 314.16, we must perform "box fill calculations" to ensure there is enough physical space inside the box for all wires, clamps, and switches. Overcrowding boxes can cause wires to pinch, leading to short circuits or heat buildup.
Once you have verified your box size:
- Turn off the power: Shut off the circuit breaker at the main panel.
- Verify the power is off: Use a non-contact voltage tester inside both switch boxes to confirm there is zero electrical activity.
- Prep the cables: Strip about 6 inches of the outer sheathing off your NM-B cables.
- Strip the conductors: Use wire strippers to remove exactly 1/2 inch to 3/4 inch of insulation from the individual wire ends.
Making the Connections
With your wires prepped, it is time to make the physical connections. Remember to bend the exposed wire ends into a "C" hook shape and wrap them clockwise around the screw terminals. This ensures that as you tighten the screw, the loop closes tighter around the terminal.
-
Wire Switch 1:
- Connect the incoming black hot wire (from the breaker) to the dark common terminal.
- Connect the black and red traveler wires (from the 14/3 cable) to the two brass traveler terminals.
- Connect the bare copper ground wire to the green grounding screw.
- Join the white neutral wire from the power source to the white neutral wire of the 14/3 cable using a wire nut. Do not connect any neutral wires to the switch itself.
-
Wire Switch 2:
- Connect the outgoing black wire (going to the light) to the dark common terminal.
- Connect the black and red traveler wires (from the 14/3 cable) to the two brass traveler terminals.
- Connect the bare copper ground wire to the green grounding screw.
- Join the white neutral wire coming from Switch 1 to the white neutral wire going to the light fixture.
-
Ground Everything: If you are using metal junction boxes, you must run a ground pigtail from the ground splice to the box itself.
-
Secure and Protect: Wrap the sides of the switches with high-quality electrical tape to cover the exposed terminal screws. This provides an extra layer of protection when folding the wires back into the box.
For a detailed look at general switch installations, see our How to Wire a Switch Complete Wiring Guide.
Troubleshooting and Common Wiring Mistakes
Even experienced DIYers can make mistakes when wiring a 3-way circuit. In fact, three-way switch errors are among the most common troubleshooting calls we receive at Sartell Electrical Services.
Here are the most common issues and how to fix them:
- The Light Only Works in Certain Switch Positions: This is the classic "traveler-common mix-up." If you connect a traveler wire to the dark common terminal, or vice versa, the circuit will only complete when the other switch is flipped to a specific side. To fix this, use a multimeter or carefully trace your wires to ensure only the true line hot or load hot is connected to the dark common screws.
- The Circuit Breaker Trips Immediately: This usually happens when a neutral wire has been mistakenly connected to a switch terminal, creating a direct short circuit when the switch is flipped. Remember: standard 3-way switches do not use neutral connections.
- The Light Flickers or Sparks: Loose connections are a major fire hazard. Make sure all wire nuts are tight and that the terminal screws are firmly clamped down on the copper conductors.
If you are planning to add a dimmer to your 3-way setup, keep in mind that you cannot simply install two standard dimmers on the same 3-way circuit. Learn how to do this correctly by reading our guide on 3-way dimmer switch install.
Smart 3-Way Switches vs. Traditional Wiring
If you are upgrading to a smart home system, the rules of the 3 way switch hook up diagram change significantly. Smart switch installations have grown by over 35% year-over-year, but they require a different approach.
Unlike a mechanical switch, a smart switch contains computer chips, transmitters, and LED status lights. These components need constant power to run, even when the light is turned off. Because of this, 95%+ of modern smart switch installations require a dedicated neutral wire to complete the internal circuit.
Additionally, smart 3-way setups usually do not use traditional traveler wires to pass high-voltage current back and forth. Instead, they use a "Master" switch and an "Auxiliary" or "Add-on" companion switch. The companion switch communicates with the master switch via low-voltage signal lines or wireless protocols like Z-Wave or Wi-Fi.
If you live in an older home without neutral wires in your switch boxes, you aren't completely out of luck. Read our guide on The No-Neutral Solution for Your 2-Wire Dimmer Switch to explore your options.
Frequently Asked Questions About 3-Way Switches
Can I use a 3-way switch as a standard single-pole switch?
Yes, you can easily convert a 3-way switch for single-pole use. Simply connect your incoming hot wire to the dark common terminal and your outgoing load wire to one of the brass traveler terminals. Cap off the remaining unused brass traveler terminal with a wire nut or leave the screw tightened down empty.
Why do 3-way switches lack ON/OFF labels?
Because a 3-way switch controls a light from two locations, the physical position of the toggle switch does not correspond directly to whether the light is on or off. Flipping either switch changes the state of the circuit. Therefore, having "ON" or "OFF" labels would be misleading.
Do both 3-way switches require a neutral wire?
Under the current National Electrical Code (NEC Article 404.2(C)), a neutral wire is required at almost all switch locations to accommodate future electronic controls. However, in traditional mechanical wiring, the neutral wire simply passes through the switch boxes without connecting to the switches themselves.
Conclusion
Wiring a 3-way switch is a highly rewarding home improvement project, but it requires patience, attention to detail, and a strict adherence to safety codes. By following a proper 3 way switch hook up diagram, keeping your common and traveler wires straight, and ensuring your system is properly grounded, you can enjoy the convenience of multi-location lighting control with total peace of mind.
However, electrical work is not something to guess at. If you open your switch box and find a confusing web of wires, or if your home was built before modern color-coding standards, the safest choice is always to call in a professional.
At Sartell Electrical Services, we have been serving homeowners and businesses throughout Reading, MA, and the greater Boston area with a commitment to safety, leadership, and excellence. Whether you need help troubleshooting a faulty switch or want to upgrade your home to a modern smart lighting system, our team of licensed electricians is here to help.
Ready to get started? Check out our How to Wire a Switch Complete Wiring Guide for more expert tips, or contact us today to schedule your next service call!
Why Your House Wiring Panel Is the Heart of Your Home's Electrical System
Your house wiring panel is the central hub that receives electricity from the utility grid and distributes it safely to every circuit in your home.
Quick answer: What does a house wiring panel do?
- Receives high-voltage power from the utility and steps it down for home use
- Splits electricity into individual circuits (lighting, appliances, outlets)
- Protects each circuit with a breaker or fuse that shuts off power during overloads
- Provides a single shutoff point for the entire home in an emergency
- Allows circuits to be added or upgraded as your power needs grow
Most homes built before the 1980s were wired for 60–100 amps. Today, 200-amp service is the standard — and homes adding EV chargers, heat pumps, or solar often need even more capacity.
When your panel is undersized or aging, the symptoms are hard to ignore. Lights that flicker when the AC kicks on. Breakers that trip every time you run the microwave and toaster at the same time. A faded, barely-legible label on a box that hasn't been touched in decades. These aren't just annoyances — they're warnings.
This guide walks you through everything you need to know: how panels work, when to upgrade, what it costs, and how to stay safe and code-compliant through the process.
I'm Ed Sartell, President of Sartell Electrical Services, and I've been working with residential and commercial house wiring panel installations across Massachusetts since 1985. Over nearly four decades in the trade, I've seen what happens when panels are undersized, neglected, or improperly installed — and I'm here to help you avoid those problems entirely.
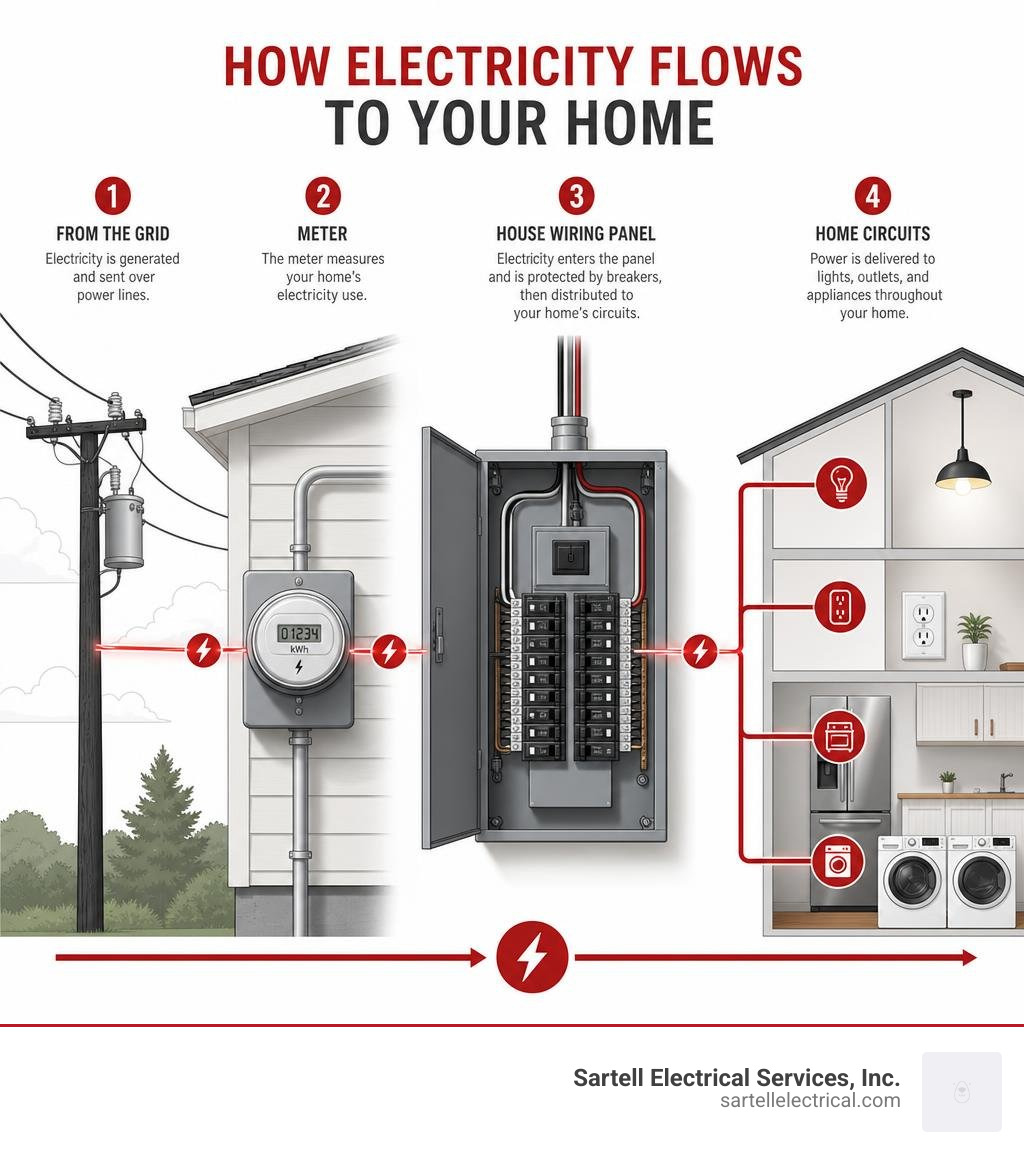
Understanding Your House Wiring Panel: Components and Function
To understand how your home handles electricity, think of your house wiring panel as a highly organized highway interchange. Power arrives from the utility company at a high pressure (voltage) and is safely funneled into smaller, manageable "streets" (branch circuits) that run through your walls.
Inside the metal enclosure of a standard Electrical Panel Box for Home, several critical components work together to keep the power flowing safely:
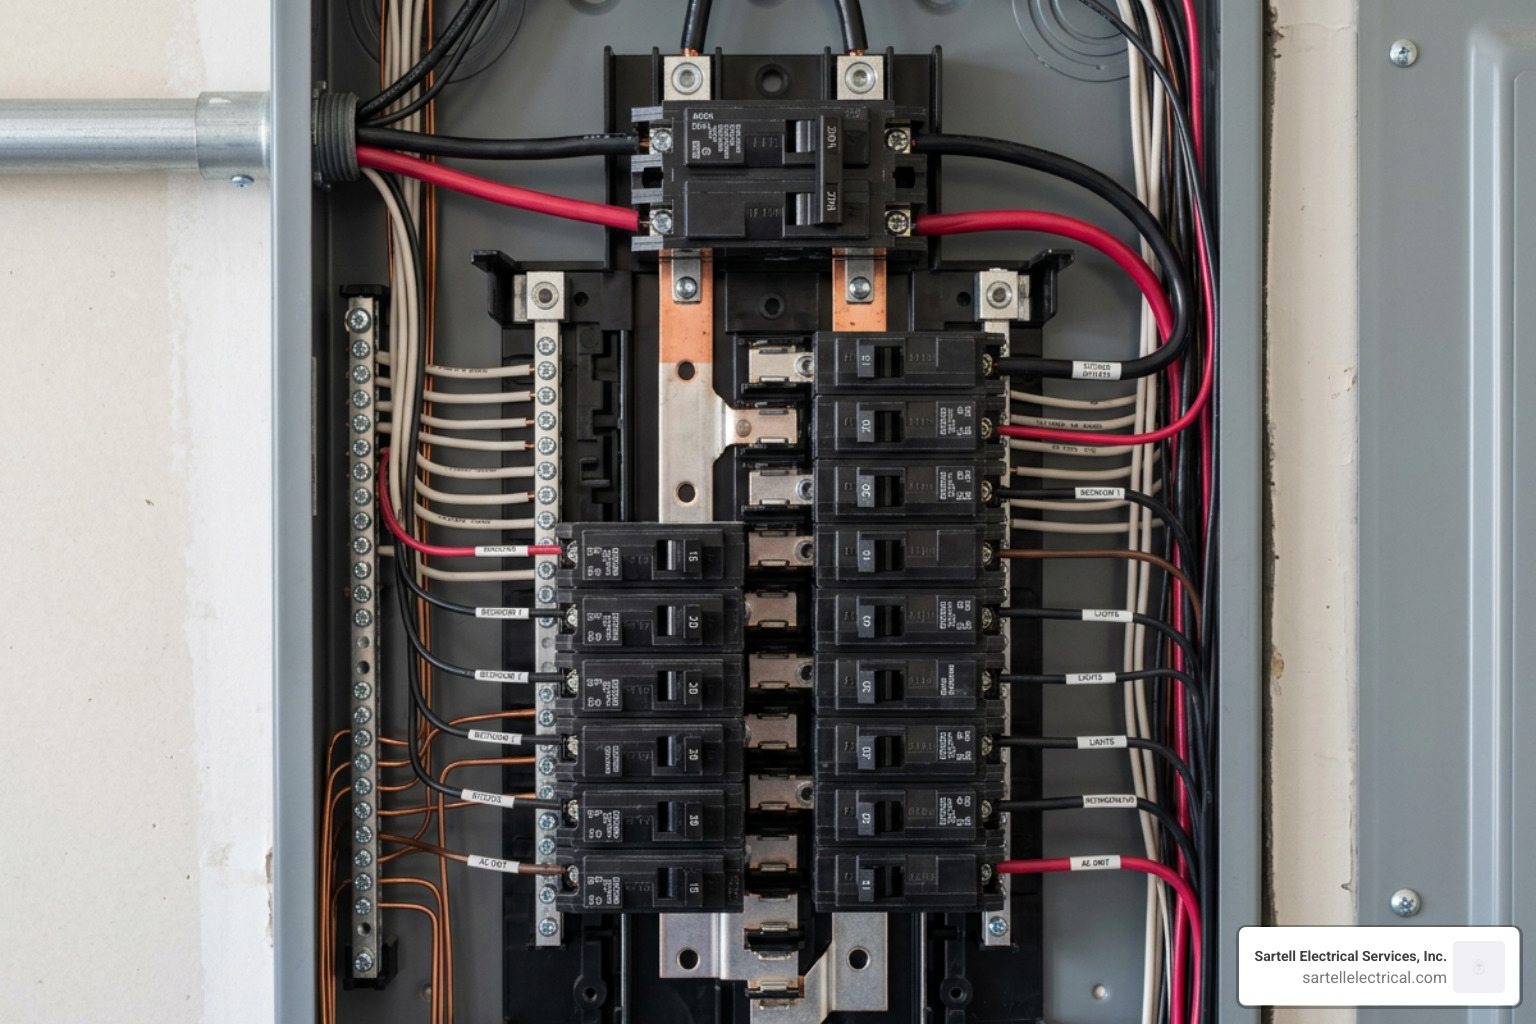
- The Enclosure: The physical metal box that houses all internal components. It must remain closed and free of rust or physical damage to protect your family from accidental contact with live wires.
- The Main Breaker: This is the master switch. Flipping this breaker cuts off all electricity to the entire house. It is also rated for the total amperage capacity of your home (e.g., 100, 200, or 400 amps).
- Hot Busbars: These are two thick metal strips running down the center of the panel. They carry 120 volts of electricity each from the main service lines. Your circuit breakers snap directly onto these busbars to draw power.
- The Neutral Bar: After electricity travels through your home's appliances and devices, it must return to the panel to complete the circuit. The white neutral wires connect to this silver bar, which sends the current back to the utility grid.
- The Ground Bar: This is your safety net. Copper ground wires connect to this bar, which is physically bonded to a metal rod driven deep into the earth outside your home. If a hot wire accidentally touches a metal appliance or box, the ground bar safely diverts that dangerous current into the earth, tripping the breaker rather than shocking you.
For a deeper dive into these internal dynamics, you can Learn more about the distribution board on Wikipedia or read our comprehensive Residential Main Electrical Panel Complete Guide.
Main-Lug vs. Main-Breaker vs. Subpanels
Not all panels are configured the same way. Depending on your home's layout and electrical design, you may encounter three distinct configurations:
- Main-Breaker Panels: This is the most common type of main panel. It features a built-in main circuit breaker that can instantly shut off all power to the system. It serves as the primary service disconnect for your home.
- Main-Lug Panels: These panels do not have a main breaker built into them. Instead, the electrical wires connect directly to "lugs" on the busbars. Main-lug panels are typically used as downstream panels or when there is a separate main service disconnect switch located near your electric meter outside.
- Subpanels: A subpanel is a smaller breaker box fed by a double-pole breaker from your main panel. Subpanels are incredibly useful during home renovations, additions, or when wiring up detached garages. They allow you to add multiple new circuits to a specific area of your home without running dozens of individual wires all the way back to the main panel.
Crucial safety note: When wiring a subpanel, the National Electrical Code (NEC) strictly requires that the neutral bar and the ground bar remain completely isolated from each other. In a main panel, they are bonded together; however, bonding them in a subpanel violates code and creates parallel paths for fault current, which can energize metal surfaces and pose a severe shock hazard.
Circuit Breakers vs. Fuses: How They Protect Your Home
Both circuit breakers and fuses serve the exact same primary purpose: they act as safety valves to protect your home's wiring from overheating, melting, and catching fire. However, the way they accomplish this is entirely different.
A fuse is an older technology. It contains a thin metal filament designed to melt and break when the electrical current exceeding its rated capacity passes through it. Once a fuse "blows," it is permanently destroyed and must be replaced with a new one.
A circuit breaker is a modern, reusable switch. Inside the breaker, an electromagnet or a bimetallic strip detects when the current is too high. When an overload or short circuit occurs, the breaker mechanically trips, moving the switch to the "off" or "tripped" position and stopping the flow of electricity. To restore power, you simply resolve the issue that caused the trip and flip the switch back to "on."
To learn more about how these safety devices compare, check out the Home Electrical Panel: Complete Guide & Diagrams and our article Keeping the Lights On What is a Breaker Box.
Within a modern house wiring panel, you will typically find two main types of breakers:
- Single-Pole Breakers: These are narrow, single switches that snap onto one hot busbar, supplying 120 volts of electricity. They are used for standard household circuits like lighting, bedroom outlets, and living room electronics. They usually come in 15-amp or 20-amp ratings.
- Double-Pole Breakers: These are wider, double-connected switches that snap onto both hot busbars simultaneously, supplying 240 volts of electricity. They are dedicated to high-demand appliances like central air conditioners, electric dryers, water heaters, and electric vehicle (EV) chargers.
Modern Safety Features: AFCI, GFCI, and Surge Protection
A modern house wiring panel is equipped with advanced safety devices designed to protect against distinct types of electrical hazards:
- Arc-Fault Circuit Interrupters (AFCIs): Standard breakers only trip when there is a massive overload or a direct short circuit. They cannot detect "arcing"—which happens when a damaged, frayed, or loose wire creates sparks behind your walls. Arcing is a leading cause of residential electrical fires. AFCI breakers use microprocessors to continuously analyze electrical waveforms, instantly shutting down power if they detect dangerous arcing patterns.
- Ground-Fault Circuit Interrupters (GFCIs): These are designed to protect people from lethal electrical shocks. A GFCI breaker monitors the balance of current between the hot and neutral wires. If it detects even a tiny leak of current (as low as 4 to 6 milliamperes)—which could mean electricity is flowing through a person to the ground—it cuts the power in milliseconds. These are essential for wet areas like kitchens, bathrooms, unfinished basements, and outdoor outlets.
- Surge Protective Devices (SPDs): Modern homes are packed with sensitive electronics, from smart TVs to computer workstations. A whole-home surge protector is installed directly inside or adjacent to your main panel. It acts as a shield, clamping down on high-voltage transient surges caused by lightning strikes or utility grid fluctuations, safely diverting that excess energy into the ground before it can fry your appliances.
For detailed diagrams and installation guides on modern safety standards, refer to Graphic1.
Upgrading Your Electrical Panel: Pros, Cons, and Future-Proofing
If you are planning to modernize your home, you will quickly discover that your electrical panel is the foundation of all your goals.

As Massachusetts homeowners embrace home electrification—transitioning away from fossil fuels toward clean energy—the demand on our electrical systems is skyrocketing. Installing a Level 2 EV charger, switching to energy-efficient heat pumps, installing solar panels, or adding a hot tub all require substantial electrical capacity.
If your current panel is maxed out, a Home Electrical Panel Upgrade is the only path forward.
Pros and Cons of a Panel Upgrade
| Pros of Upgrading | Cons of Upgrading |
|---|---|
| Enhanced Safety: Eliminates fire hazards associated with old, corroded, or loose-fitting breakers. | Upfront Cost: Upgrading is a significant investment, typically ranging from $2,000 to $5,000. |
| Increased Capacity: Provides the power needed to run modern, high-draw appliances simultaneously. | Utility Coordination Delays: The process requires scheduling power shutoffs with local utilities (like Eversource or National Grid). |
| Future-Proofing: Adds physical space (empty slots) for future solar, batteries, or EV charging. | Potential Secondary Costs: If your service mast or meter box is outdated, those must be replaced too. |
| Code Compliance: Brings your home up to modern safety standards, satisfying home insurance requirements. | Minor Disruption: Your home will be completely without power for several hours on installation day. |
When to Upgrade Your House Wiring Panel
Electrical panels do not last forever. While a well-installed panel has a typical lifespan of 25 to 40 years, components degrade over time. If your panel is over 20 years old, it is wise to start planning for its replacement.
Keep an eye out for these immediate warning signs that your panel is struggling or failing:
- Flickering or Dimming Lights: If your lights dim every time your refrigerator or central AC kicks on, your system is struggling to handle the sudden load.
- Frequent Tripping Breakers: If you find yourself constantly walking down to the basement to reset a tripped switch, the circuit is overloaded, or the breaker itself has weakened and failed.
- Physical Warmth or Burning Smells: If the panel door feels warm to the touch, or if you notice a faint plastic burning smell near the box, shut off your main breaker immediately and call a professional. This indicates a highly dangerous loose connection or active arcing.
- Corrosion or Rust: Water intrusion from a damaged outdoor service cable can slowly drip into your panel, causing rust and corrosion on the busbars. This ruins electrical conductivity and creates a severe fire risk.
- Outdated Brands: If your home still has a fuse box, or if your panel was made by defunct manufacturers known for safety failures (such as Federal Pacific Electric or Zinsco), it must be replaced immediately.
For a detailed look at the decision-making process, read Should You Replace Your Electrical Panel Decisions Costs and DIY Considerations.
Choosing the Right Size for Your House Wiring Panel
How much power does your home actually need? To determine this, we perform a formal load calculation based on your home's square footage, heating/cooling systems, and major appliances.
Here is a quick breakdown of common residential service sizes:
| Panel Rating (Amps) | Typical Home Profile | Capability |
|---|---|---|
| 60 Amps | Common in pre-1960s homes. | Highly outdated. Barely enough for lighting and basic outlets. Cannot support modern appliances. |
| 100 Amps | Standard for small-to-medium older homes with gas appliances. | Adequate for basic lighting, electronics, and a few standard appliances, but lacks room for expansion. |
| 150 Amps | Common in mid-sized homes built in the 1980s and 1990s. | Provides decent capacity for standard homes, but may struggle if you add an EV charger and electric heat pumps. |
| 200 Amps | The Modern Standard for new construction and major renovations. | Easily handles a fully electric home, including central AC, electric cooking, EV charging, and solar. |
| 400 Amps | Large luxury homes (typically over 3,500 sq. ft.) with heavy heating/cooling loads. | Excellent for homes with multiple EV chargers, heated pools, guest houses, and extensive smart home automation. |
To learn how to calculate your home's specific power demands, consult our Residential Electrical Capacity Guide.
Traditional vs. Smart Electrical Panels
As we navigate through 2026, home energy technology is evolving rapidly. Traditional panels are passive devices—they sit in your basement or garage, and you only interact with them when a breaker trips. Smart electrical panels (such as the SPAN panel) are changing this completely.
A smart panel replaces standard breakers with computer-controlled, cloud-connected switches. This offers several game-changing benefits:
- Real-Time Energy Monitoring: Through a smartphone app, you can see exactly how many watts of electricity every single appliance in your home is drawing at any given second.
- Active Load Management: If you are close to exceeding your panel's electrical capacity, a smart panel can automatically pause lower-priority loads (like your water heater or EV charger) while your high-priority loads (like your electric stove or heat pump) are running. This smart load-sharing can save you thousands of dollars by allowing you to fully electrify your home without paying your utility company for a costly service upgrade.
- Optimized Battery Backup: During a power outage, a smart panel allows you to instantly toggle off non-essential circuits from your phone, extending your home battery backup life by up to 40%.
The Installation Process: Costs, Permits, and Safety Standards
Upgrading a house wiring panel is a highly regulated process that requires precision, expertise, and strict adherence to local codes.
In Massachusetts, all electrical work must comply with the Massachusetts Electrical Code, which incorporates the National Electrical Code (NEC) along with specific state amendments.
The Typical Upgrade Timeline & Step-by-Step Process:
- Permitting: We pull an electrical permit with your local town or city hall (whether you are in Reading, Andover, Chelsea, or Boston).
- Utility Coordination: We coordinate with your utility provider (Eversource or National Grid) to schedule a specific date for power disconnection and restoration.
- The Tear-Down: On installation day, the utility disconnects the power at the street or meter. We carefully remove your old panel, service wires, and meter socket.
- The Build-Out: We install a brand-new, code-compliant meter box, service entrance cables, weatherhead, grounding rods, and the new breaker panel itself.
- Circuit Wiring & Bonding: We carefully wire each branch circuit into its new breaker, ensuring proper separation of neutrals and grounds, and installing modern AFCI/GFCI breakers as required by code.
- Inspection & Reconnection: A local municipal electrical inspector reviews our work to ensure it is 100% safe. Once approved, the utility company reconnects the live power lines to your home.
Upgrading Costs
The typical cost for a standard residential panel upgrade ranges between $2,000 and $5,000. This generally includes the cost of the new panel, circuit breakers, meter socket, service cables, permit fees, and labor.
However, if your home requires a major service upgrade—such as running new underground service lines or having the utility company replace a nearby transformer—the total cost can scale up, occasionally reaching up to $25,000 in complex scenarios.
For a detailed breakdown of pricing factors, view our Home Electrical Panel Upgrade Cost page.
Organizing and Labeling Circuits for Safety
A safe panel is an organized panel. When emergency strikes, you cannot afford to waste time guessing which breaker controls which room.
During our installations, we prioritize clean wire management and logical organization:
- Clean Dressing: Wires are neatly routed along the sides of the panel enclosure, avoiding a "rat's nest" of tangled cables. This ensures proper heat dissipation and easy serviceability.
- Clear Circuit Directory: We fill out a permanent, highly detailed circuit directory on the inside door of your panel. Instead of vague labels like "Plugs," we use precise descriptions like "Kitchen Counter GFCIs," "Master Bedroom Outlets," or "Sump Pump - Dedicated."
To understand how circuits should be laid out, check out our guide on House Breaker Panel Wiring.
Frequently Asked Questions about House Wiring Panels
How long does an electrical panel upgrade take?
For a standard residential home, the actual installation work takes one full working day (typically 6 to 8 hours). During this window, your power will be completely shut off. We handle all the utility coordination and town inspections beforehand to ensure that power is safely restored by the end of the afternoon.
Can I upgrade my electrical panel myself?
Absolutely not. Working inside a house wiring panel exposes you to live, unmetered utility lines that carry enough current to cause fatal shocks. Furthermore, improper wiring can lead to catastrophic house fires, code violations, and the denial of home insurance coverage. Always hire a licensed, insured electrician to perform panel work.
To keep your system running smoothly between professional visits, you can follow The Essential Circuit Breaker Maintenance Checklist for Homeowners.
How much does it cost to replace a main breaker panel?
While a simple panel swap (keeping your existing service capacity) typically costs between $2,000 and $4,000, upgrading your overall service capacity to 200 amps usually ranges from $3,000 to $5,000 because it requires replacing the electric meter, service mast, and heavy-gauge service wires. For a deeper look at these figures, read our guide on the Cost to Replace Main Breaker Panel.
Conclusion
Your house wiring panel is the unsung hero of your home. It works 24/7 to keep your lights shining, your appliances running, and your family safe. Whether you are dealing with flickering lights, planning to install an EV charger, or preparing to transition to clean solar energy, upgrading your panel is the smartest investment you can make for your home's safety and future value.
At Sartell Electrical Services, we have spent over 30 years helping homeowners across Reading, Middlesex County, Essex County, and the Greater Boston area modernize their electrical systems. We pride ourselves on exceptional craftsmanship, absolute safety compliance, and unmatched customer service.
Are you ready to take the next step toward a safer, more powerful home? Explore our specialized guide on Residential Main Panel Wiring or contact us today to schedule your professional panel assessment!
Why 18 AWG Direct Burial Wire Is the Smart Choice for Outdoor Low-Voltage Projects
18 AWG direct burial wire is a specialized low-voltage cable built to be installed underground without conduit, used in applications like irrigation control, landscape lighting, outdoor security systems, and audio runs.
Quick answer — what you need to know:
| Feature | Detail |
|---|---|
| Wire gauge | 18 AWG (American Wire Gauge) |
| Common conductor counts | 2, 4, 6 conductors |
| Typical voltage ratings | 30V to 600V depending on type |
| Temperature range | As low as -39°C, as high as 90°C |
| Best uses | Irrigation, landscape lighting, security, access control |
| Jacket materials | PVC, Polyethylene (PE), or LLDPE |
| Shielding options | Unshielded or aluminum foil with drain wire |
| Key certifications | UL Listed, CL3/FPL, UL Type VNTC |
Running wire underground is one of those jobs where the wrong product can fail silently — corroding, swelling with moisture, or degrading from soil chemicals — long before you ever notice a problem above ground. That's what makes choosing the right direct burial wire so important from the start.
I'm Ed Sartell, President of Sartell Electrical Services, and over nearly four decades of electrical work across Massachusetts, I've specified and installed 18 AWG direct burial wire on countless outdoor low-voltage projects — from commercial irrigation systems to institutional security infrastructure. Choosing the right cable construction upfront is one of the single biggest factors in whether an underground installation lasts 5 years or 25.
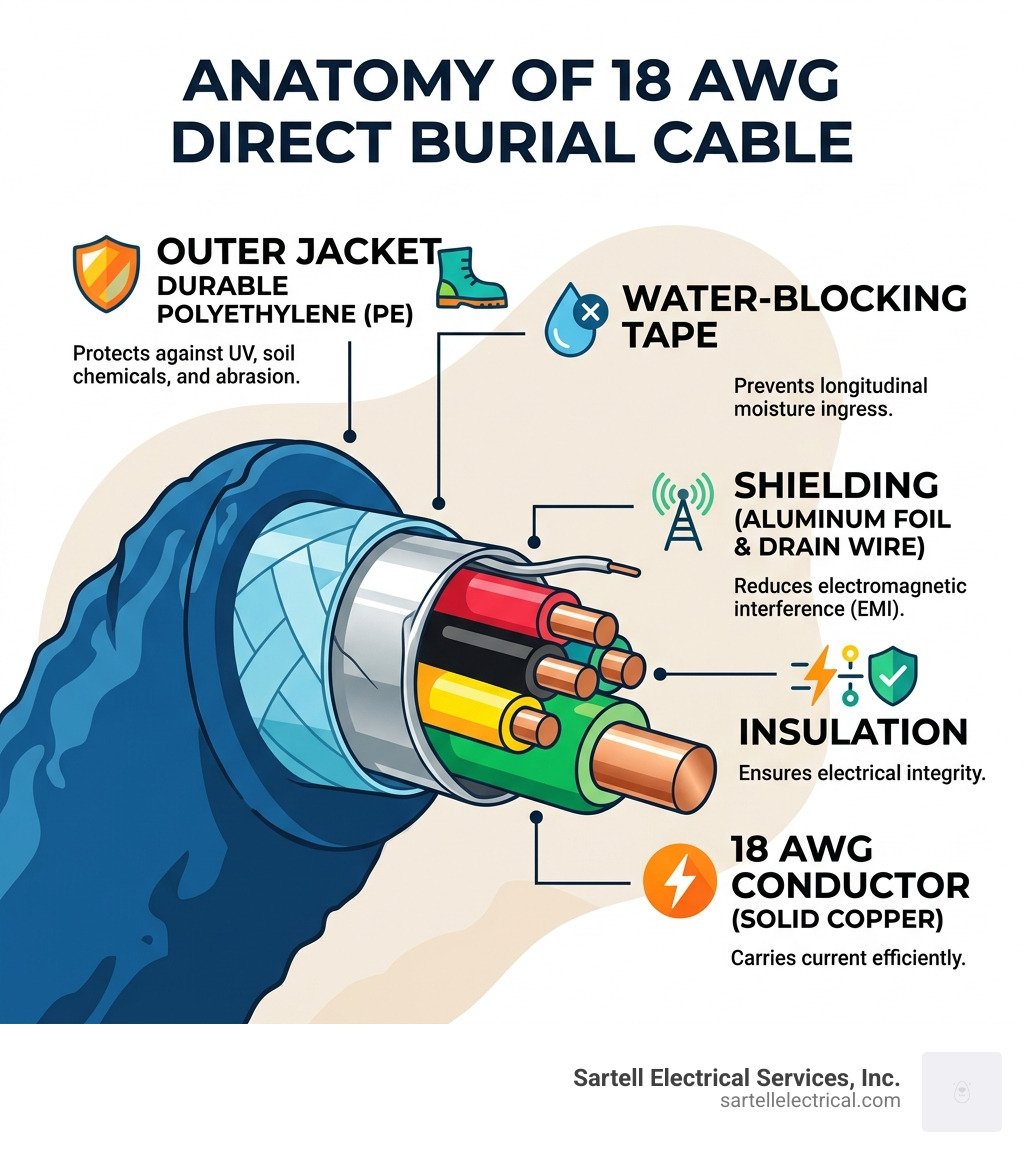
Understanding 18 AWG Direct Burial Wire Specifications
When we talk about 18 AWG direct burial wire, we are looking at a very specific "sweet spot" in the electrical world. The "18 AWG" refers to the American Wire Gauge system, where a smaller number indicates a thicker wire. For low-voltage outdoor work in May 2026, 18-gauge is the industry standard because it’s beefy enough to handle decent distances without massive voltage drop, yet flexible enough to work with easily.
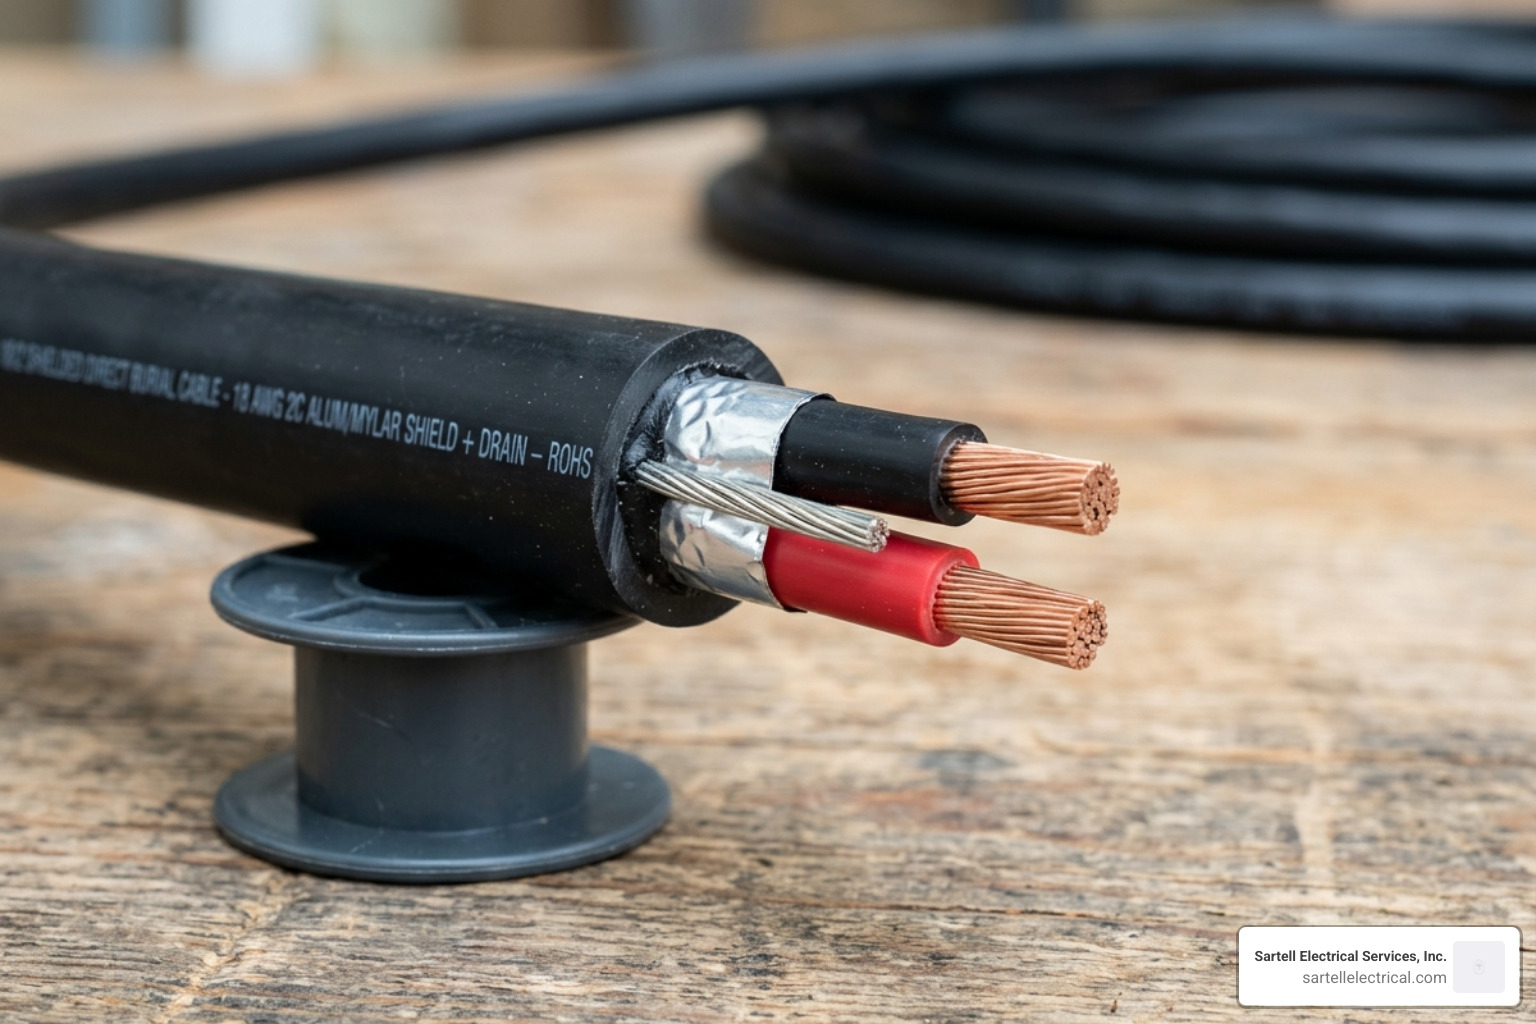
The specifications for these cables vary based on their intended environment. For instance, an 18 AWG Solid AWU Direct Burial Low Energy Underground Circuit Cable is often used for irrigation because it is optimized for low-energy circuits. When planning your project, you should also consider how this fits into your Standard Residential Electrical Wiring plan to ensure all systems are compatible.
One of the most important specs to check is the jacket material. While PVC is common, many high-end direct burial wires use LLDPE (Linear Low-Density Polyethylene).
Jacket Material Comparison
| Feature | PVC (Polyvinyl Chloride) | LLDPE (Linear Low-Density Polyethylene) |
|---|---|---|
| UV Resistance | Moderate | Superior |
| Chemical Resistance | Good | Excellent (includes methane/soil acids) |
| Moisture Permeability | Higher | Very Low |
| Durability | Standard | High resistance to burrowing animals |
A typical 1000ft spool of 18/2 stranded direct burial wire weighs about 26.5 lbs, while a 4-conductor version can weigh significantly more. The nominal outer diameter for a standard 18/2 sprinkler wire is approximately 0.190 to 0.195 inches, making it slim enough for narrow trenches.
Shielding Benefits in 18 AWG Direct Burial Wire
In our experience at Sartell Electrical Services, we often recommend shielded wire for specific "noisy" environments. If you are running security lines near power cables, electromagnetic interference (EMI) can play havoc with your signals.
Cables like the 18-6 Stranded Shielded Direct Burial Rated Cable feature an aluminum foil shield and a dedicated drain wire. This construction provides 100% coverage, ensuring that your security cameras, motion sensors, or intercom systems don't suffer from "ghosting" or false alarms. The shielding acts as a barrier, keeping the signal "clean" as it travels through the Massachusetts soil.
Stranded vs. Solid 18 AWG Direct Burial Wire
Choosing between stranded and solid conductors depends entirely on your installation method.
- Stranded Conductors: These are made of many tiny strands (often a 7x26 configuration). They are much more flexible, making them the top choice for pulls through tight bends or for applications where the wire might experience vibration. This is often the preferred Wire For House Wiring when flexibility is a priority.
- Solid Conductors: These consist of a single, solid piece of copper. They are generally preferred for irrigation systems because they are easier to "poke" into terminal blocks and offer excellent conductivity over long runs. Most solid copper direct burial wires are manufactured to ASTM B3 standards for purity and performance.
Key Applications for Outdoor Low-Voltage Projects
The versatility of 18 AWG direct burial wire makes it a staple in our trucks. Whether we are working in Reading, Andover, or down in Quincy, we see this wire used across several key sectors.
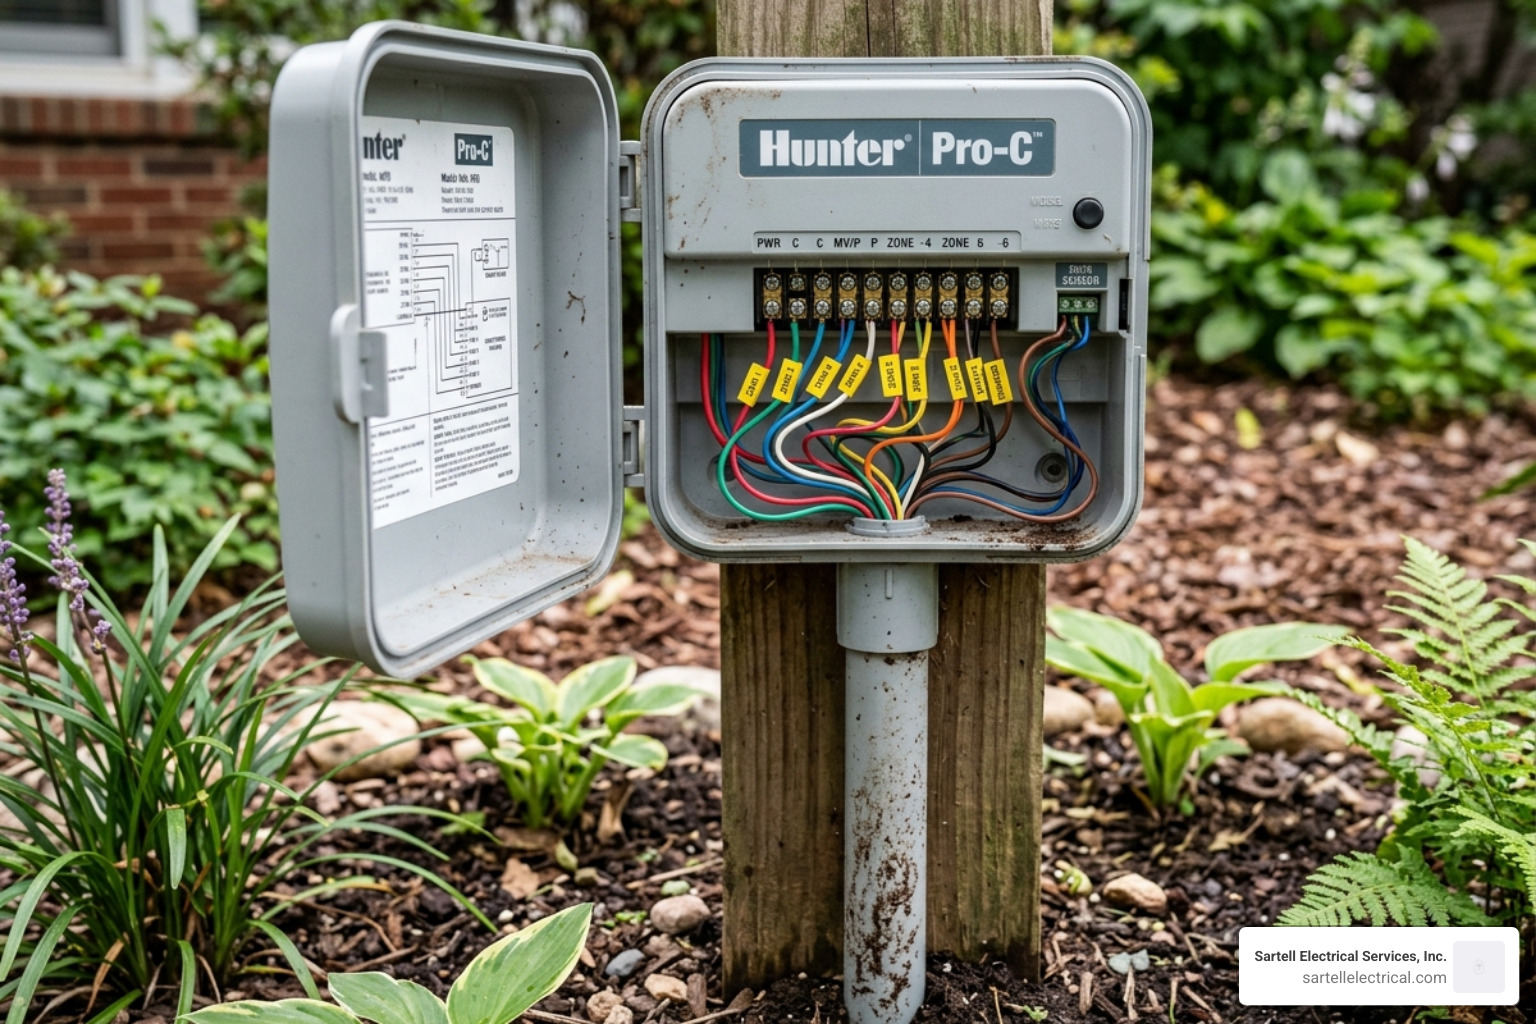
One primary use is for 18/2 Sprinkler Wire. Irrigation systems rely on these wires to connect the main controller to individual solenoids at the valves. Because these systems are constantly exposed to moisture, having a dedicated Underground Electrical Wiring Residential rating is non-negotiable.
Other common applications include:
- HVAC Systems: Connecting outdoor condenser units to indoor thermostats.
- Access Control: Wiring for gate openers, keypads, and magnetic locks.
- Audio Systems: Running outdoor speakers for a backyard sound system.
- Security: Connecting glass break sensors and smoke detectors in outbuildings.
18 AWG Direct Burial Wire for Landscape Lighting
Landscape lighting is where 18-gauge wire really shines. While it’s important to refer to a Building Electrical Wiring Complete Guide to calculate voltage drop, 18 AWG is perfect for LED garden lights which have very low power draws.
Modern outdoor lighting often uses RGB (color-changing) technology. For these setups, we use 4 Conductor RGB Direct Burial Wire. This allows for parallel connections of single-color LEDs or the complex signaling required for color-changing displays. Most of these wires carry a 30V rating, which is the standard safety threshold for "low voltage" landscape lighting.
Advanced Construction: LLDPE Jackets and Water Blocking
The real "secret sauce" of high-quality 18 AWG direct burial wire is how it handles the elements. Traditional underground cables often used messy gels to block water. Today, we prefer modern "dry" water-blocking technologies.
Many premium cables, such as the Direct Burial Shielded 18 AWG 2 Conductor, use water-swellable tape (often called REPEL technology). If the outer jacket is ever nicked by a shovel, this tape reacts with the moisture, swelling up to create a physical plug that stops water from migrating down the length of the cable.
Furthermore, LLDPE jackets provide:
- Methane Impermeability: Essential if you are burying wire near septic systems or in areas with high organic decomposition.
- Biological Immunity: Resistance to fungi and microorganisms that live in wet soil.
- Animal Resistance: A tougher exterior that is less "tasty" or easy to chew through for local Massachusetts rodents.
Installation Best Practices and Safety Standards
At Sartell Electrical Services, we always emphasize that "direct burial" doesn't mean "toss it in a shallow hole and hope for the best." Following the National Electrical Code (NEC) is vital for safety and insurance compliance.
When installing 18 AWG direct burial wire, keep these standards in mind:
- Depth: While low-voltage (under 30V) lines can often be buried at 6 inches, we recommend going deeper (12-18 inches) in high-traffic areas to avoid "death by lawnmower" or aerators.
- Ratings: Look for UL 1493 listings or CL3/FPL ratings. CL3 indicates the cable is safe for in-wall use as well, which is helpful when transitioning from the yard into the home.
- Main Panel Safety: Even low-voltage systems should be properly integrated. Consult our guide on Residential Main Panel Wiring to understand how to safely power your outdoor transformers.
- Tension and Bending: Most 18/4 cables have a max pull tension of about 84 lbs and a minimum bend radius of 2.7 inches. Exceeding these can stretch the copper and cause premature failure.
Frequently Asked Questions about Direct Burial Wire
Is 18 AWG wire suitable for direct burial?
Yes, provided it is specifically rated for "Direct Burial." Standard 18 AWG wire used inside walls will rot quickly if placed in soil. Direct burial versions feature specialized jackets (PE or LLDPE) and moisture-blocking components to survive underground.
What is the difference between gel-filled and water-blocking tape?
Gel-filled cables use an icky, petroleum-based gel to keep water out. It works, but it's a nightmare to clean off during termination. Water-blocking tape is a "dry" solution that only activates if water enters the cable, making it much cleaner and faster for our electricians to install.
Do I need conduit for direct burial rated wire?
Technically, no — that’s the benefit of the "direct burial" rating. However, we often suggest using conduit in areas where you might be doing future digging (like flower beds) or where the wire passes under a driveway. It provides mechanical protection that even the best LLDPE jacket can't match.
Conclusion
Choosing 18 AWG direct burial wire is an investment in the longevity of your outdoor projects. Whether you're lighting up a walkway in Reading or setting up a security perimeter in Boston, the right wire makes all the difference.
At Sartell Electrical Services, Inc., we’ve spent over 30 years helping Massachusetts property owners navigate the complexities of electrical code and outdoor wiring. If you are planning a project and want to ensure it's done right the first time, we are here to help. From Underground Electrical Wiring Residential to complex industrial telecom installs, our commitment to excellence remains our top priority.
Ready to start your outdoor project? Learn more about underground electrical wiring residential or contact us today for expert guidance tailored to the Greater Boston area.
What Is Electrical Switchgear Maintenance — and Why Does It Matter?
Electrical switchgear maintenance is the regular process of inspecting, testing, cleaning, and servicing the assemblies that control, protect, and isolate your facility's power systems.
Here's a quick overview of what it involves:
- Visual inspections — checking for discoloration, corrosion, dust, and physical damage
- Electrical testing — insulation resistance, contact resistance, and relay functionality checks
- Mechanical checks — exercising circuit breakers and verifying interlock operation
- Thermal scanning — infrared thermography to detect overheating before it causes failure
- Cleaning and lubrication — removing contaminants and servicing moving parts
- Documentation — recording all findings for compliance and trend tracking
Most switchgear failures don't come out of nowhere. They announce themselves early — through subtle heat buildup, unusual sounds, or gradual insulation breakdown. The problem is that without a structured maintenance program, those warning signs go unnoticed until something catastrophic happens.
The stakes are high. A single switchgear failure leads to an average of 261 hours of downtime. Neglected equipment also raises arc flash risk by 83% and cuts component lifespan nearly in half — from a potential 35 years down to just 17.
For commercial and industrial facilities, that's not just an inconvenience. It's a serious safety risk and a significant financial loss.
I'm Ed Sartell, President of Sartell Electrical Services, Inc., and with nearly four decades of hands-on experience in commercial and industrial electrical switchgear maintenance, I've seen what separates facilities that stay up and running from those that face costly emergency repairs. In the sections below, I'll walk you through everything you need to know to build a maintenance program that protects your equipment, your people, and your bottom line.
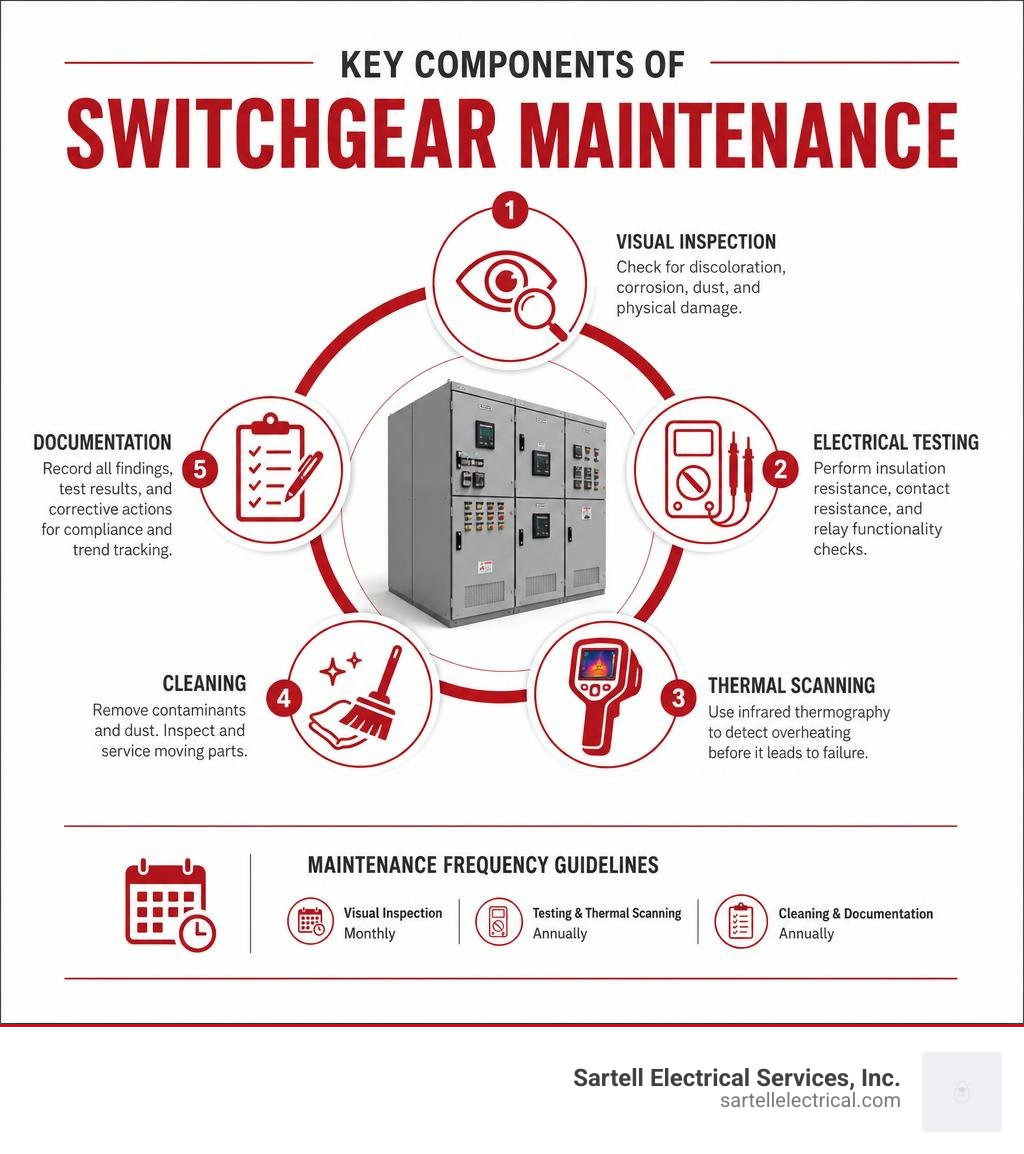
Electrical switchgear maintenance basics:
- electrical safety for industrial facilities
- electrical condition monitoring
- industrial power monitoring system
The Critical Role of Electrical Switchgear Maintenance
In any commercial or industrial setting across Massachusetts—whether you are operating a manufacturing plant in Middlesex County, a medical center in Greater Boston, or a corporate complex in Reading, MA—the electrical distribution system relies entirely on your switchgear. Switchgear acts as the traffic cop and emergency brake of your electrical network. When a fault occurs downstream, it is the switchgear that senses the anomaly and trips to isolate the issue, saving millions of dollars in equipment and, more importantly, protecting human lives.
However, electrical equipment is not designed to remain perpetually energized and neglected. Over time, physical mechanisms degrade, lubrication dries up, and environmental contaminants creep in. When switchgear is neglected, the consequences are severe:
- Arc Flash Vulnerability: Neglecting routine service increases the likelihood of catastrophic arc flash incidents by 83%. An arc flash can vaporize metal, destroy entire equipment rooms, and cause fatal injuries.
- Asset Lifespan Reduction: Properly maintained switchgear can easily last at least 35 years. In contrast, unmaintained equipment has an average lifespan of just 17 years—meaning neglect cuts your equipment's useful life by approximately 50%.
- Costly Downtime: According to IEEE surveys, a single major switchgear failure results in an average of 261 hours of downtime. For modern operations, that represents an incredible financial hit in lost productivity, emergency repair fees, and supply chain disruptions.
By partnering with experienced professionals to deliver comprehensive electrical maintenance services, facilities can transition from reactive panic to planned efficiency. Implementing standard guidelines like those outlined in Maintaining Electrical ensures that every circuit breaker, busbar, and protective relay performs exactly as designed when an anomaly occurs.
Common Causes of Switchgear Failure and Prevention
Understanding why switchgear fails is the first step in stopping failures from happening. The vast majority of failures can be traced back to a handful of predictable, preventable issues:
1. Overheating (The 80% Culprit)
Research indicates that 80% of switchgear failures are caused by overheating. This is usually driven by loose physical connections, corroded joints, or overloaded circuits. As resistance increases at a loose connection point, localized temperatures spike. If left unchecked, this thermal runaway destroys insulators, melts busbars, and ignites fires.
2. Environmental Contamination
Dust, metallic particles, and debris are silent killers in electrical rooms. In fact, dust and metallic particles contribute to 34% of insulation failures in switchgear. When conductive dust settles on insulating surfaces, it creates a path for electrical tracking, which can lead to phase-to-phase or phase-to-ground short circuits.
3. Moisture and High Humidity
Humidity is a major threat to electrical contacts. Moisture and excessive humidity can increase contact resistance by up to 70%. When humidity combines with dust, it forms a highly conductive paste that degrades insulation and causes rapid corrosion of silver-plated copper parts.
Prevention Strategies
Preventing these failures requires a mix of environmental controls and modern diagnostic techniques. Keeping electrical rooms clean, dry, and climate-controlled is step one. Step two is utilizing predictive technologies.
By utilizing Condition Based Asset Monitoring for Electrical Systems, facilities can track real-time changes in temperature and current. Additionally, regular infrared thermography scans allow technicians to spot hotspots while the equipment remains safely energized and under load.
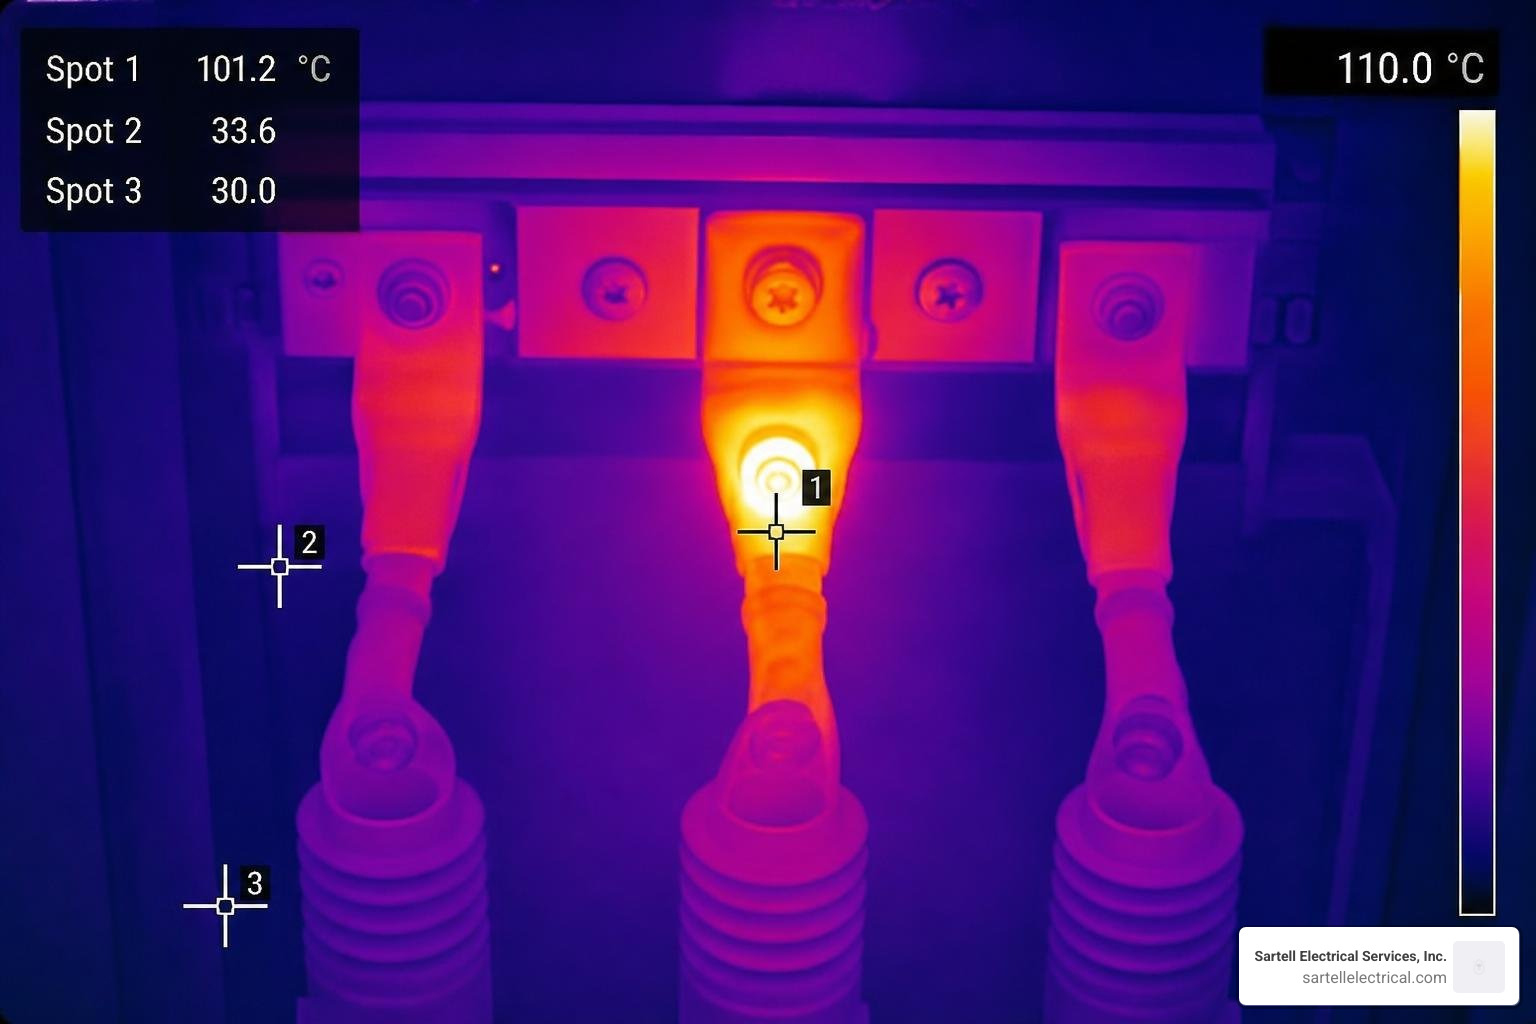
Key Components of a Comprehensive Checklist
To ensure no critical detail is missed during maintenance, we rely on a structured, step-by-step checklist. This ensures consistency across shifts and technicians, keeping your systems fully compliant with manufacturer specifications like those found in the Maintaining the Switchboard - Power-Style QED-2 Switchboards Technical Literature.
A comprehensive switchgear maintenance program is divided into distinct execution phases:
- Safety & Isolation: Verify lockout/tagout (LOTO) protocols, isolate control power, and verify de-energization.
- Visual Inspection & Cleaning: Vacuum out dust with HEPA-filtered vacuums and inspect for signs of overheating or physical damage.
- Mechanical Servicing: Manually exercise breakers, check alignment, and apply manufacturer-specified lubricants (e.g., BG20 grease for contacts) to moving parts.
- Electrical Testing: Perform insulation resistance and contact resistance tests to verify the integrity of conductors and connections.
- Re-energization & Verification: Confirm all tools are removed, close all compartment doors, remove safety grounds, and systematically restore power.
Visual Inspections in Electrical Switchgear Maintenance
Visual inspections are your first line of defense. They should be integrated into your routine Building Electrical Maintenance schedules. During a visual inspection, technicians look for:
- Physical Integrity: Dents, loose door latches, damaged gaskets, or signs of rodent nesting.
- Corrosion and Discoloration: Slight tarnishing on silver-plated contacts is normal, but severe discoloration or flaking indicates extreme overheating or exposure to chemical vapors.
- Insulation Degradation: Cracking, tracking lines, or chalking on epoxy or porcelain insulators.
Electrical Testing in Electrical Switchgear Maintenance
Visual checks alone cannot identify internal insulation flaws or contact degradation. That is where specialized diagnostic testing comes in. According to Switchgear Maintenance and Testing Services - Martin Technical, several essential electrical tests must be performed:
- Insulation Resistance Testing (Megger Testing): Measures the resistance of the insulation system to identify moisture ingress, dirt accumulation, or cracking before a breakdown occurs.
- Contact Resistance Testing (Ducter Testing): Measures the resistance across bolted busbar joints and breaker contacts. High resistance indicates loose connections or pitted contacts.
- Protective Relay Testing: Simulates fault conditions to verify that the relays will accurately command the circuit breakers to trip within specified timeframes.
Industry Standards and Maintenance Frequency
How often should your switchgear be maintained? The answer depends on equipment criticality, age, and environmental conditions. Industry standards like NFPA 70B (which is now a mandatory standard rather than a recommended practice) and NETA (InterNational Electrical Testing Association) provide clear guidelines.
For standard, clean environments, a comprehensive maintenance cycle is recommended every 3 to 5 years. However, in highly contaminated or high-vibration environments, circuit breaker exercising and contact cleaning may be required annually or even semi-annually.
To help you visualize these requirements, here is a comparison of standard maintenance frequencies based on equipment condition:
| Equipment Condition / Environment | Recommended Visual Inspection | Recommended Diagnostic Testing | Recommended Mechanical Servicing |
|---|---|---|---|
| Excellent / Clean Environment | Monthly | Every 3 to 5 Years | Every 3 Years |
| Moderate / Normal Industrial | Weekly | Every 2 to 3 Years | Every 2 Years |
| Severe / High Dust, Moisture, or Heat | Daily | Annually | Annually (Max 2-year breaker exercise) |
Following these structured guidelines is central to a robust Electrical Asset Management Complete Guide program. For international or highly specialized standards, some facilities also reference AS 2467:2025 | Standards Australia Store to align their safety and diagnostic testing protocols with global best practices.
Safety Protocols and Required PPE
Working on or near electrical switchgear is inherently hazardous. Safety is not just a priority; it is a strict regulatory requirement enforced by OSHA and governed by the NFPA 70E Standard for Electrical Safety in the Workplace.
Before any technician touches a piece of switchgear, several safety protocols must be executed:
- De-energization & Verification: Always treat a circuit as live until it is proven dead. A qualified person must use a properly rated, certified voltage-sensing device to verify the absence of voltage.
- Lockout/Tagout (LOTO): Apply physical locks and tags to all energy isolation devices. If multiple teams are working, use lockout devices that accommodate up to six padlocks to ensure no single person can re-energize the system prematurely.
- Establish Safety Grounds: Install temporary protective grounding cables to protect workers from accidental backfeed or induced voltages from adjacent active circuits.
- Appropriate PPE: Technicians must wear arc-rated clothing, face shields, insulated gloves, and safety glasses matching the arc flash hazard analysis of the specific equipment.
For detailed government and institutional guidelines, the MS-28 Handbook - Maintenance of Electrical Switchgear TL-4, May 10, 2011; PSIN: HBKMS28, provides an excellent framework for safety practices, de-energization verification procedures, and the management of protective equipment testing records.
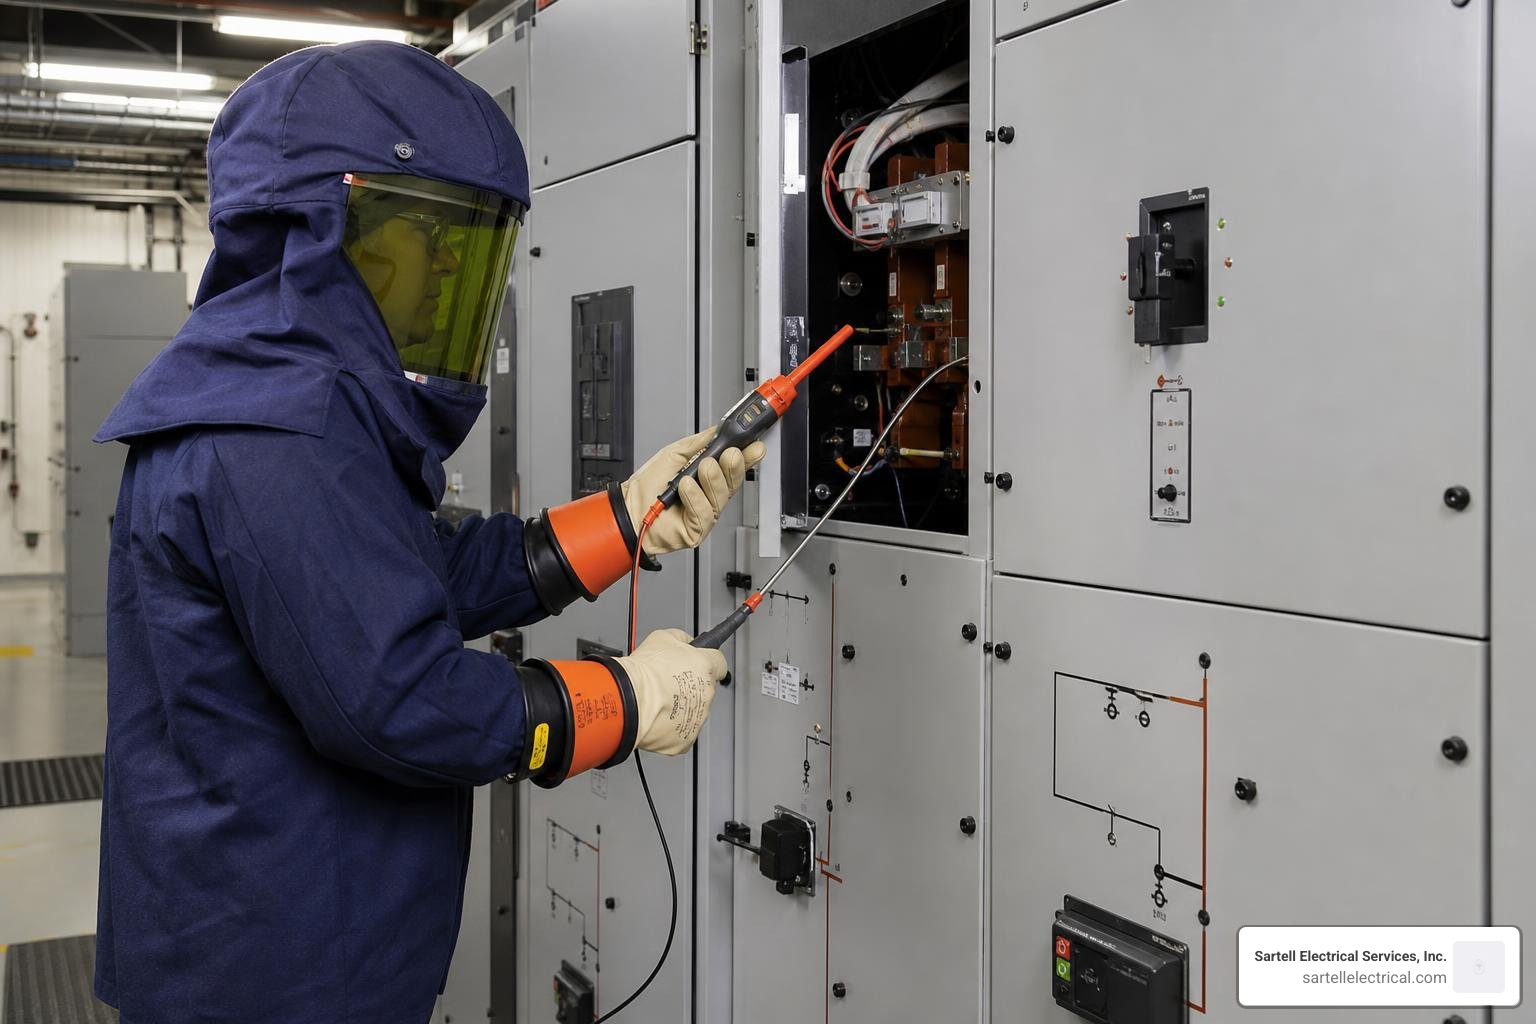
Voltage-Specific Maintenance Requirements
Switchgear maintenance is not a one-size-fits-all discipline. The procedures, safety distances, and testing complexities change dramatically depending on the voltage level:
Low-Voltage Switchgear (Up to 1,000 V AC)
Commonly found in commercial buildings, retail complexes, and light industrial facilities. Maintenance focuses heavily on molded-case circuit breakers, air circuit breakers, and fusible switches. Key tasks include checking contact alignment, verifying fuse tightening torque (typically 21–30 lb-ft), and ensuring dry, clean environments. For a comprehensive look at managing these systems, see our Industrial Electrical Maintenance Complete Guide.
Medium-Voltage Switchgear (1,000 V to 35 kV)
Typically found in heavy industrial plants, hospitals, and large campuses. These systems require highly specialized care. According to the Inspection and Maintenance - SureSeT MV Indoor Switchgear Technical Literature, medium-voltage installations often utilize:
- Vacuum Circuit Breakers: Require vacuum integrity checks (Hi-Pot testing) and mechanism lubrication.
- SF6 Gas Insulated Switchgear: Requires specialized gas pressure monitoring, leak detection, and strict adherence to environmental regulations regarding SF6 gas handling.
- Digital Health Monitoring: Modern systems with Level 4 digital monitoring can safely extend physical maintenance intervals from 3 years to 5 years by continuously tracking insulation and contact temperatures.
Digital Tools and CMMS Integration
The days of tracking complex electrical maintenance on clipboards and paper logs are quickly fading. Modern facilities are transitioning to digitized maintenance logs integrated with Computerized Maintenance Management Systems (CMMS).
The benefits of digitization are clear:
- Efficiency: Technicians using paper checklists typically spend 15 to 30 minutes per work order on manual data entry and administrative overhead. Digital checklists eliminate this waste.
- Audit Readiness: Facilities utilizing digitized maintenance logs reduce their compliance audit preparation time by 41%.
- Data Trending: A digital CMMS allows you to track and trend insulation resistance and contact resistance measurements over several years. This makes it easy to spot a declining trend and schedule repairs before a catastrophic failure occurs.
Integrating these logs with a broader Electrical Network Monitoring Complete Guide strategy gives facility managers a real-time, comprehensive view of their entire electrical infrastructure, turning maintenance from a guessing game into a precise, data-driven science.
Frequently Asked Questions about Switchgear Maintenance
How often should switchgear be tested?
For most standard commercial and industrial facilities, comprehensive testing and maintenance should be performed every 3 to 5 years. However, you should adjust this frequency based on the age of your equipment, its operational criticality, and environmental factors like dust, humidity, and ambient temperature.
Does the power need to be turned off during maintenance?
Yes, for a complete, hands-on preventive maintenance service, the switchgear must be fully de-energized and safely isolated. This requires careful coordination with utility providers and facility managers to schedule a planned power outage. However, some predictive testing—such as infrared thermography scans and continuous thermal monitoring—is performed while the system is fully energized and running under normal load. To learn more about managing these shutdowns, refer to our guide on Industrial Electrical Maintenance.
What are the benefits of preventive vs reactive maintenance?
Implementing a structured preventive maintenance program reduces switchgear failure risks by approximately two-thirds compared to a reactive "run-to-failure" approach. It also doubles the physical lifespan of your switchgear, prevents catastrophic arc flash incidents, and saves tens of thousands of dollars in emergency repairs and unplanned downtime. Check out our Electrical Maintenance Ultimate Guide for a detailed comparison of these strategies.
Conclusion
Your electrical switchgear is the heart of your facility's power distribution. Neglecting it is a gamble that risks costly downtime, expensive equipment replacements, and severe safety hazards. By implementing a proactive, structured maintenance program, you protect your assets, ensure regulatory compliance, and keep your operations running smoothly.
At Sartell Electrical Services, Inc., we have been serving businesses throughout Massachusetts—including Reading, MA, Greater Boston, and Middlesex County—for over 30 years. Our team of highly trained, qualified electricians is committed to delivering excellence, safety, and unmatched customer service on every project.
Don't wait for a costly breakdown to take action. Schedule professional industrial electrical services with Sartell Electrical Services, Inc. today, and let us help you keep the spark alive safely!
Control Your Lights from Two Locations: What You Need to Know About 2-Way Dimmer Switch Wiring
2-way dimmer switch wiring lets you control a single light fixture from two different locations — like the top and bottom of a staircase — while also adjusting brightness. Here's the quick answer:
How to wire a 2-way dimmer switch (quick summary):
- Turn off power at the breaker and verify with a voltage tester
- Replace one standard switch with a dimmer — leave the second as a regular 2-way switch
- Connect the common wire to the COM terminal on the dimmer
- Connect the traveler wires to the L1 and L2 terminals
- Restore power and test from both switch locations
Key rule: Only one switch in the circuit should be a dimmer. Never install two dimmers in the same 2-way circuit — it causes flickering, uneven brightness, and wiring conflicts.
This applies whether you're wiring a staircase, hallway, or large open room. The second switch stays a standard 2-way toggle.
A few things determine whether your installation goes smoothly:
- The type of dimmer you choose (single-pole vs. 2-way/3-way rated)
- Whether your switch box has a neutral wire (many older homes don't)
- Bulb compatibility — dimmable LEDs need an LED-rated dimmer
- Local code requirements, especially if you're in Massachusetts
This guide walks through every step — from identifying your wires to testing the finished install.
I'm Ed Sartell, President of Sartell Electrical Services in Reading, Massachusetts, with nearly four decades of hands-on electrical experience helping homeowners tackle projects like 2-way dimmer switch wiring safely and correctly. I've seen how a small wiring mistake — like swapping the common and traveler terminals — can turn a 30-minute job into a full diagnostic session, and this guide is built to help you avoid exactly that.
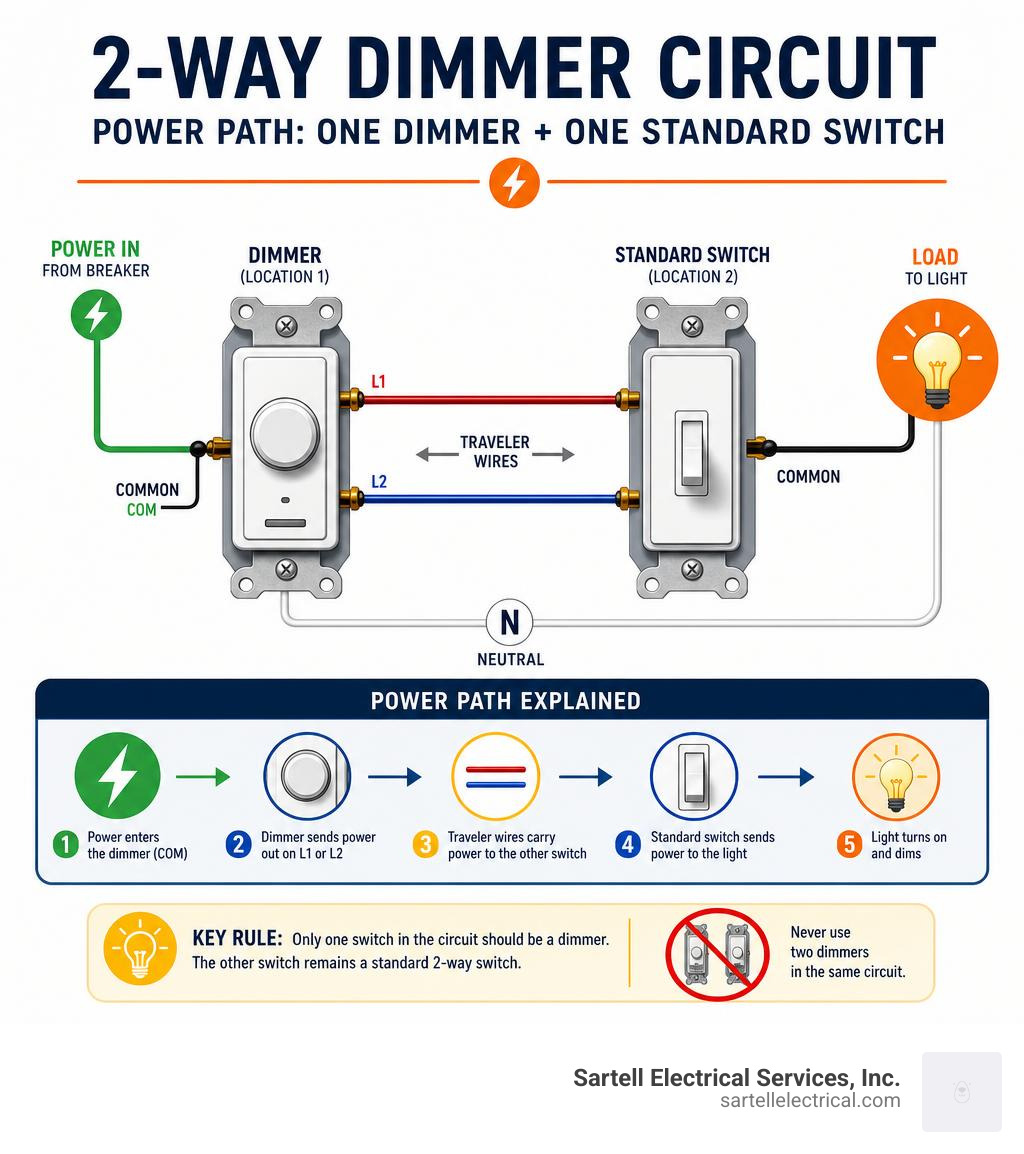
2 way dimmer switch wiring basics:
What Is a 2-Way Dimmer Switch and How Is It Different from a Standard 2-Way Switch?
A 2-way dimmer switch setup lets you control one light fixture from two separate switch locations and dim the light from one of those locations.
In UK-style wiring guides, this is called 2-way switching. In North America, including Massachusetts, the same general two-location lighting setup is usually called a 3-way switch circuit. Here is the simple translation:
- UK/common search term: 2-way switch
- North American electrical term: 3-way switch
- What it means: Two switches control the same light
A standard 2-way or 3-way switch only turns the light on or off. A 2-way dimmer setup adds brightness control, usually by replacing one of the two switches with a dimmer rated for multi-location use.
This type of setup is useful on staircases, in hallways, in large rooms with two entrances, and in bedrooms. For a general overview of traditional 2-way switch wiring, this 2-way light switch guide shows the basic switching concept.
Standard 2-Way Switch vs. 2-Way Dimmer Switch
A standard 2-way switch is a mechanical switch. It routes power between terminals so the light can be turned on or off from either location.
A 2-way dimmer switch does more. It includes electronics that reduce the power delivered to the lighting load, allowing the brightness to rise or fall.
The terminals usually include:
- COM or common: The pivot point of the circuit. This connects either to the incoming live/hot wire or the outgoing switched live/load wire, depending on the box.
- L1 and L2: The two traveler terminals, also called strappers.
- Ground or earth: The safety grounding connection, usually green or bare copper.
- Neutral, if required: Used by some smart or electronic dimmers to power their internal electronics.
Can You Install Two Dimmers in One 2-Way Circuit?
Usually, no.
In a typical 2-way dimmer setup, you should install one dimmer and one standard 2-way/3-way switch. Installing two ordinary dimmers in the same circuit can cause:
- Flickering lights
- Uneven dimming
- Buzzing
- Failure to turn on or off properly
- Conflicting electronics between the dimmers
- Premature dimmer or lamp failure
There are exceptions, but only when the manufacturer specifically designs the system for multi-location dimming. These systems usually use one master dimmer and compatible companion controls. We explain this in more detail in our guide: Dimmer Duos Can You Really Use Two Dimmers On One 3 Way Switch.
Where 2-Way Dimmers Work Best
A 2-way dimmer is ideal anywhere you want both convenience and atmosphere. Common locations include:
- Staircases with switches at the top and bottom
- Long hallways
- Bedrooms with a switch near the door and bed
- Open-plan kitchens and living rooms
- Dining rooms and finished basements
They are especially useful with dimmable LED fixtures because you can lower brightness for comfort and reduce energy use. Just remember: LED success depends heavily on choosing the right dimmer.
2 Way Dimmer Switch Wiring: Wires, Terminals, and Common Diagrams

Before touching any wires, you need to understand what each conductor does. In 2 way dimmer switch wiring, the most important mistake to avoid is mixing up the common wire with the traveler wires.
For more background on dimmer wiring basics, see our complete Dimmer Switch Wiring guide.
Essential Wires in 2 Way Dimmer Switch Wiring
Wire colors vary by age of home and region. Never rely on color alone; use terminal markings and testing.
Here are the essential wires:
- Line hot or permanent live: The wire bringing power from the electrical panel.
- Load or switched live: The wire carrying controlled power from the switching circuit to the light fixture.
- Common wire: The wire attached to the common terminal. In one box it may be the incoming hot; in the other, it may be the switched leg to the light.
- Traveler wires: The pair of wires running between the two switches. These connect to L1 and L2 or the two traveler screws.
- Neutral wire: Usually white in North American wiring. Standard switches often do not use it, but smart dimmers and some electronic dimmers may require it.
- Ground wire: Bare copper or green. This connects to the green screw or ground lead for safety.
In North American 3-way boxes, travelers are often red and black, but older Massachusetts homes may have inconsistent colors. The common terminal is your best clue.
How to Identify the Common Wire and Traveler Wires
Here is our field-tested process:
- Turn off power first.
- Remove the wall plate and gently pull the switch forward.
- Find the screw that is a different color from the other two non-ground screws. This is usually the common terminal.
- Look for a stamped label such as COM, COMMON, or a darker screw.
- Take a clear photo before disconnecting anything.
- Tag the wire on the common terminal with tape.
- Mark the two remaining insulated wires as travelers.
- Keep the ground wire separate.
If the switch is already disconnected, use a continuity tester with power safely isolated to identify the traveler pair. If you must identify a permanent live conductor, call an electrician.
A good rule: map terminals, not colors. The red wire is not always a traveler. The black wire is not always common.
Common 2 Way Dimmer Switch Wiring Configurations

Most 2-way dimmer setups use one of these layouts:
| Configuration | What It Means | Key Wiring Idea |
|---|---|---|
| Power at first switch | Line hot enters the first switch box | Common on first switch connects to incoming hot |
| Power at light fixture | Power enters at the ceiling box first | Switch loop wiring may be present |
| Power at second switch | Line enters the other switch box | Common location may be opposite of what you expect |
| UK-style 3-core and earth | Uses COM, L1, L2 and strappers | Non-brown live conductors should be properly identified |
| North American 14/3 or 12/3 cable | Uses common plus two travelers | Neutrals are spliced through, grounds are bonded |
In a basic North American two-location lighting circuit:
- One common connects to line hot.
- The two travelers run between switches.
- The other common connects to the switched hot going to the light.
- Neutrals are spliced together and normally do not land on a standard mechanical switch.
- Grounds are connected to each switch and metal box, if present.
If you are replacing an existing switch, do not redesign the circuit. Replace like-for-like using the old terminal mapping and the dimmer manufacturer’s wiring diagram.
For another explanation of two-way lighting layouts and common mistakes, see this guide on wiring a double dimmer switch on a two-way lighting circuit.
When a Neutral Wire Is Required
Not every dimmer needs a neutral wire, but many modern dimmers do.
A neutral wire may be required for:
- Smart Wi-Fi dimmers
- Some Zigbee or other hub-based dimmers
- Digital dimmers with locator lights
- Dimmers with advanced programming
- Certain LED-compatible electronic dimmers
Why? The dimmer’s internal electronics need a small amount of constant power, even when the lights are off. A neutral provides that return path.
Many older homes in Reading, Boston, Cambridge, Andover, Woburn, and Newton may not have a neutral in the switch box. In older switch-loop wiring, the neutral may only be at the light fixture.
Options include:
- Use a dimmer specifically listed as no-neutral required
- Have a neutral added by a licensed electrician
- Use a compatible smart lighting system designed for your wiring
- Keep a standard 2-way switch if dimmer compatibility is poor
Some no-neutral Zigbee-style dimmers are designed to work in older two-wire switch boxes, but compatibility still depends on the lighting load, bulb type, minimum wattage, and manufacturer instructions. We cover this topic in more detail here: The No Neutral Solution For Your 2 Wire Dimmer Switch.
How to Choose the Right Dimmer Before You Start Wiring
Choosing the right device is half the job. The wrong dimmer can make perfect wiring look broken.
| Dimmer Type | Best For | Not For | Notes |
|---|---|---|---|
| Single-pole dimmer | One switch controls one light | Two-location control | Wrong choice for 2-way/3-way circuits |
| 2-way/3-way dimmer | Two switches control one light | Circuits needing two independent dimmers | Use one dimmer plus one standard switch unless listed otherwise |
| Smart dimmer | App, schedule, voice, automation | Boxes without required wiring unless no-neutral rated | Many need neutral |
| No-neutral dimmer | Older switch boxes without neutral | All loads automatically | Check LED compatibility and minimum load |
| Multi-location dimmer system | Dimming from multiple points | Mixing random dimmers | Requires matched companions/remotes |
Single-Pole vs. 2-Way or 3-Way Dimmer
A single-pole dimmer is for a light controlled from one location. It typically has line, load, and ground connections.
A 2-way/3-way dimmer is for a light controlled from two locations. It has a common connection and traveler connections, or manufacturer-specific leads that perform the same function.
If you install a single-pole dimmer in a two-location circuit, symptoms may include:
- One switch stops working
- The light only works in one switch position
- The dimmer behaves unpredictably
- The breaker trips or the light will not turn off fully
Always look for packaging or instructions that say the dimmer is rated for 3-way or multi-location use. In Massachusetts, most product labeling will use the North American term “3-way,” even if you searched online for “2-way dimmer.”
LED, CFL, Halogen, and Incandescent Compatibility
Not all dimmers work with all bulbs.
Use this quick guide:
- Dimmable LED bulbs: Use an LED-rated dimmer. Trailing-edge dimmers often perform better with LEDs.
- Non-dimmable LED bulbs: Do not use with a dimmer.
- CFL bulbs: Must be labeled dimmable and paired with a compatible dimmer.
- Incandescent bulbs: Usually work with many older dimmers, but still follow wattage limits.
- Halogen bulbs: Often work with leading-edge dimmers, but check ratings.
- Low-voltage fixtures: Need dimmers matched to transformer type, such as magnetic low-voltage or electronic low-voltage.
Avoid mixing bulb types on the same dimmer. For example, do not put two dimmable LEDs and one old incandescent on the same dimmed load. Mixed loads can cause flickering, buzzing, or strange low-end behavior.
Smart bulbs are a separate issue. Most smart bulbs want full power all the time. Putting them on a wall dimmer can cause app control problems, flicker, reset issues, or shortened bulb life.
Wattage Rating, Box Depth, and Heat
Add up the wattage of every bulb or fixture controlled by the dimmer. Then choose a dimmer rated above that load. We like a safety margin of about 25 percent where practical.
Example:
- Five 60-watt bulbs = 300 watts
- 300 watts x 1.25 = 375 watts minimum preferred rating
Many dimmers are rated differently for different loads. A device might handle 600 watts of incandescent lighting but only 300 watts of LED/CFL load. Read the label carefully.
Also check the wall box depth. Many dimmers are bulkier than standard switches. A commonly recommended minimum wall box depth is about 2-3/4 inches, especially for larger electronic dimmers. Crowded boxes are harder to wire safely and may violate box-fill requirements.
And yes, dimmers can feel warm during normal operation. They dissipate heat as part of controlling the load. Warm is expected. Hot, discolored, buzzing loudly, or smelling burnt is not.
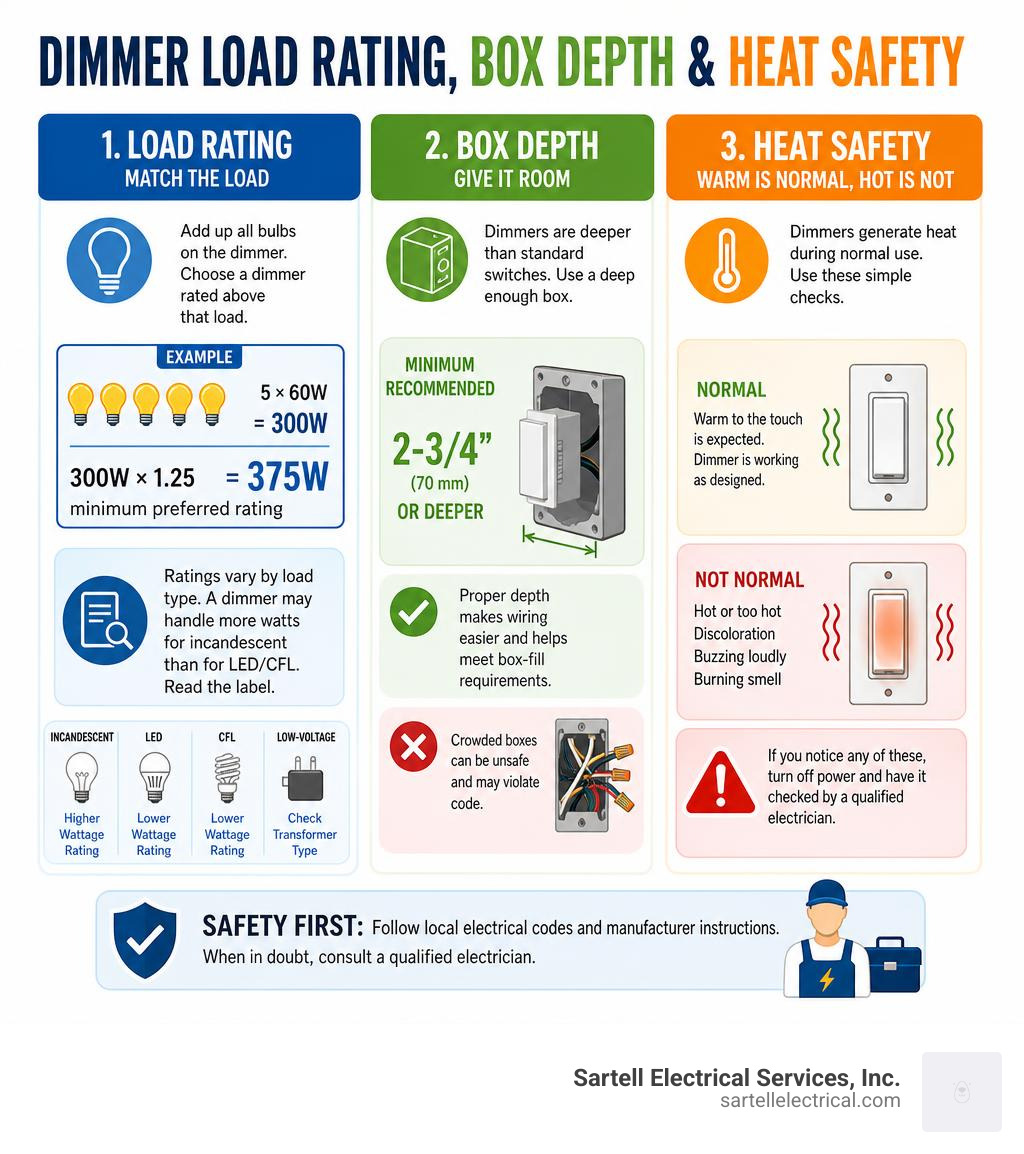
Step-by-Step 2 Way Dimmer Switch Wiring Installation
A quick safety note: electrical work must comply with local codes. In Massachusetts, some projects require permits and inspections. If you are unsure whether your project qualifies as a simple device replacement, consult a professional before starting.
For a broader walk-through, see our guide on how to wire a dimmer switch fast by using simple steps.
Tools and Safety Gear You Need
Gather everything before opening the switch box:
- Non-contact voltage tester
- Multimeter or two-lead voltage tester
- Insulated screwdrivers
- Wire stripper and wire cutter
- Approved wire connectors and electrical tape
- Flashlight or headlamp
- Phone camera
- Wire labels or masking tape
- Permanent marker
- Safety glasses
- Torque screwdriver, if required by the device instructions
- Correct 2-way/3-way rated dimmer
- Matching wall plate and manufacturer wiring diagram
Do not use tape as a substitute for proper wire connectors.
Safety Checks Before Touching Any Wires
Follow these checks every time:
- Turn off the circuit breaker.
- Test your voltage tester on a known live source.
- Test the switch wires to confirm power is off.
- Test the voltage tester again on a known live source to confirm it still works.
- Lock or label the breaker if someone else is home.
- Inspect the box for damage, scorch marks, brittle insulation, or moisture.
- Stop if you find aluminum wiring, knob-and-tube wiring, melted insulation, or no grounding path.
Never assume a switch box is dead because the light is off. In multi-way circuits, wires can remain energized depending on other switch positions.
Step-by-Step 2 Way Dimmer Switch Wiring Checklist
Use this checklist for replacing one existing 2-way/3-way switch with a compatible dimmer.
- Turn off power at the breaker.
- Verify power is off. Use a voltage tester at both switch locations.
- Remove the wall plate. Unscrew the existing switch and gently pull it forward.
- Photograph the wiring. Take clear pictures of the terminals before removing wires.
- Tag the common wire. Identify the wire on the darker or labeled common screw. Mark it with tape.
- Label the travelers. Mark the two remaining non-ground wires as travelers.
- Disconnect the old switch. Keep wires separated so they do not get mixed up.
- Connect the ground first. Attach the bare or green ground to the dimmer’s green screw or ground lead. Bond the metal box if required.
- Connect the common wire. Attach the tagged common wire to the dimmer’s COM, black lead, or common terminal as directed.
- Connect the traveler wires. Attach the two traveler wires to L1 and L2 or the dimmer’s traveler leads. In many traditional switches, traveler order does not matter, but follow the manufacturer’s diagram.
- Handle the neutral correctly. If the dimmer requires neutral, connect it to the neutral bundle using an approved connector. If it does not require neutral, leave the neutral bundle intact. Do not disconnect neutrals just because they are in the box.
- Cap unused wires. Any unused dimmer lead must be capped according to the instructions.
- Fold wires neatly into the box. Avoid sharp bends and do not crush conductors behind the device.
- Mount the dimmer. Secure it evenly. Do not overtighten.
- Install the wall plate.
- Restore power and test.
For a related multi-location installation guide, see Wiring Wonders Installing Your 3 Way Dimmer Switch Like A Pro.
Testing the Dimmer After Installation
Test before celebrating. We recommend checking:
- The light turns on and off from both switch locations.
- The dimmer works through its full range.
- The light does not flicker at low brightness.
- The dimmer does not buzz loudly.
- The breaker does not trip.
- The faceplate fits flat.
- The switch feels warm at most, not hot.
- The minimum brightness setting is comfortable.
Many LED dimmers feature a low-end trim. If lights flicker at the lowest setting, raise the minimum brightness until stable.
Troubleshooting, FAQs, and When to Call a Professional
Even careful DIYers run into problems. Most dimmer issues fall into a few categories: wrong dimmer, wrong bulbs, loose connection, or mixed-up common/travelers.
For a deeper technical look at dimmer operation, see our AC Dimmer Circuit Diagram resource.
Fixing Flickering, Buzzing, or Lights That Won’t Dim
Common causes include:
- Non-dimmable LED bulbs or LED bulbs not compatible with the dimmer
- Dimmer not rated for LED loads or load below the dimmer’s minimum requirement
- Loose wire connector or mixed bulb types on one dimmer
- Low-end trim set too low or overloaded dimmer
- Faulty light fixture, incompatible LED driver, or defective dimmer
Try these steps:
- Confirm every bulb is labeled dimmable.
- Check the dimmer’s approved bulb compatibility list.
- Replace mixed bulbs with identical dimmable bulbs.
- Adjust the low-end trim.
- Turn power off and recheck wire connections.
- Confirm total wattage is within the dimmer rating.
- Test with a known compatible bulb.
If buzzing comes from the dimmer itself, it may be overloaded or incompatible. If buzzing comes from the fixture, the lamp or driver may be the issue.
Why the Dimmer Does Not Work from Both Switch Locations
If the dimmer works from one location but not the other, look for:
- Common wire connected to traveler terminal (or vice versa)
- Single-pole dimmer used instead of 2-way/3-way dimmer
- Failed standard switch at the other location
- Incompatible companion switch or remote
- Loose traveler connection
- Neutral mistakenly used as a traveler
- Incorrect manufacturer diagram for your wiring layout
The most common cause is a swapped common. That one little wire can make the whole setup act unpredictably.
When to Stop DIY and Call an Electrician
Stop and call a licensed electrician if you find:
- Unknown or unmarked wiring
- No ground wire or questionable grounding
- Aluminum branch-circuit wiring or knob-and-tube wiring
- Scorch marks inside the box or a burning smell
- Breaker trips repeatedly or warm/hot wall plate
- Melted wire insulation or crowded electrical box
- Moisture in or near the box
- Lights flickering throughout the home
- Any commercial, industrial, healthcare, or telecom wiring
- Uncertainty about Massachusetts code or permit requirements
At Sartell Electrical Services, Inc., we serve Reading, Greater Boston, and surrounding Massachusetts communities. With over 30 years of experience across residential, commercial, and industrial electrical work, we are here to help before a small issue becomes a major problem.
FAQ: Can I Use Smart Bulbs with a 2-Way Dimmer?
Usually, we do not recommend using smart bulbs on a standard wall dimmer.
Smart bulbs require constant full voltage for their internal electronics (Wi-Fi, Bluetooth, Zigbee). A dimmer reduces power, causing:
- Flickering
- Bulbs dropping offline
- App control failure
- Random resets
- Buzzing or shortened bulb life
Better options include:
- Use dimmable LED bulbs with a compatible wall dimmer.
- Use smart bulbs with standard on/off switches.
- Use a smart dimmer with compatible standard dimmable bulbs.
- Use a no-neutral smart dimmer only if it is compatible with your wiring and load.
FAQ: Does Every Dimmer Need a Neutral Wire?
No.
Standard rotary, slide, or toggle dimmers rarely need a neutral. However, smart and digital dimmers require a neutral to provide constant power for their internal electronics and wireless communication.
If your box has a bundle of white wires tucked in the back, that may be a neutral bundle. Do not assume. Test and verify.
If no neutral is present, your options are:
- Choose a listed no-neutral dimmer
- Use a standard non-smart dimmer rated for your load
- Have a neutral added by an electrician
- Use another lighting control strategy
Never borrow a neutral from another circuit. That can create serious shock and code hazards.
FAQ: What Is the Maximum Wire Length for Multi-Location Dimming?
Multi-location dimming systems using companion controls often have a maximum wire length limit, typically 300 feet from the master dimmer to all remotes.
Long traveler runs can cause communication issues, voltage drop, flicker, or delayed response.
For large homes, long hallways, multi-story stair circuits, or commercial applications, follow the exact manufacturer instructions. If the run is unusually long, have an electrician evaluate it before selecting devices.
Conclusion: Wire Your 2-Way Dimmer Safely and Confidently
2-way dimmer switch wiring is manageable when you slow down, identify the common wire correctly, use one compatible dimmer, and match the device to your bulbs and wiring.
Remember the big points:
- Use one dimmer and one standard switch unless the system is specifically designed for multi-location dimming.
- Choose a 2-way/3-way rated dimmer, not a single-pole dimmer.
- Use LED-rated dimmers with dimmable LED bulbs.
- Do not rely on wire color alone.
- Label the common wire before disconnecting anything.
- Leave neutral bundles intact unless your dimmer requires neutral.
- Stop if you see damaged, old, overheated, or confusing wiring.
If you want help making sure your dimmer installation is safe, code-compliant, and built to last, Sartell Electrical Services, Inc. is here to help. We are based in Reading, MA and serve homeowners and businesses throughout Greater Boston and surrounding Massachusetts communities.
For more wiring guidance, visit our main Dimmer Switch Wiring resource.