Why Knowing How to Connect Two Light Switches Together Makes Your Home Smarter
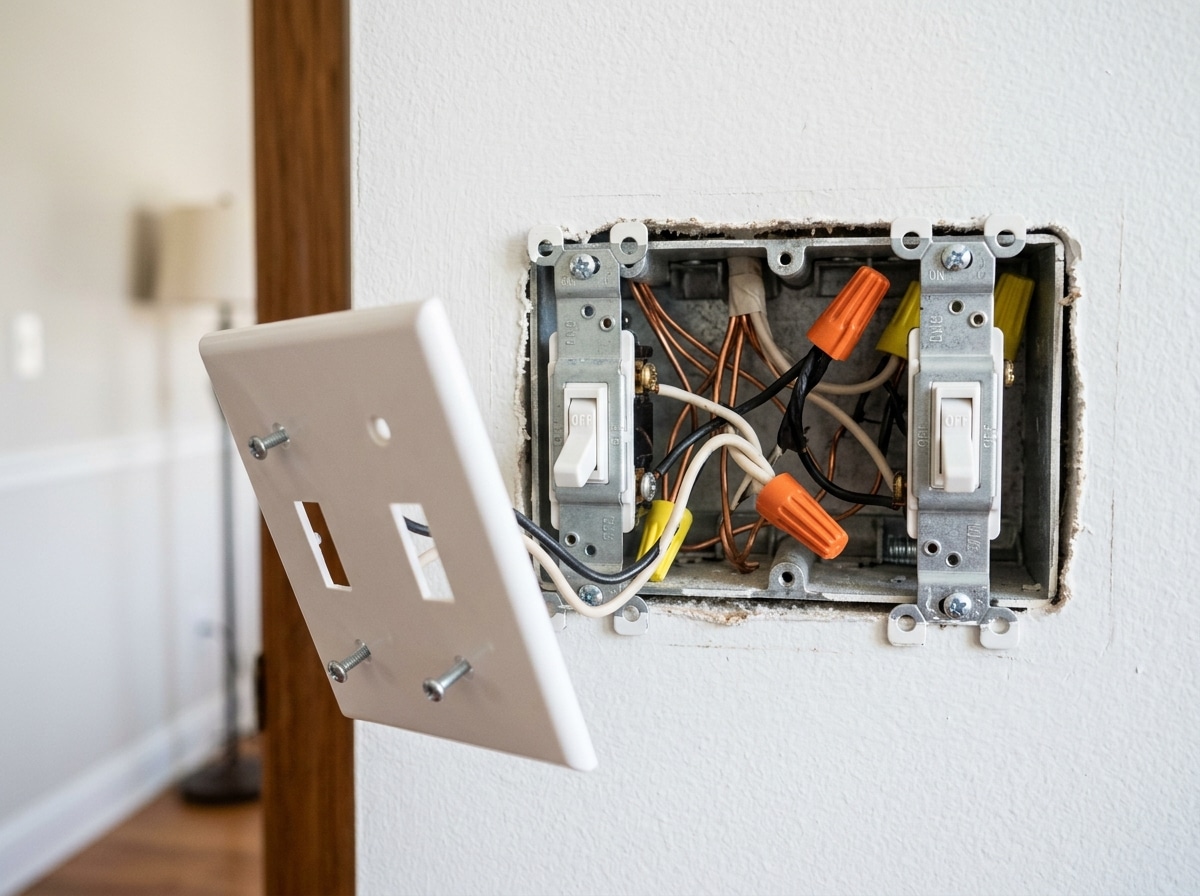
Knowing how to connect two light switches together is one of the most practical electrical skills a homeowner can have — whether you want to control a hallway light from both ends, or simplify a cluttered switch panel into one clean unit.
Here's a quick answer based on your goal:
To connect two light switches together, follow these steps:
- Turn off power at the circuit breaker and verify with a non-contact voltage tester
- Identify your wires — hot (black), neutral (white), ground (bare or green)
- Choose your wiring method:
- 3-way switches — to control one light from two separate locations
- Parallel wiring — to control two lights from one switch
- Stack switch — to combine two switches into one compact unit
- Connect the wires to the correct terminals (common and traveler for 3-way; shared hot for parallel)
- Secure all connections with wire nuts and electrical tape
- Restore power and test each switch position
The right method depends entirely on what you're trying to control — one light from two places, or two lights from one place. We'll cover both clearly below.
I'm Ed Sartell, President of Sartell Electrical Services, and with nearly four decades of hands-on electrical work across Massachusetts, I've wired countless switch configurations — from simple single-pole setups to complex multi-location circuits. Understanding how to connect two light switches together correctly is something I've helped homeowners and contractors get right since 1985.
How to connect two light switches together terms at a glance:
- Switch Wiring Guide
- how to connect multiple lights to one power source
- how to connect multiple light switches
Essential Safety and Tools for Wiring Two Light Switches
Before we dive into the "how-to," we need to talk about the "how-to-stay-safe." Electricity doesn't offer many second chances. In our experience serving communities from Reading to Braintree, we've seen that the biggest mistakes happen when people rush the preparation.
The Golden Rule: De-Energize
Always start at the circuit breaker. Don't just flip the wall switch off; cut the power at the source. Once the breaker is off, use a non-contact voltage tester to confirm the wires in the box are truly "dead." Sometimes, multi-gang boxes contain wires from two different circuits, so test every single wire before you touch them.
Your Electrical Toolkit
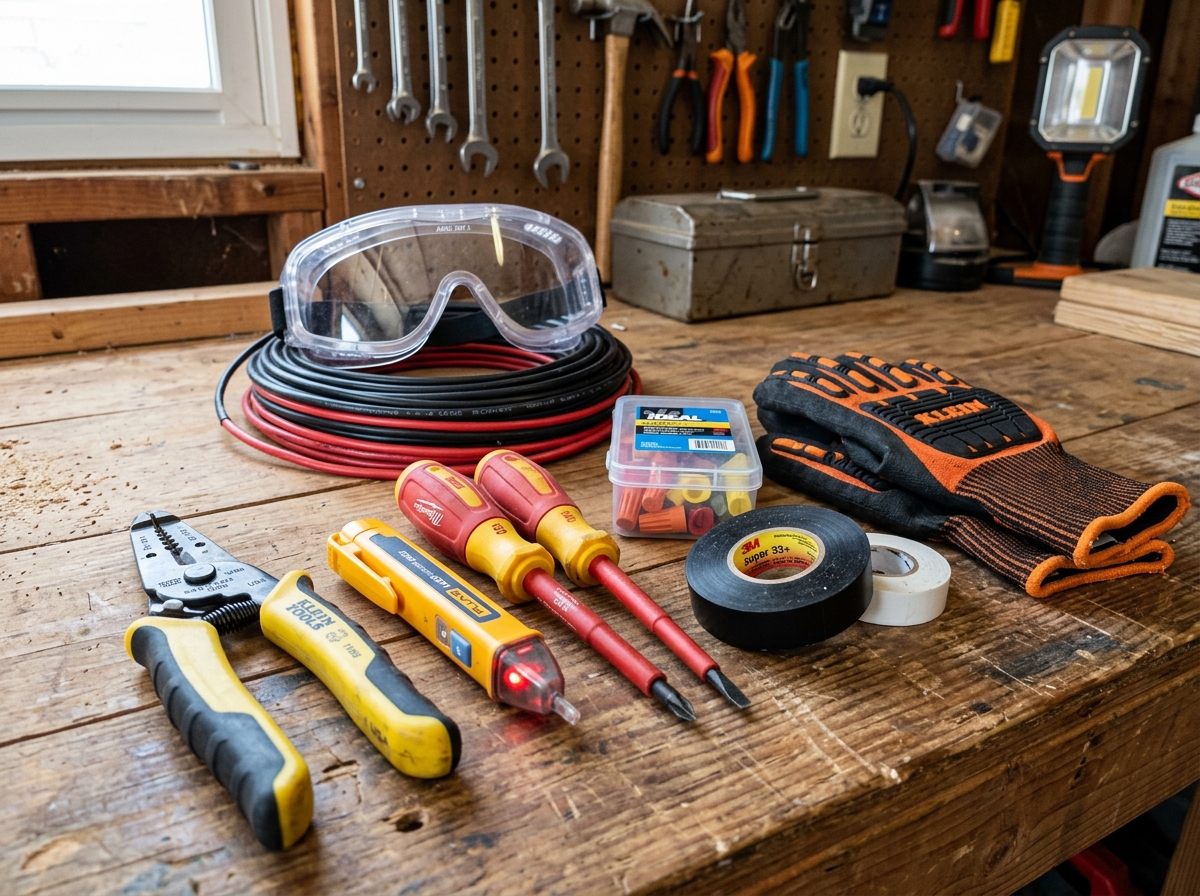
To successfully learn how to connect two light switches together, you’ll need a specific set of tools. Using the wrong tool (like using pliers to strip wire) can damage the copper and lead to hot spots or arcing.
- Wire Strippers: Essential for removing insulation without nicking the wire.
- Non-Contact Voltage Tester: Your best friend for safety.
- Screwdrivers: Both Phillips and flathead (insulated handles are preferred).
- Wire Nuts (Connectors): To join multiple wires securely.
- Electrical Tape: To wrap wire nuts or provide extra insulation.
- Safety Gear: Safety goggles and insulated gloves are highly recommended.
Understanding AWG Standards
In Massachusetts residential wiring, you’ll typically encounter two sizes of wire. It is crucial to match your wire gauge to your circuit's amperage:
- 14 AWG: Used for 15-amp circuits (common for lighting).
- 12 AWG: Used for 20-amp circuits.
You can check the AWG standards to ensure you are using the correct thickness. Mixing these up can be a violation of the National Electrical Code (NEC) and could create a fire hazard. For a deeper dive into the basics, check out our how-to wire a switch complete wiring guide.
How to Connect Two Light Switches Together for Multi-Location Control
One of the most common reasons homeowners ask us how to connect two light switches together is to create a 3-way circuit. This is the setup that allows you to turn a light on at the bottom of the stairs and off at the top.
According to the NEC, 3-way switches are required for controlling lights from multiple locations in nearly 70% of modern homes. If you live in a multi-story home in Newton or a long ranch in Andover, you likely have several of these already.
Identifying the Components
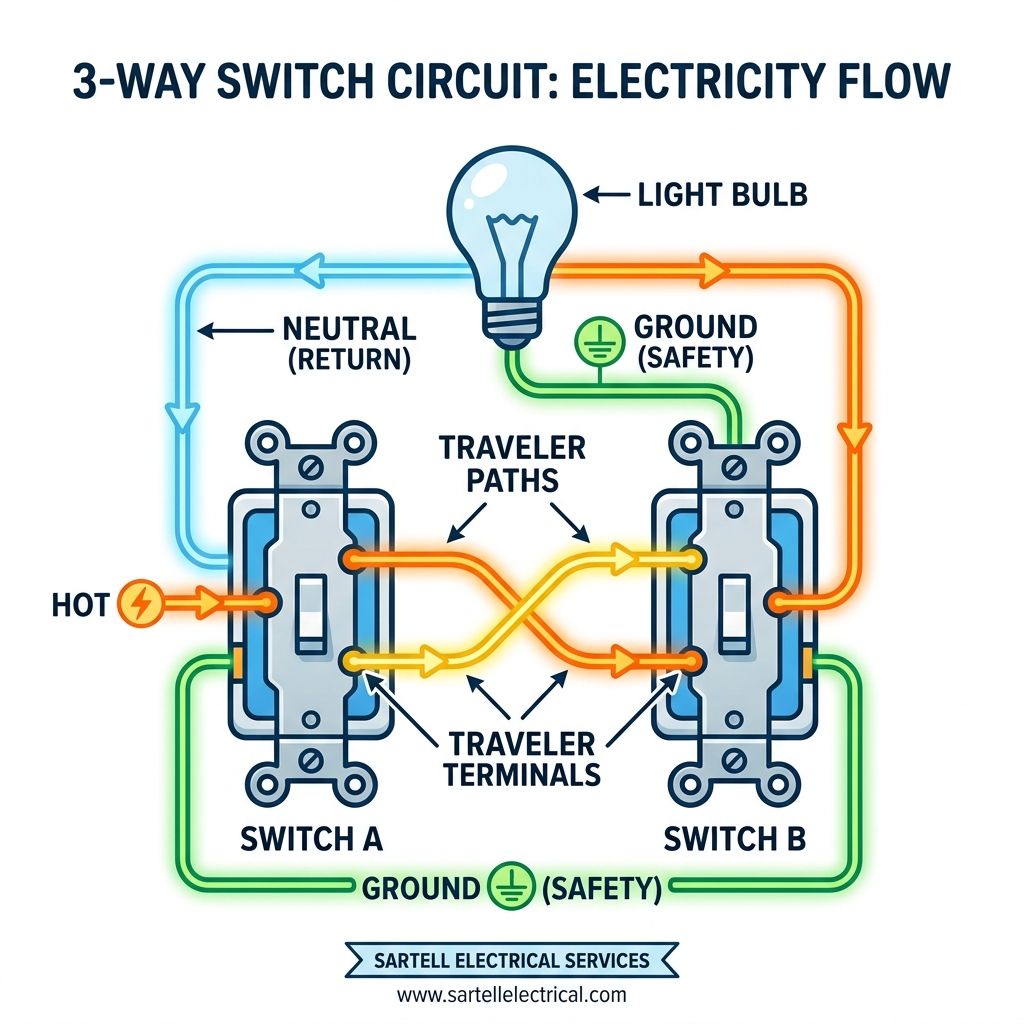
A 3-way switch (technically a Single Pole Double Throw or SPDT switch) looks different from a standard switch. It has three screw terminals instead of two (excluding the green ground screw):
- The Common Terminal: Usually a darker-colored screw (black or bronze). This is where the "hot" power enters the first switch or exits the second switch to the light.
- The Traveler Terminals: Usually two brass-colored screws. These carry the electricity between the two switches.
The Wiring Flow
When you are learning Two-Way Switching Explained, the logic is simple: the electricity needs a path to travel from Switch A to Switch B.
- The Hot wire (Black) from the power source connects to the Common terminal of Switch 1.
- Two Traveler wires (typically one Red and one Black from a 14/3 cable) connect the traveler terminals of Switch 1 to the traveler terminals of Switch 2.
- The Load wire (Black) connects the Common terminal of Switch 2 to the light fixture.
- The Neutral wires (White) bypass the switches entirely and are joined together with a wire nut to complete the circuit back to the panel.
If you’re looking to add a touch of ambiance, you might consider a 3-way dimmer switch install instead of a standard toggle.
Ground Bonding
Never skip the ground. In Massachusetts, local codes are very strict about grounding. All green or bare copper wires must be bonded together and connected to the green grounding screw on each switch. This provides a safe path for electricity in the event of a fault, preventing shocks.
Parallel vs Series: The Best Way to Connect Two Light Switches Together
When people talk about how to connect two light switches together, they are sometimes referring to controlling two different lights from a single location using two switches. There are two ways to think about this: Series and Parallel.
In 80% of residential lighting, parallel wiring is the standard. Why? Because in a series circuit, if one switch or bulb fails, the whole circuit dies. In a parallel circuit, each component operates independently.
| Feature | Series Wiring | Parallel Wiring |
|---|---|---|
| Control Logic | AND (Both must be ON) | OR (Either can be ON) |
| Voltage | Divided between loads | Consistent 120V to all |
| Reliability | Low (One failure stops all) | High (Independent operation) |
| Common Use | Old holiday lights | Modern home lighting |
Parallel switch wiring allows for redundancy and consistent brightness. For more on this, read about how-to-connect-multiple-lights-to-one-power-source.
Step-by-Step: How to Connect Two Light Switches Together Using a Stack Switch
If you have a 2-gang box (a wide box with two switches) and you want to reclaim wall space, or if you only have a 1-gang box but need to control two separate lights, a stack switch (or "duplex switch") is your best friend. This device fits two switches into the space of one.
Steps for a Stack Switch Installation:
- Identify the Power: You will usually have one "Line" (power in) and two "Loads" (power out to lights).
- Pigtailing Hots: Instead of trying to jam two wires under one screw, create a "pigtail." Connect the incoming hot wire to two short pieces of black wire using a wire nut. These two pigtails will then connect to the "Line" side of the stack switch.
- Remove the Tab (If Necessary): Most stack switches have a metal break-off tab connecting the two hot terminals. If you are using power from two different circuits (rare in residential but possible), you must break this tab. If you are sharing one power source for both lights, keep the tab intact.
- Connect Load Wires: Connect the black wire for Light A to the top terminal and Light B to the bottom terminal on the opposite side.
- Cap Unused Wires: If you are consolidating from two boxes to one, you might have extra wires. Any wire not in use should be capped with a wire nut and tucked safely into the back of the box.
This is a great way to handle how-to-connect-multiple-light-switches when you're limited on space.
Testing and Troubleshooting Your New Switch Setup
Once you’ve finished the wiring, don't just screw everything in and hope for the best. Testing is the most critical step to ensure your "wiring wonder" doesn't become a "wiring blunder."
The Continuity Test
Before turning the power back on, you can use a multimeter to check for continuity. This ensures that when the switch is "on," the circuit is closed, and when it's "off," it's open. This prevents "short circuits" where a hot wire might be accidentally touching a neutral or ground.
Common Warning Signs
If you restore power and notice any of the following, turn the breaker back off immediately:
- Flickering Lights: This often indicates a loose connection at the terminal. Ensure your wire loops are wrapped clockwise around the screw and tightened firmly.
- Breaker Tripping: This is a sign of a short circuit. Check for any bare wires touching the metal box or each other.
- Warm Switch Plate: A switch that feels hot to the touch is a major fire hazard, usually caused by an overloaded circuit or a poor connection.
Avoid "Backstabbing"
Many modern switches have small holes in the back where you can push the wire in. We call this "backstabbing," and we generally advise against it. These connections can loosen over time as the house settles or as wires expand and contract with heat. Always use the side screw terminals for a secure, long-lasting connection.
If you’re working with dimmers and encounter issues, our guides on dimmer switch wiring and ac dimmer circuit diagram can help you troubleshoot specific electronic components.
Frequently Asked Questions about Connecting Light Switches
Can I combine two switches by simply capping wires?
Not exactly. You can't just cap wires and expect the circuit to work. If you are removing a switch, you must decide if you want the light to be "always on" (by joining the hot and load wires with a nut) or "always off" (by capping them separately). However, if that circuit feeds power to another room (pass-through power), capping the wrong wires could kill the power to half your house! Always trace the "downstream" power before capping.
What is the difference between a 2-way and a 3-way switch?
This is mostly a matter of where you live. In the UK and EU, a switch that controls a light from two places is called a "2-way switch." In North America (including right here in Massachusetts), we call that a "3-way switch." To make it more confusing, a standard on/off switch is called a "single-pole" switch here, but a "1-way switch" in Europe.
How do I identify the traveler wires in an existing box?
If you open a box and see a cable with three insulated wires (Black, White, and Red) plus a ground, you are likely looking at a 3-way setup. In a standard 14/3 or 12/3 Romex cable, the Red and Black wires are typically used as the travelers, while the White wire should be marked with black tape to indicate it is also a hot traveler (though in some modern setups, the white is a true neutral). The traveler wires will always be connected to the two screws that are the same color on a 3-way switch.
Conclusion
Mastering how to connect two light switches together can transform the way you interact with your home. Whether you're finally fixing that annoying "dead" switch at the top of the stairs or consolidating your kitchen lighting into a sleek stack switch, the key is patience and a "safety-first" mindset.
However, we know that electrical work can be intimidating. If you open a wall box and find a "rat's nest" of old wires, or if you're dealing with sensitive historical wiring in places like Salem or Lexington, it's always better to be safe than sorry. A small mistake in wiring can lead to flickering lights, damaged appliances, or worse.
At Sartell Electrical Services, Inc., we’ve spent over 30 years ensuring that Massachusetts homes are safe, bright, and up to code. Whether you need a quick consultation or a full home rewiring, our team is ready to help. More info about residential electrical services is just a click away.
Don't stay in the dark—reach out to the experts who know the local codes of Middlesex and Essex counties inside and out. Your project's success and your family's safety are our top priorities!