Commercial Electrical Contractors Servicing Greater Boston, MA for Over 30 Years!

The Ins and Outs of House Breaker Panel Wiring

House Breaker Panel Wiring: 3 Essential Steps


Why House Breaker Panel Wiring is the Heart of Your Electrical System

House breaker panel wiring is the central nervous system of your home, distributing electricity from the main power supply to every light, outlet, and appliance. This complex network requires precise installation and strict adherence to safety protocols.

Quick Overview: House Breaker Panel Wiring Essentials

  • Main Components: Main breaker, hot bus bars, neutral bus bar, and individual circuit breakers
  • Safety First: Always shut off main power and verify with a voltage tester before working
  • Key Steps: Connect main service wires → install ground wire → wire branch circuits → install breakers → test and label
  • Wire Sizing: Use 14-gauge wire for 15-amp circuits, 12-gauge for 20-amp circuits
  • Professional Help: Required for main service connections and any work you’re unsure about

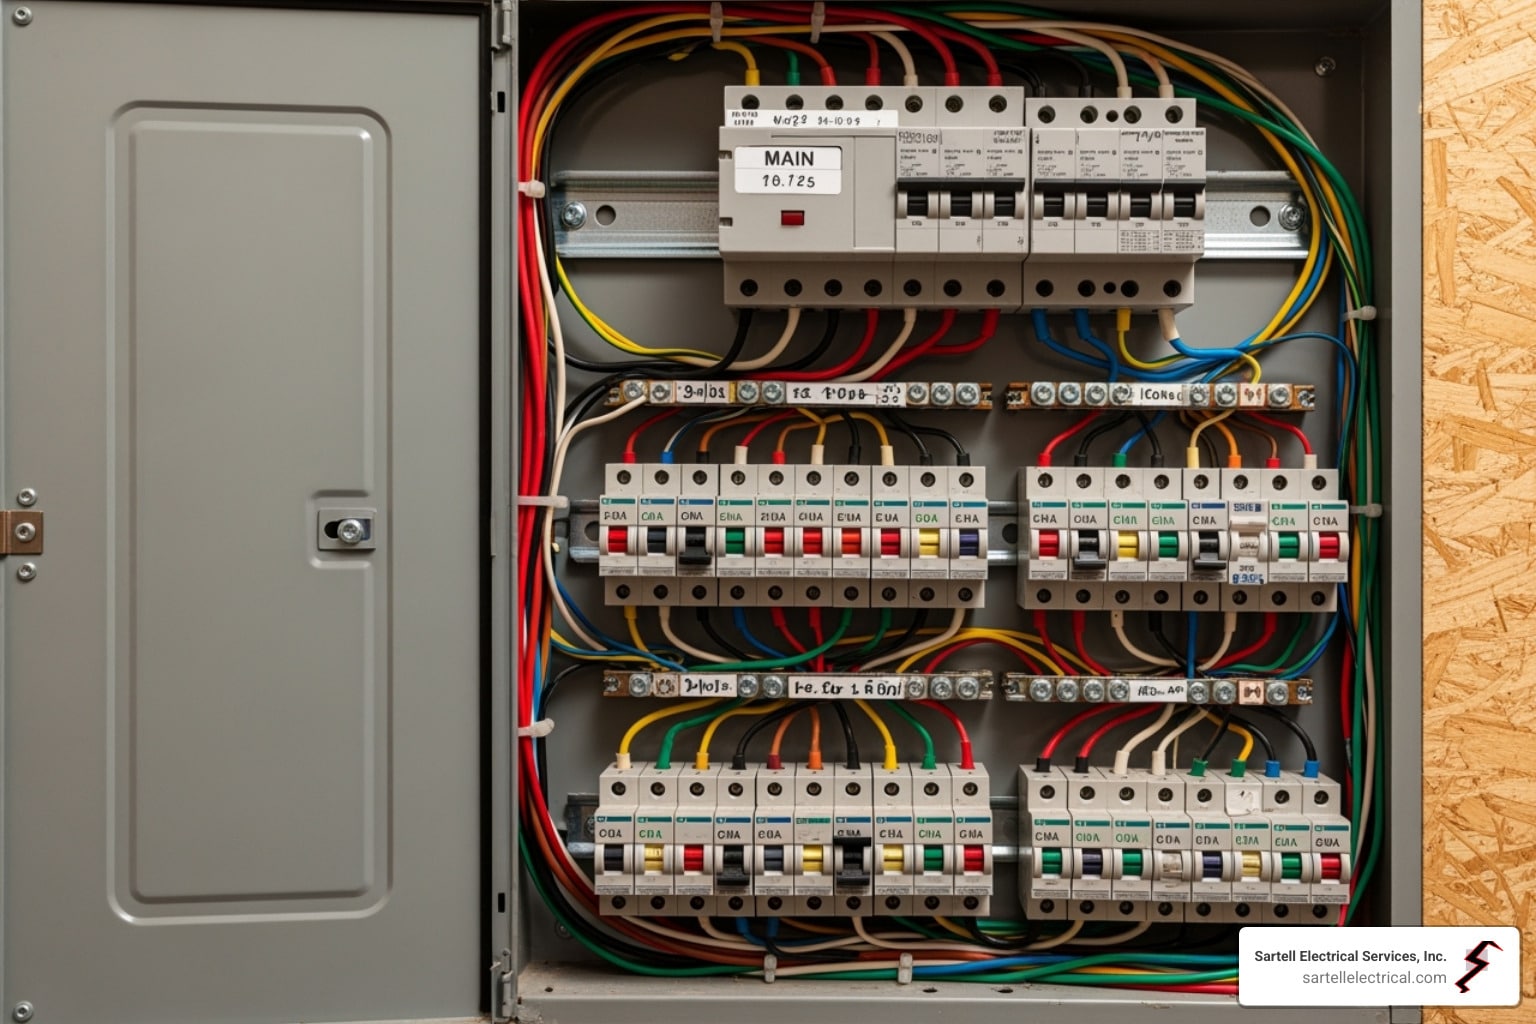
Your breaker panel is the control center for your home’s electrical system. It takes incoming power and safely distributes it to separate circuits, each protected by a breaker that shuts off power during an overload or short circuit. This is an advanced electrical project. While some experienced DIYers can handle parts of it, many jurisdictions require professional installation, especially for main service connections.

I’m Ed Sartell, President of Sartell Electrical Services. With nearly four decades in the trade since 1985, I’ve guided countless homeowners through the complexities of house breaker panel wiring. Let me walk you through this critical process.

Diagram of house breaker panel wiring, featuring main breaker, individual circuit breakers, neutral and ground bus bars, and branch circuit wires, illustrating essential components for safe electrical distribution.

Before You Begin: Planning, Safety, and Tools

Proper house breaker panel wiring requires meticulous planning, much like laying a home’s foundation. This advanced project can take a full day, with material costs ranging from $700 to $950.

essential tools and safety gear for electrical work - house breaker panel wiring

Safety is the only priority. Before opening the panel, contact your utility company to shut off power to the feeder wires. Those main lugs are always live until the utility disconnects them. After they do, use a voltage tester to verify power is off everywhere. Your Personal Protective Equipment (PPE) is mandatory: insulated gloves, safety glasses, and rubber-soled shoes. Never work on a damp floor.

When planning a new branch circuit, calculate the total load by adding the wattage of all connected devices. A 15-amp circuit safely handles 1,440 watts, while a 20-amp circuit manages 1,920 watts. Also, check your breaker box capacity. Panels over 25 years old may need an upgrade to handle modern electrical demands and meet current safety codes.

More info about our electrical services

Understanding Your Breaker Panel

  • Main Lugs: Large terminals where utility service wires connect. They remain live even when the main breaker is off.
  • Main Breaker: The master switch at the top of the panel that cuts power to all branch circuits.
  • Hot Bus Bars: Metal bars that distribute power from the main breaker to individual circuit breakers.
  • Neutral & Grounding Bus Bars: Metal bars where white neutral wires and bare/green ground wires connect, respectively. In a main panel, these are bonded together.
  • Breaker Spaces: Empty slots for new circuit breakers.
  • Panel Labels: Provides manufacturer, model, and amperage rating information.

Essential Tools and Materials

You’ll need a voltage tester (both non-contact and multimeter), insulated screwdrivers, wire strippers, lineman’s and needle-nose pliers, fish tape, and cable clamps. Materials include the correct circuit breakers, properly sized electrical wire (14-gauge for 15-amp, 12-gauge for 20-amp), a level, and a drill.

Sizing Breakers and Wires

Follow the 80% rule: never load a circuit beyond 80% of its capacity for continuous loads (running 3+ hours).

  • 15-amp circuits (14-gauge wire): Max 1,440 watts. Ideal for general lighting and standard outlets.
  • 20-amp circuits (12-gauge wire): Max 1,920 watts. Best for kitchens, bathrooms, and laundry rooms.
  • Dedicated circuits: Reserved for single, high-power appliances like refrigerators or microwaves to prevent overloads.

All work must follow the National Electrical Code, which dictates wire sizing, panel placement, and safety requirements. Following these guidelines ensures the job is done right and safely.

A Step-by-Step Guide to House Breaker Panel Wiring

This is where the serious electrical work of house breaker panel wiring begins. It’s an advanced task that can take up to 8 hours, requiring careful execution.

Electrician wearing safety goggles and gloves, working on a house breaker panel with tools, emphasizing safe wiring practices for electrical installations.

First, follow the golden safety protocol. Shut off the main power by having the utility company disconnect service for any work on feeder wires. Then, verify power is off with a voltage tester on every connection. The main lugs remain live unless the utility has disconnected them. Working with thick, stiff feeder wires requires muscle and coordination with the utility company—this is non-negotiable.

Preparing the Panel Box

  1. Remove the panel cover carefully.
  2. Open knockouts in the panel box where cables will enter using a hammer and screwdriver.
  3. Install cable clamps in the knockouts to secure each cable and protect wires from damage.
  4. Mount the panel securely to wall studs, ensuring it is level and plumb. A wobbly panel is a dangerous one.

Connecting the Main Service and Ground Wires

This is the foundation of your electrical system, where precision is everything.

  • Pull main service wires (two hot, one neutral, one ground) into the panel, leaving plenty of length to work with.
  • Connect the two hot service wires to the main breaker’s terminal lugs, stripping about 3/4 inch of insulation and tightening the screws firmly.
  • Connect the main neutral wire to the main neutral bus bar, ensuring a rock-solid connection.
  • Connect the main ground wire to the grounding bus bar. This bar is bonded to the neutral bus and the panel enclosure, creating the primary safety ground for your home.

Installing Branch Circuits and Breakers

Now, we wire the individual circuits that power your home.

  1. Pull branch circuit wires into the panel through their clamps, leaving 10-12 inches of slack.
  2. Strip wire sheathing, removing the outer jacket and then stripping 1/2 to 3/4 inch of insulation from the hot and neutral wires.
  3. Connect ground wires (bare copper or green) from each circuit to the grounding bus bar, one wire per screw.
  4. Connect neutral wires (white) from each circuit to the neutral bus bar, again, one wire per screw.
  5. Install the circuit breaker by snapping it firmly onto the hot bus bar.
  6. Connect the hot wire (black or red) to the breaker’s terminal screw. For GFCI or AFCI breakers, follow their specific wiring instructions, which typically involve connecting the neutral wire to the breaker as well.

Finalizing the Installation: Testing, Labeling, and Common Pitfalls

The final steps of house breaker panel wiring are as crucial as the first. This is where we ensure every connection is secure and every circuit is safe.

Labelled circuit breaker panel with kitchen outlets, master bedroom lights, and HVAC connections, emphasizing safe wiring practices and organization for electrical installations.

The importance of secure connections cannot be overstated. Loose connections create heat, a major fire hazard. Every terminal screw must be firmly tightened, ideally to the manufacturer’s torque specifications (often 10-12 foot-pounds) using a torque screwdriver. Before restoring power, perform a final safety check: look for exposed wires, ensure neat routing, and remove any tools or scraps from the panel.

To restore power safely, install the panel cover with all breakers in the “OFF” position. After the utility company restores power, turn on the main breaker, then energize and test individual circuits one by one.

Testing and Labeling Your Work

  • Test the new circuit: Use a multimeter to verify correct voltage. You should see 120V between hot and neutral for single-pole circuits and 240V between the two hots for double-pole circuits.
  • Test GFCI/AFCI breakers: Press the “TEST” button on each breaker. It should trip immediately. If it doesn’t, there’s a wiring problem that needs immediate attention.
  • Create a clear panel legend: Make a detailed, legible directory on the inside of the panel cover. Specific labels like “Master Bedroom Outlets” are far more helpful than vague ones like “bedroom.”

Common Mistakes to Avoid in House Breaker Panel Wiring

  • Overcrowding the panel: Too many wires prevent proper airflow and make future work difficult.
  • Using the wrong wire gauge: This is a fire hazard. Always use 14-gauge wire for 15-amp breakers, and 12-gauge wire for 20-amp breakers. The breaker protects the wire.
  • Leaving exposed wires: Only strip enough insulation to make a clean connection in the terminal.
  • Improperly secured connections: Loose connections cause heat and create fire risks. Tighten every screw.
  • Not following code: The National Electrical Code exists for safety. Follow it.
  • Skipping safety checks: Always verify power is off with a voltage tester before you begin work.

Wiring Different Types of Breakers

  • Standard Single-Pole: Hot wire to the breaker, neutral to the neutral bus, ground to the ground bus.
  • Double-Pole (240V): Two hot wires connect to the breaker. A neutral wire also connects to the neutral bus if the appliance needs 120V.
  • GFCI/AFCI Breakers: The circuit’s hot and neutral wires connect directly to the breaker. A white “pigtail” wire from the breaker then connects to the neutral bus bar. This allows the breaker to monitor the circuit for faults.

Breaker Types and When to Call a Professional

Circuit breakers are the security guards of your electrical system. Understanding the different types helps you choose the right protection for each area of your home.

Breaker Type Use Case Voltage Protection Type
Single-Pole General lighting, outlets 120V Overcurrent
Double-Pole Large appliances (oven, dryer) 240V Overcurrent
GFCI Wet locations (bath, kitchen, outdoor) 120V/240V Ground Fault (shock)
AFCI Living areas (bedrooms, family rooms) 120V Arc Fault (fire)

Your panel may need an upgrade if it’s more than 25 years old or shows warning signs like flickering lights, frequently tripping breakers, or a buzzing sound. Visual damage like rust or burn marks are also red flags. If you have an old fuse box, an upgrade is necessary to meet modern safety standards.

Explore our residential projects

An Overview of Circuit Breaker Types

  • Single-pole breakers handle most 120V circuits for lights and outlets.
  • Double-pole breakers control 240V circuits for large appliances like ovens and dryers.
  • Tandem breakers fit two circuits in one slot, but only work in panels designed for them.
  • Ground-Fault Circuit Interrupters (GFCI) prevent electrical shock and are required in wet locations like kitchens, bathrooms, and garages.
  • Arc-Fault Circuit Interrupters (AFCI) prevent fires by detecting dangerous electrical arcs. They are required in most living areas.
  • Dual-function breakers combine GFCI and AFCI protection in one unit.

When to Upgrade or Call for Professional House Breaker Panel Wiring

Calling a professional is the smart move in many situations.

  • Your panel is at full capacity with no room for new circuits.
  • You’re adding major appliances like an EV charger or hot tub.
  • You see signs of damage like rust, corrosion, or burn marks.
  • You need to upgrade to meet modern codes for safety and home value.
  • For any task you’re unsure about. Your safety is paramount. At Sartell Electrical Services, we’ve helped homeowners across Massachusetts since 1985. Don’t hesitate to call us for any house breaker panel wiring needs. Your family’s safety is worth it.

Frequently Asked Questions about Breaker Panel Wiring

Over my nearly four decades in electrical work, I’ve heard just about every question you can imagine about house breaker panel wiring. Here are the answers to the most common ones.

What size breaker do I need for a specific appliance?

The basic formula is Watts / Volts = Amps. For an appliance that runs for three or more hours (a continuous load), you must apply the 80% rule, meaning the circuit should only be loaded to 80% of the breaker’s rating. For example, a 2,000-watt appliance at 120 volts draws 16.67 amps (2000W ÷ 120V). This would require a 20-amp breaker and 12-gauge wire. Always check the appliance manual for its exact power requirements, as some motors have a higher startup current. When in doubt, size up.

Can I add a new circuit to my existing panel?

Maybe. It depends on two factors: available breaker slots and your panel’s total load capacity. Even if you have empty slots, your panel’s main breaker might not be able to handle the additional load from a new high-demand appliance. A 100-amp service, for instance, could be overloaded by adding an EV charger. If your panel’s load capacity is maxed out, a professional might recommend installing a subpanel, which is a smaller panel that draws power from the main one to provide additional circuit capacity.

What are the most critical safety steps when working on a breaker panel?

Safety must always come first.

  1. Shutting off the main breaker. This de-energizes most of the panel. For any work on the main service connections, the utility company must disconnect the power.
  2. Verifying power is off with a voltage tester. Check the bus bars and every breaker terminal. Test your tester on a live circuit first to ensure it’s working.
  3. Treating main lugs as always live. The large terminals where utility power enters the panel remain energized even when the main breaker is off. Stay clear of them.
  4. Using insulated tools and wearing proper PPE. This includes insulated screwdrivers, safety glasses, and insulated gloves. It’s a non-negotiable part of safe house breaker panel wiring.

Conclusion

We’ve covered a lot of ground on house breaker panel wiring, from its core components to the step-by-step installation process. It’s clear that this is not a simple DIY task. It’s the foundation of your home’s electrical system, where precision and an unwavering commitment to safety are essential.

The complexity of calculating loads, sizing wires, and navigating the National Electrical Code means that mistakes can be dangerous. Unlike a crooked shelf, an electrical mistake can have severe consequences.

That’s why at Sartell Electrical Services, Inc., we take such pride in our work. With over 30 years of experience, our team of 160 dedicated professionals has handled every type of electrical project for homes throughout Boston, Reading, Andover, and beyond. Our commitment is to excellence, leadership, and customer service. We understand that working on your home’s electrical system requires trust, a responsibility we take seriously.

Whether you’re dealing with flickering lights in Cambridge, need a panel upgrade in Lowell, or you’re planning a renovation in Worcester, we’re here to help. Calling a professional is the smartest decision for your family’s safety and peace of mind.

Contact us for your residential electrical needs – we’re here to provide the expertise, safety, and reliability your home deserves.


Sartell Electrical Services, Inc. logo featuring a lightning bolt design, representing electrical services and safety solutions for GFCI outlet issues in Massachusetts.
Sartell Electrical Services, Inc.

236 Ash St Reading, MA 01867
(By Appointment Only)

Icons representing electrical services and solutions by Sartell Electrical Services, emphasizing expertise and commitment to customer satisfaction.
Request An Estimate
Please select a valid form