For dimmer switch wiring, knowing the basics is key. Here’s a quick overview:
Dimmer switches let you adjust your lights to any brightness, creating the perfect mood while saving energy and extending bulb life. For many homeowners, installing a dimmer is a simple and rewarding DIY project.
I’m Ed Sartell, President of Sartell Electrical Services. With nearly four decades of experience in safe dimmer switch wiring and other electrical solutions, I’m committed to helping homeowners like you confidently improve your living spaces.

Upgrading to a dimmer switch is an achievable project with the right preparation. A simple single-pole installation can often take less than 30 minutes. Before starting your dimmer switch wiring, let’s cover preparation and safety.

When working with electricity, safety is the top priority. Incorrect wiring can lead to serious injury or fire.
First, you must turn off the power at the circuit breaker or fuse box. Flip the correct breaker to the “off” position. If the panel isn’t clearly labeled, turn off the main breaker for the entire home. Never work on a live circuit.
A lock-off device and padlock on the breaker can prevent it from being turned on accidentally while you work. Even after flipping the breaker, always use a non-contact voltage tester to confirm the power is off. Touch the tester to the wires; if it lights up or beeps, the circuit is still live and you must recheck the breaker.
Inspect the existing wires in the electrical box. Frayed insulation or scorch marks are red flags that require professional help. Older homes, especially in Massachusetts, may have outdated wiring that needs an expert.
All electrical work must follow local and national electrical codes. Massachusetts has specific rules, and some projects require permits and inspections. When in doubt, consult your local building department or an experienced electrician.
Having the right tools makes the job smoother and safer. For your dimmer switch wiring project, gather the following:
Picking the right dimmer is crucial for performance and avoiding issues like flickering or buzzing.
First, determine if you need a single-pole or a three-way dimmer. A single-pole dimmer controls a light from one location. A three-way dimmer is for lights controlled from two or more locations. For a three-way setup, you typically replace only one of the existing switches with a dimmer.
| Feature | Single-Pole Dimmer | Three-Way Dimmer |
|---|---|---|
| Control Locations | One | Two or more |
| Wiring | Two hot wires (line, load), one ground | Common wire, two traveler wires, one ground |
| Identification | Replaces a switch that only turns lights on/off from one spot | Replaces one of two (or more) switches controlling the same light |
Next, check the wattage rating. The dimmer’s maximum capacity must be equal to or higher than the total wattage of all connected bulbs. To calculate your load, add up the wattage of every bulb on the circuit. For example, five 60-watt bulbs total 300 watts. For safety, multiply the total by 1.25 (300W x 1.25 = 375W) and choose a dimmer with the next highest rating, such as 600 watts. A dimmer will feel warm to the touch, but if it’s excessively hot, it may be overloaded.
Finally, ensure bulb compatibility. Incandescent and halogen bulbs work with most standard dimmers. However, dimmable LED and CFL bulbs require compatible “LED” or “CFL” dimmers to avoid flickering, buzzing, or damage. Always check the bulb packaging for the “dimmable” label. Standard dimmers generally don’t work with fluorescent lights or ceiling fans.
For smart home integration (Alexa, Google Home), you’ll need a smart dimmer. These often require a neutral wire in the electrical box to power their electronics.
For more details on light output, see the Lumens and the Lighting Facts Label guide.
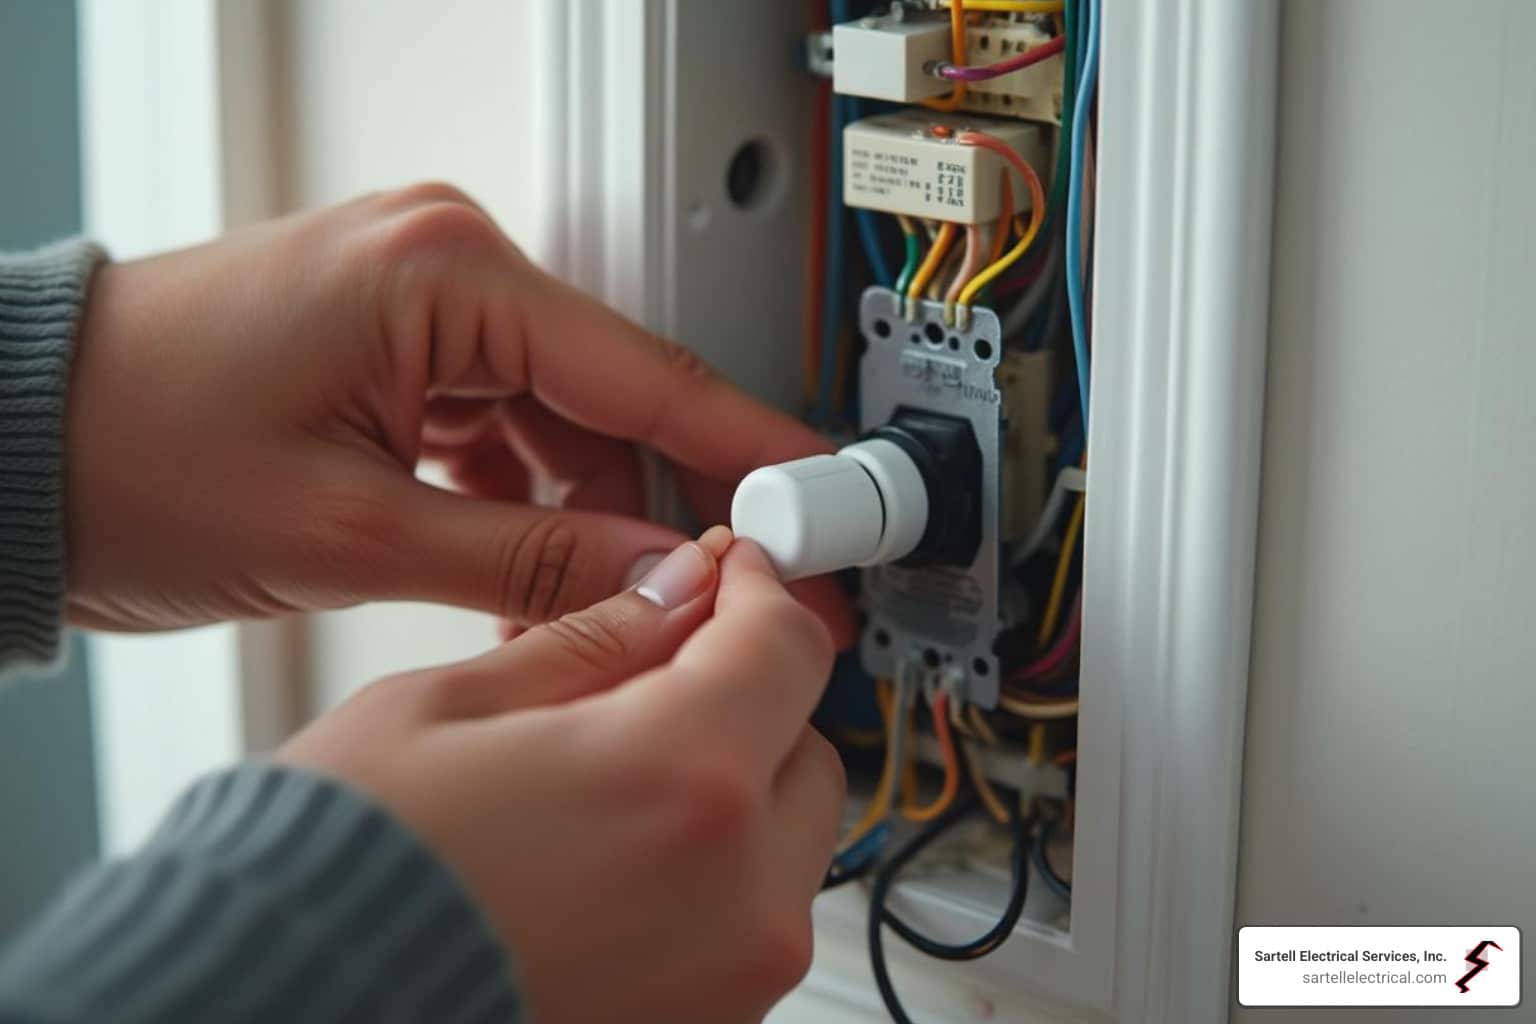
With the essentials covered, let’s proceed with the actual dimmer switch wiring. Remember: confirm the power is off with your voltage tester before touching any wires.

Before disconnecting the old switch, identify the wires. A photo of the setup is helpful. While color codes are standard, older homes in Massachusetts can have variations.
If you find unexpected wire colors or configurations, it’s safest to call a professional.
This process is similar to replacing a regular switch. Follow these steps:
For a three-way setup, you’ll replace only one of the two existing switches with a dimmer.
If you encounter issues, don’t hesitate to reach out to our team at Sartell Electrical Services. We’re happy to help Massachusetts homeowners.
Even with careful installation, you might encounter issues like flickering, buzzing, or a warm switch. These are common problems, and most have straightforward solutions.

Flickering or buzzing is a frequent issue, but it’s usually easy to fix. Check these common causes:
A dimmer switch will feel warm to the touch, as it dissipates heat to reduce power to the lights. However, excessive heat or a burning smell is a red flag requiring immediate attention.
The most common cause of overheating is an overloaded dimmer, where the total bulb wattage exceeds the dimmer’s rating. Re-calculate your wattage load. If it exceeds the rating, the dimmer is working too hard.
If the load is correct, you may need to upgrade to a higher-wattage dimmer for a better safety margin and longer lifespan. Also, ensure the electrical box is not overcrowded, as this can restrict airflow and increase heat.
If you’ve checked the wattage and the dimmer is still overheating, it’s best to call a professional electrician. For concerns about your home’s electrical system, including residential electrical upgrades and complex dimmer switch wiring, visit our More info about residential electrical services page.
After helping hundreds of Massachusetts homeowners, I’ve noticed the same questions about dimmer switch wiring come up often. Here are the answers to the most common ones.
Yes, in most cases, you can replace a standard light switch with a dimmer. The key is ensuring your light fixture and bulbs are labeled “dimmable.” You must also choose the correct dimmer type: single-pole for one switch, or three-way for two switches controlling the same light. Dimmers are for light fixtures, not for electrical outlets or ceiling fans, as they can damage a fan’s motor.
It depends on the dimmer. Standard single-pole or three-way dimmers typically don’t need special wiring and use the existing hot and ground wires. However, many smart and electronic dimmers require a neutral wire (usually white) to power their internal components. These dimmers need constant power to function even when the lights are off. Always check the manufacturer’s requirements before buying. If a neutral wire is required but not present in your electrical box, a qualified electrician will need to run new wiring.
Safety is paramount with electrical work, so calling a professional is often the smartest move. You should call an electrician if:
An electrician can identify wiring, ensure code compliance, and handle complex situations. At Sartell Electrical Services, our experienced team has helped Massachusetts homeowners for over 30 years with projects of all sizes safely and efficiently.
Installing a dimmer switch is a rewarding DIY project that transforms your home by letting you set the perfect mood for any occasion. Beyond ambiance, dimming lights can save energy and extend bulb lifespan, saving you money. By following safety procedures and choosing the right dimmer, you can confidently control your home’s lighting.
However, we understand that some electrical projects can be daunting, especially with older or unusual wiring. For complex dimmer switch wiring situations or any project beyond your comfort level, the experienced professionals at Sartell Electrical Services, Inc. are here to help.
We are committed to excellence and serve homeowners across Massachusetts, including Essex, Middlesex, Norfolk, and Suffolk Counties, and the Greater Boston area. Our licensed electricians are ready to assist in towns from Reading to Andover, Chelsea to Acton, and all towns in between. Contact our team for expert residential electrical services and let us light up your home safely and efficiently.
236 Ash St Reading, MA 01867
(By Appointment Only)